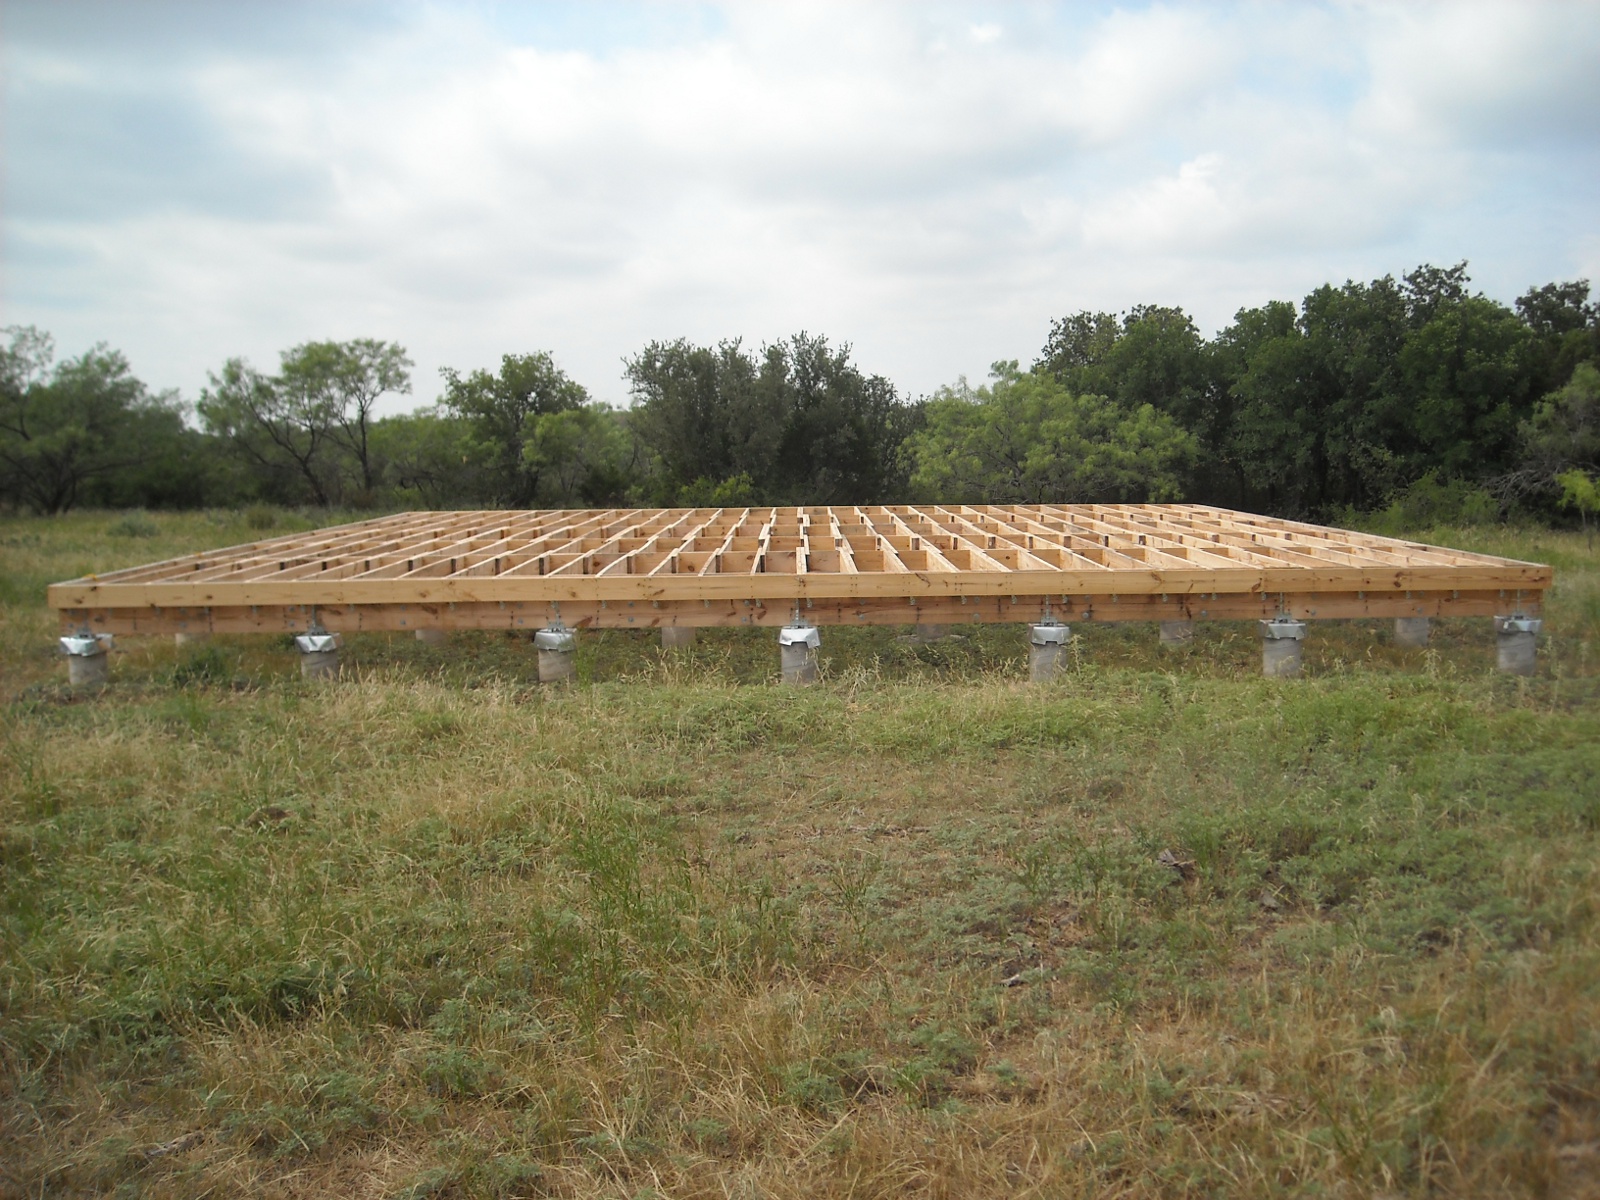
With the foundation beams up, it was time to start on the floor.
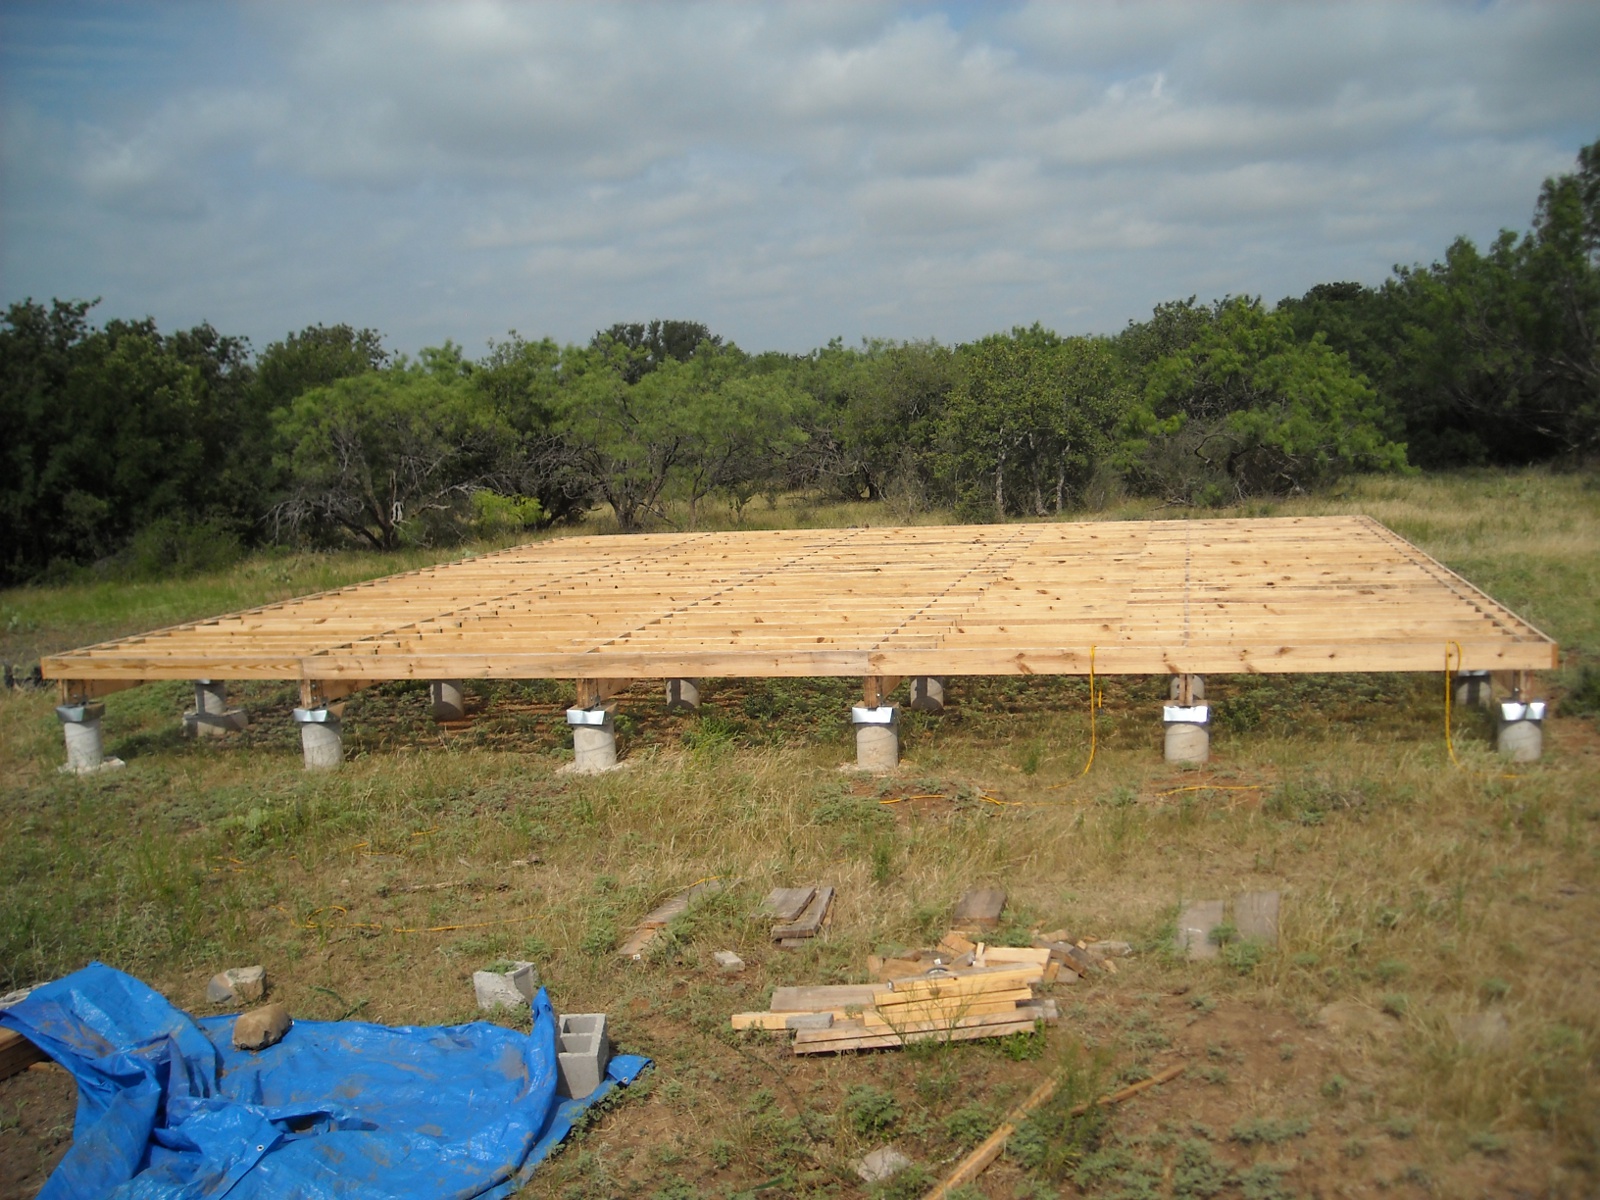
Floor Joists
Given the approximately 8 foot spans, I chose to go with 2x8s for the floor joists, which I planned to overlap on each beam, spaced 16 inches on center. (I had originally thought I would need the entire piers under the floor; but in looking back, given there is planned to be a porch, I probably would have brought the ends of the floor to sit right on the beams.)
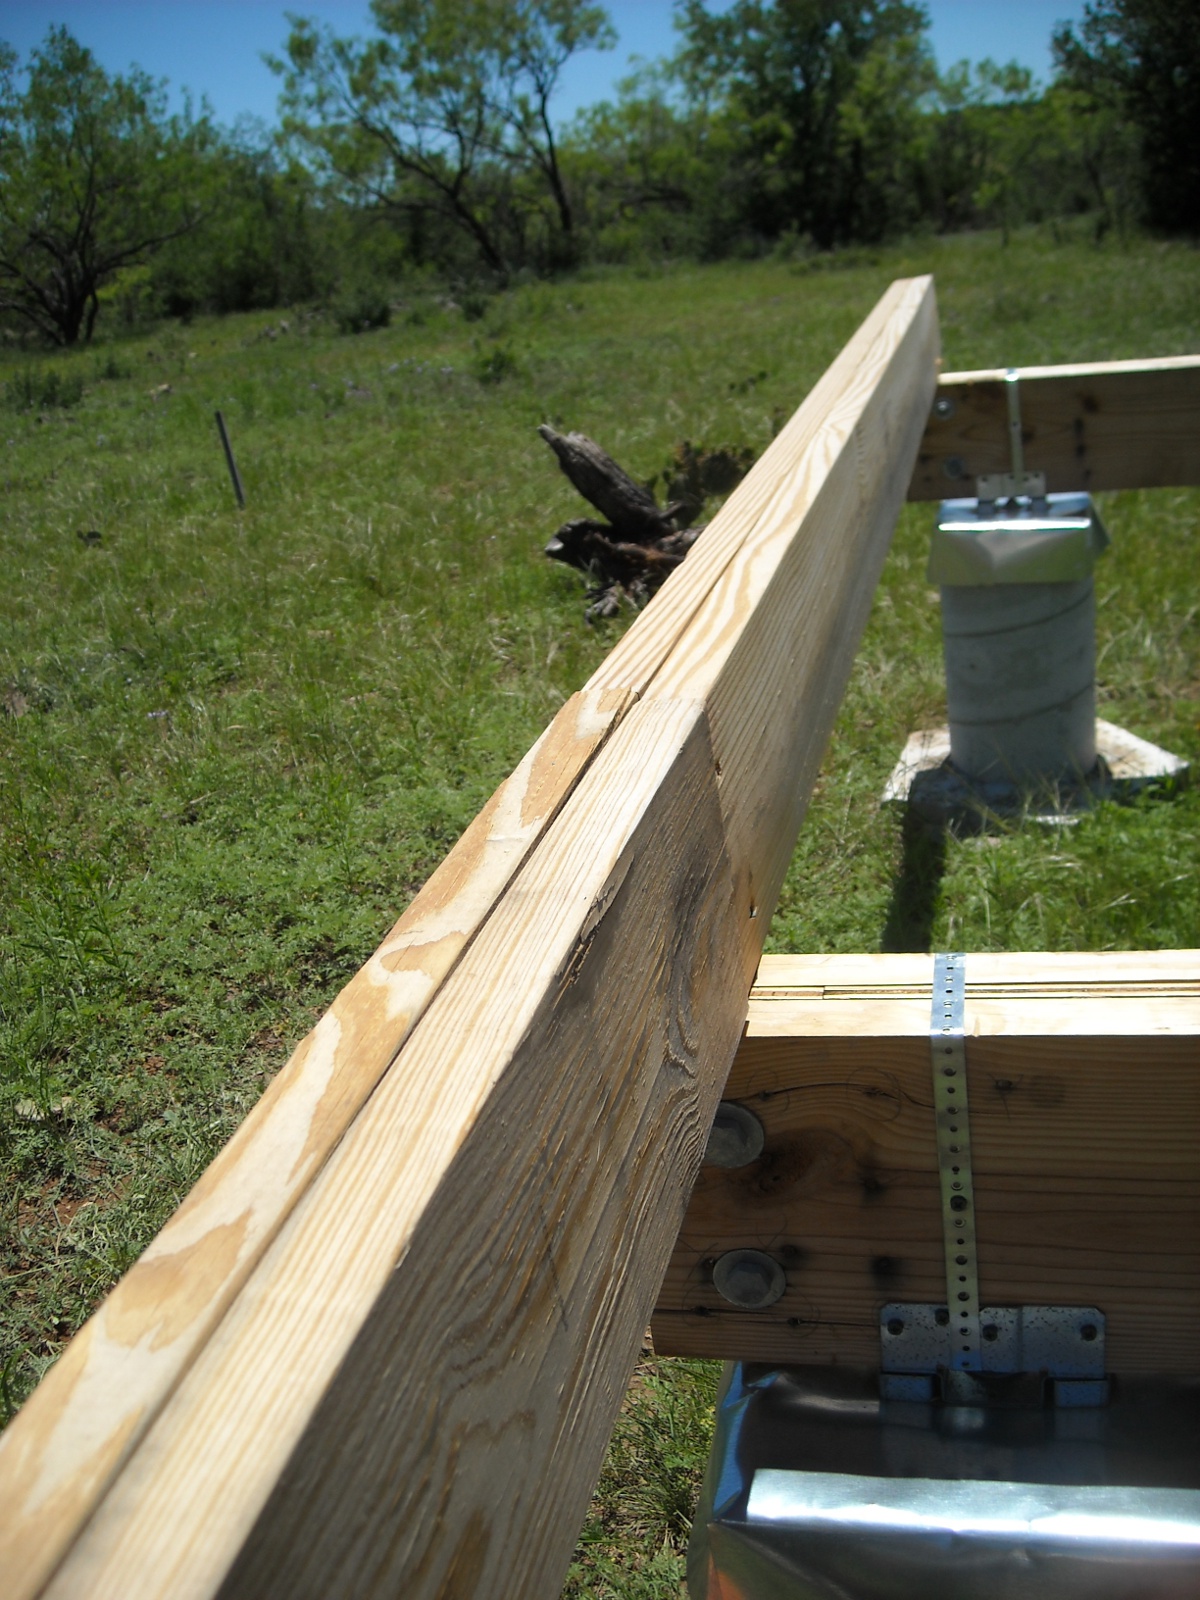
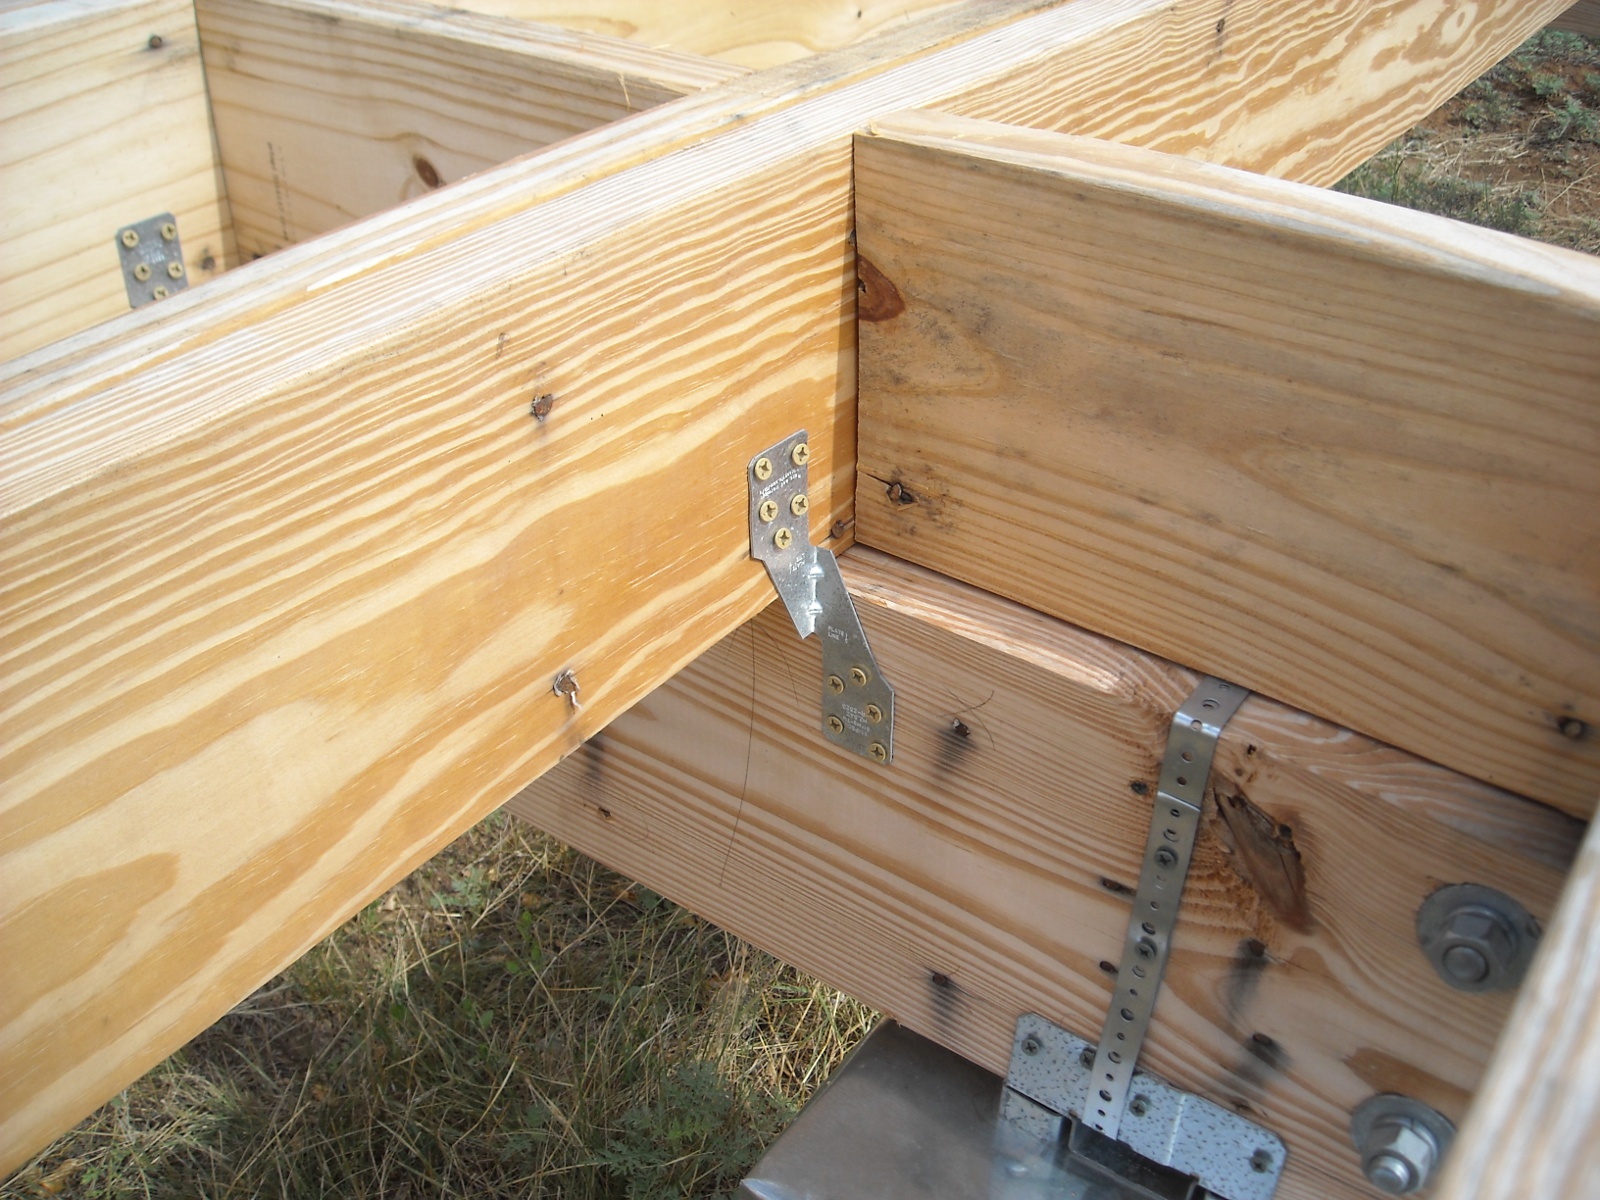
I started with the ends, which I decided to double because they were going to support the gabled walls; and I staggered them, similarly to the built-up beams. Also, since I would be overlapping the joists as they crossed the beams, this would offset the joists 1 1/2 inches off from the 16 inch on center layout, which would cause problems with being able to lay the subfloor down evenly centered on joists. However, having these end joists doubled would allow for shifting the subfloor boards to once again end up sitting evenly centered on the joists. The final subfloor board in a course would end up 1 1/2 inches off the end, which I would cut off and put back on the other side, which had been shifted 1 1/2 inches away from the end:
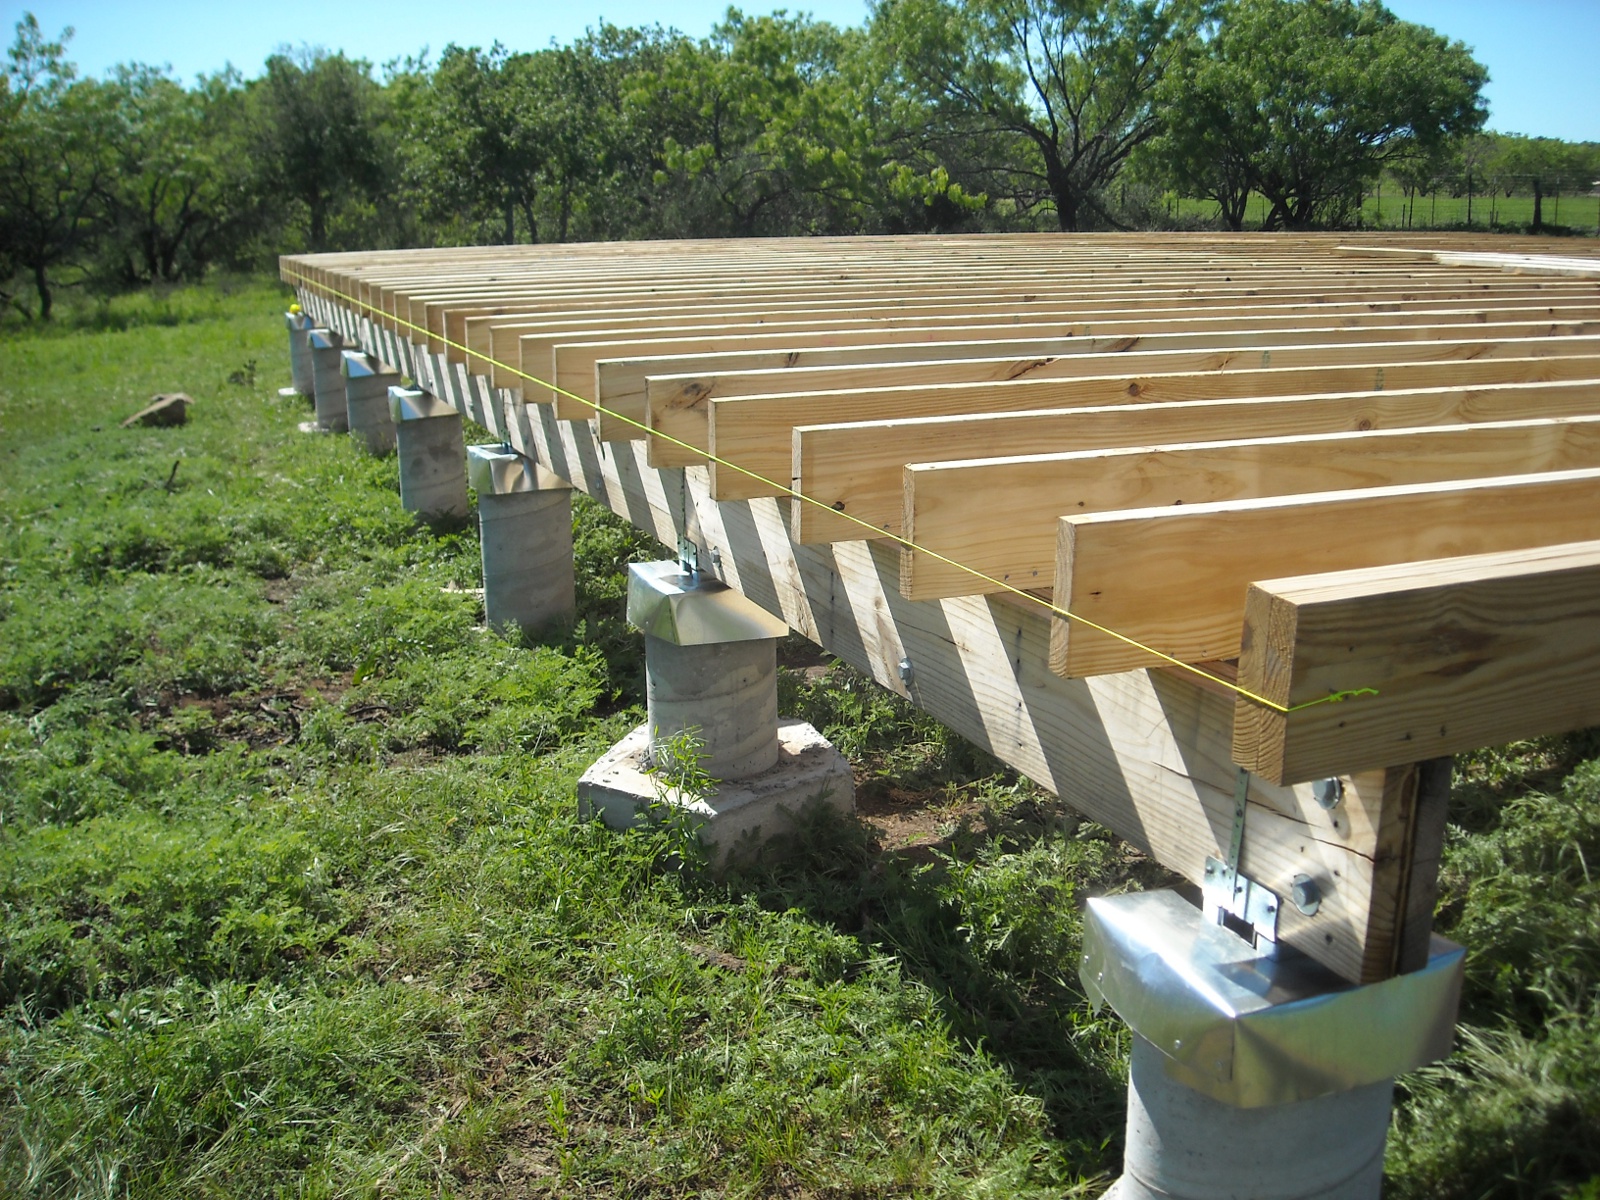
After putting them up on both sides, I ran a header string from each built-up joist…
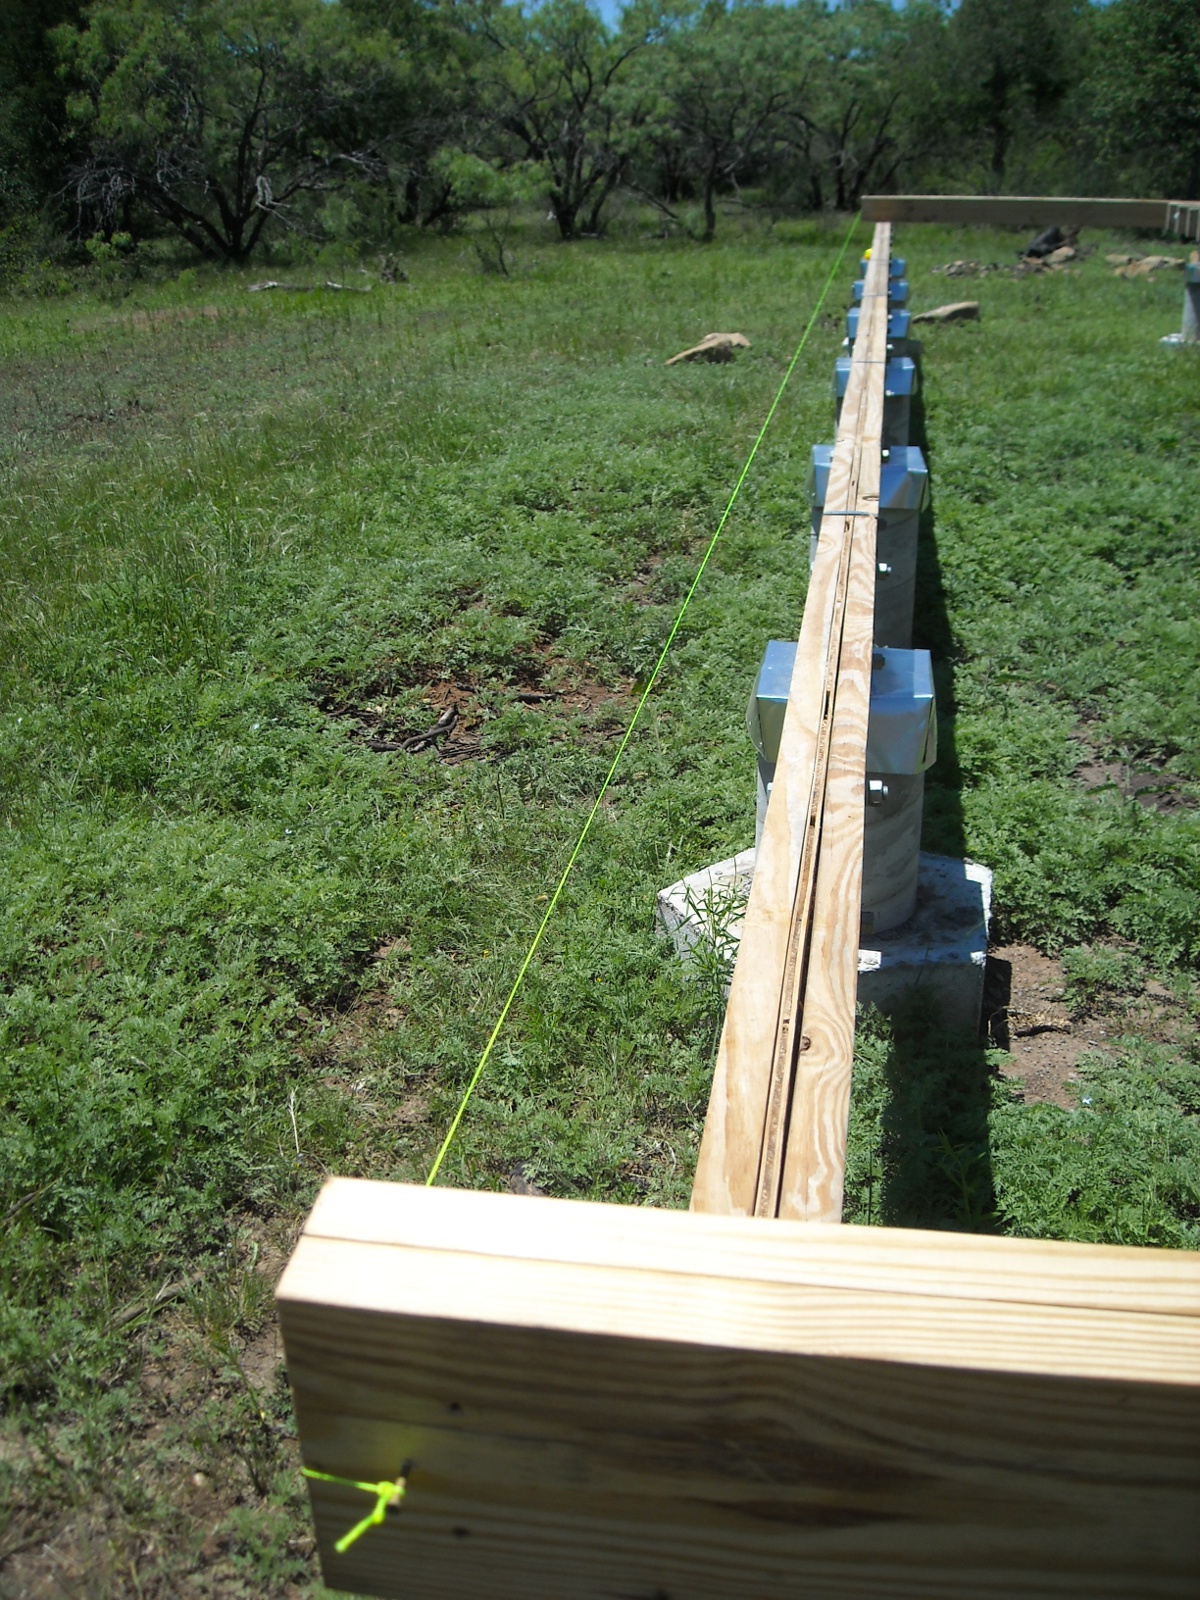
…which would be used to line up the internal joists with each other:

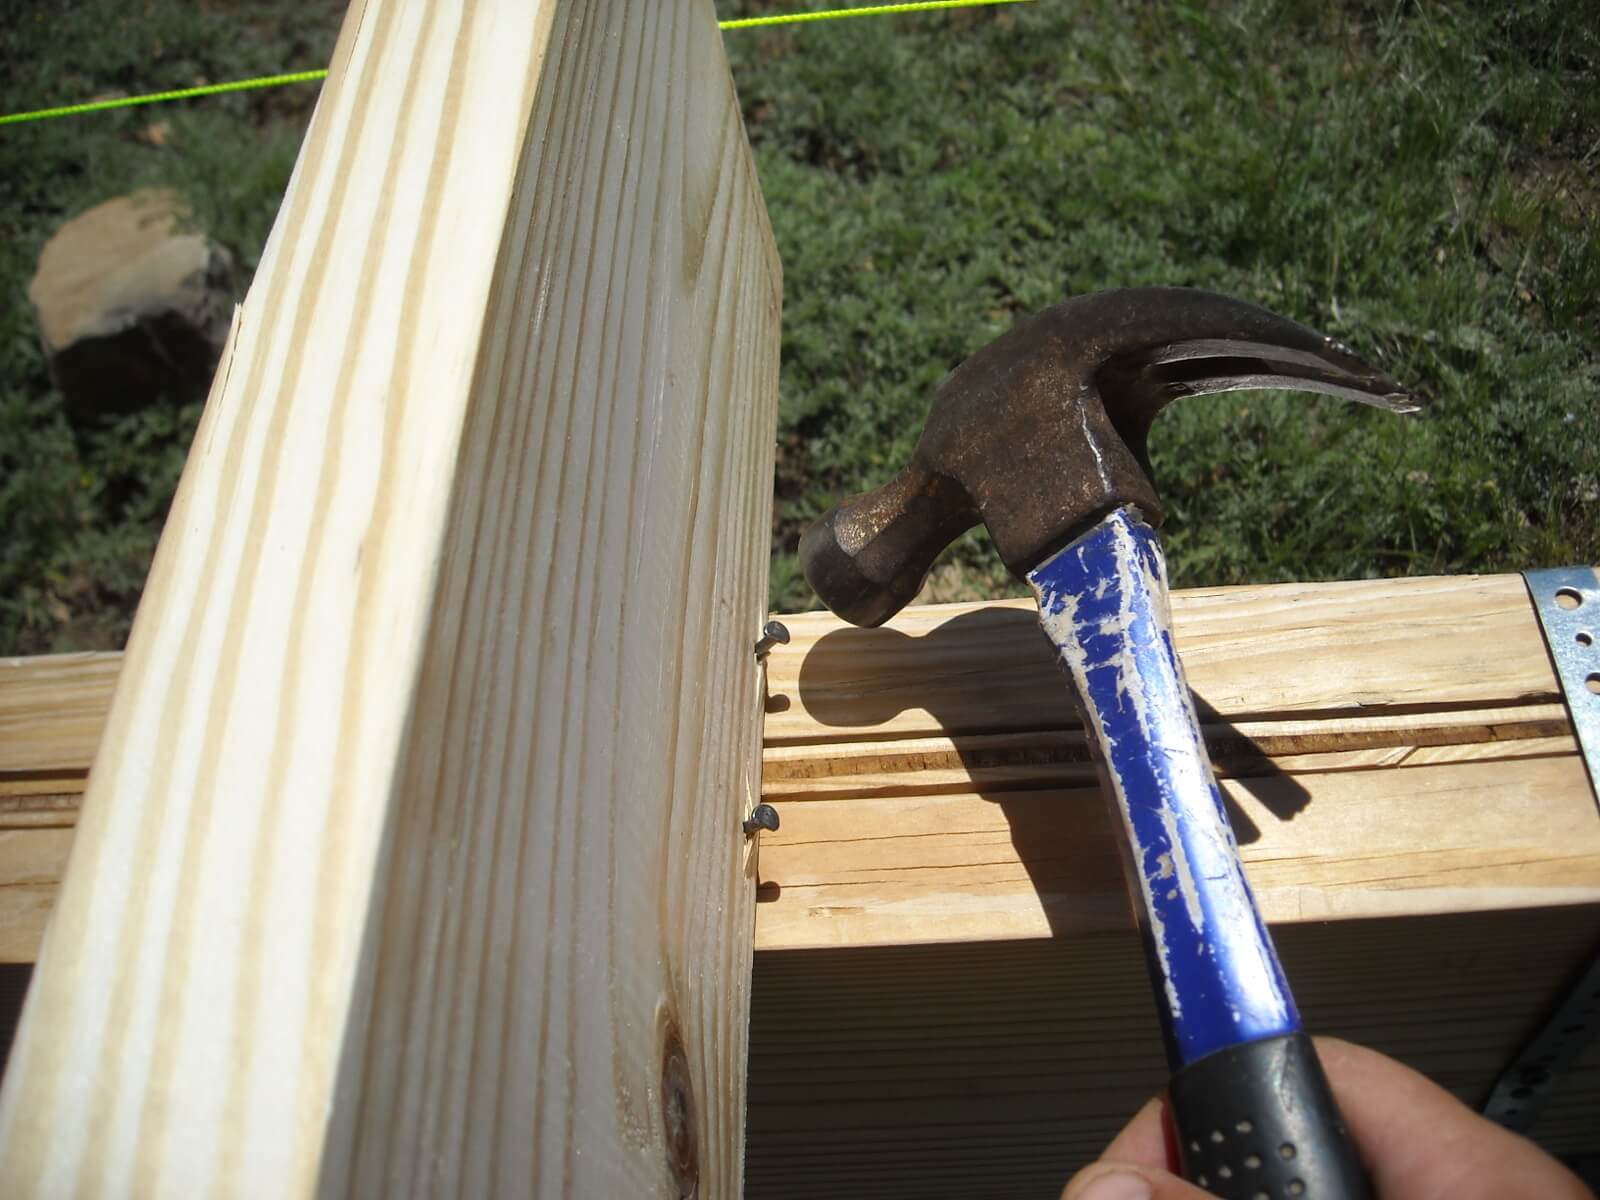
Once a joist was in place, I toe-nailed it to the beam….
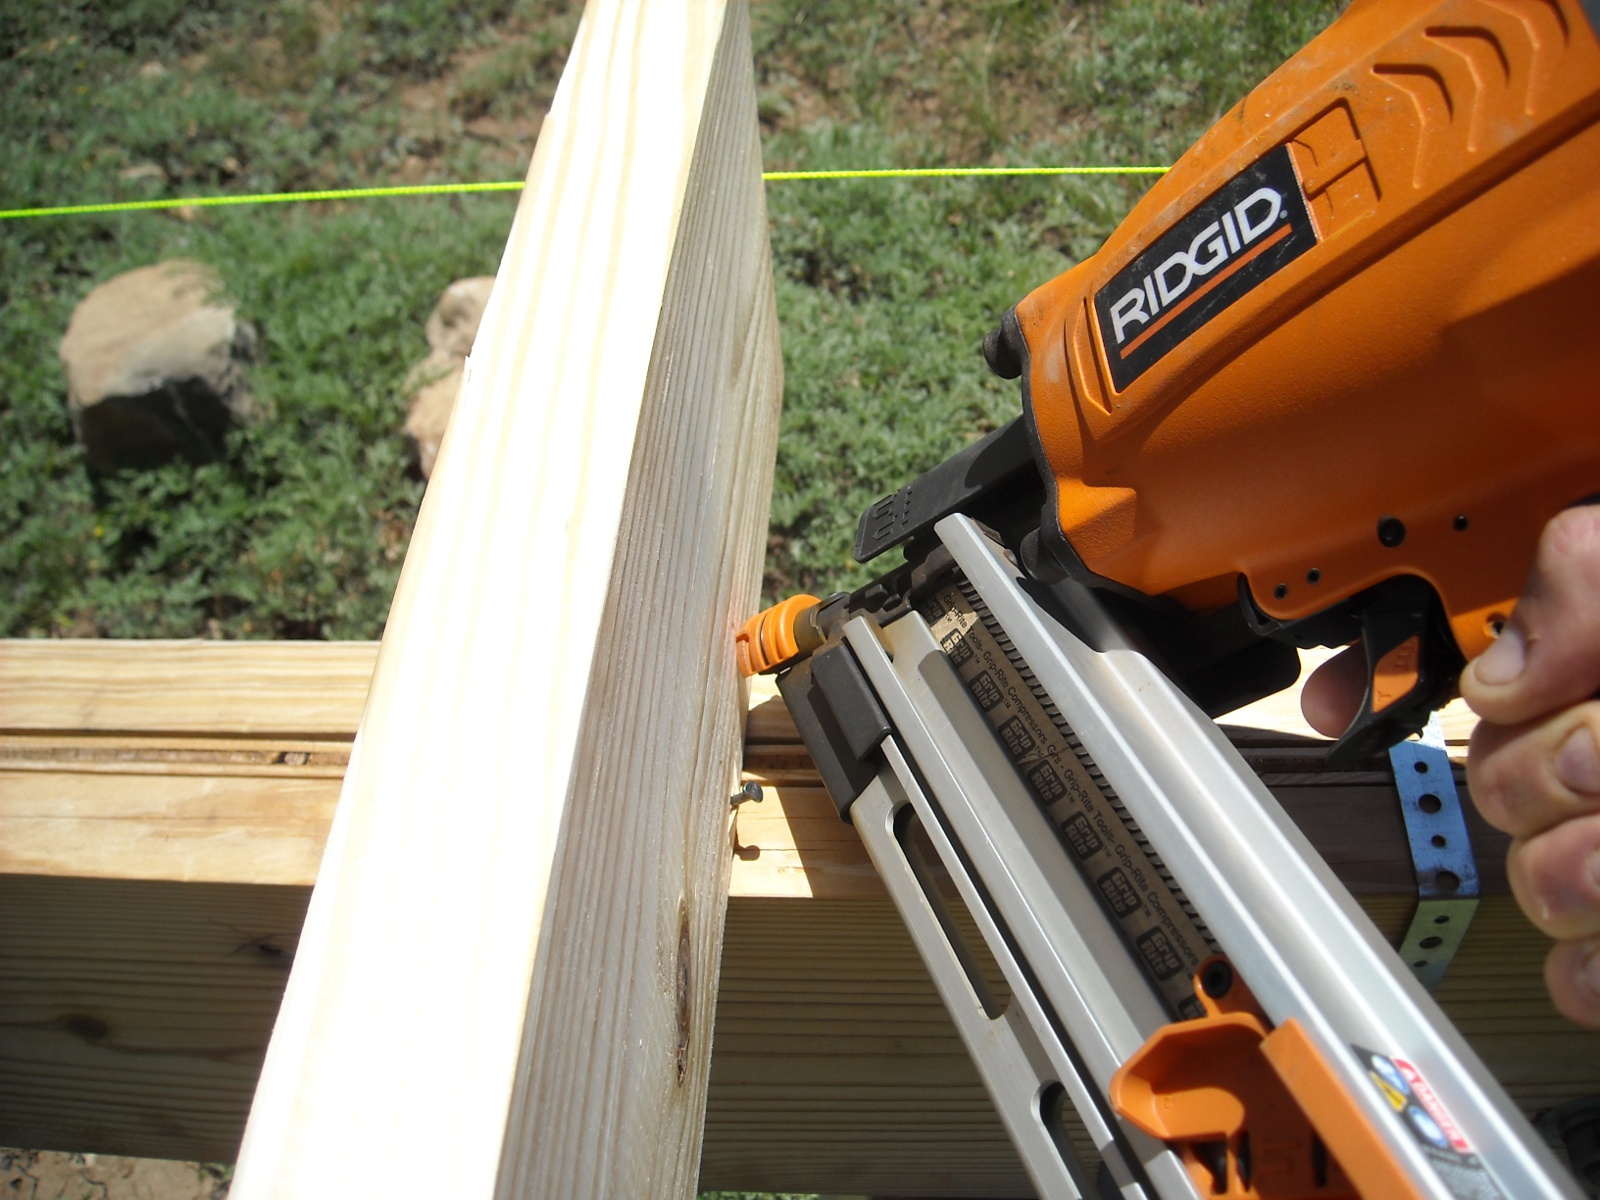
And finished them by hammering them in further. Being right-handed, it was fun to learn and practice hammering with my left hand:
And here is one side of the joists all set in a line:
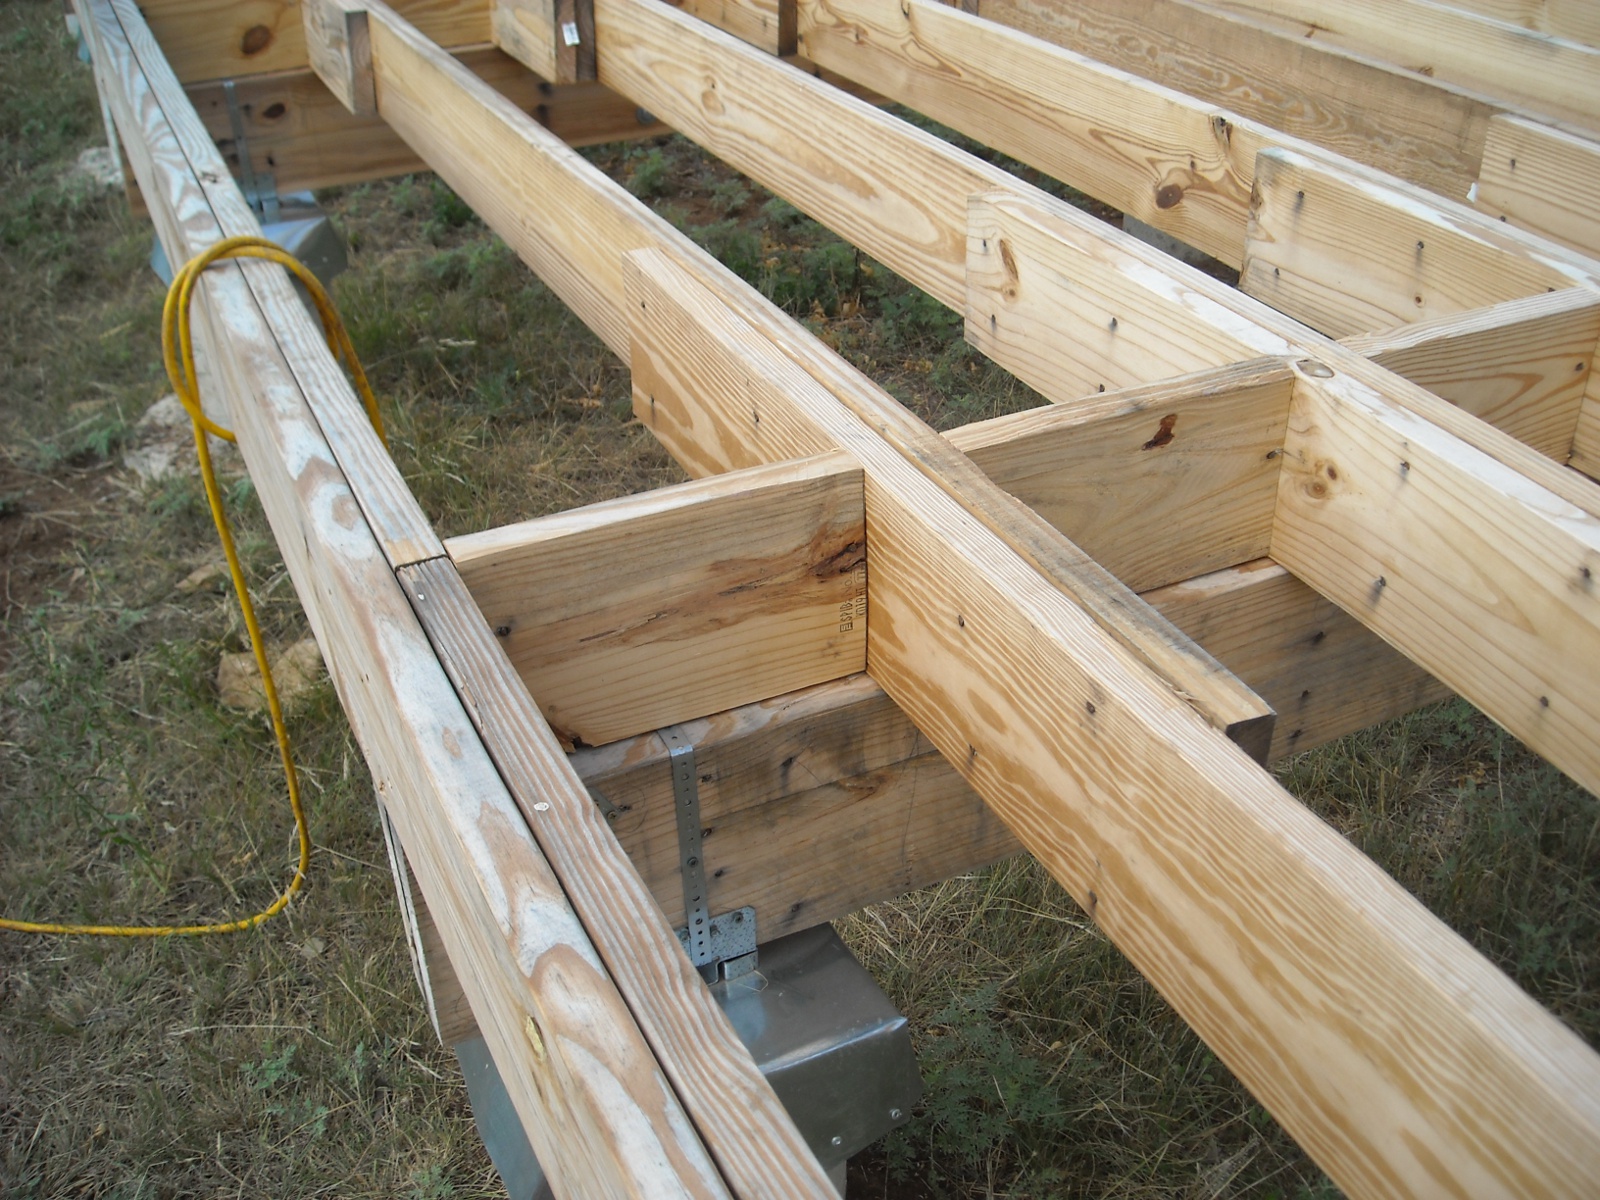
This is the overlapping of the joists. With any warped boards, I would sometimes have to clamp them together to be able to nail them together properly:

I added spacers between the joists to straighten them and give the overall floor more stability. Also, I put them on the beams, again, for more stability:
After getting the joists in place, I added the header boards:
Because we are planning on having an inner wall down the middle of the house, and the middle of the house is in between two beams, on every other joist on the middle row of joists, I doubled the joists to give extra support to that wall. I doubled joists for another inner wall that’s to run parallel with the joists; and in this picture, I added several doubled joists in a row, which is where we are planning to put our wood burning stove:
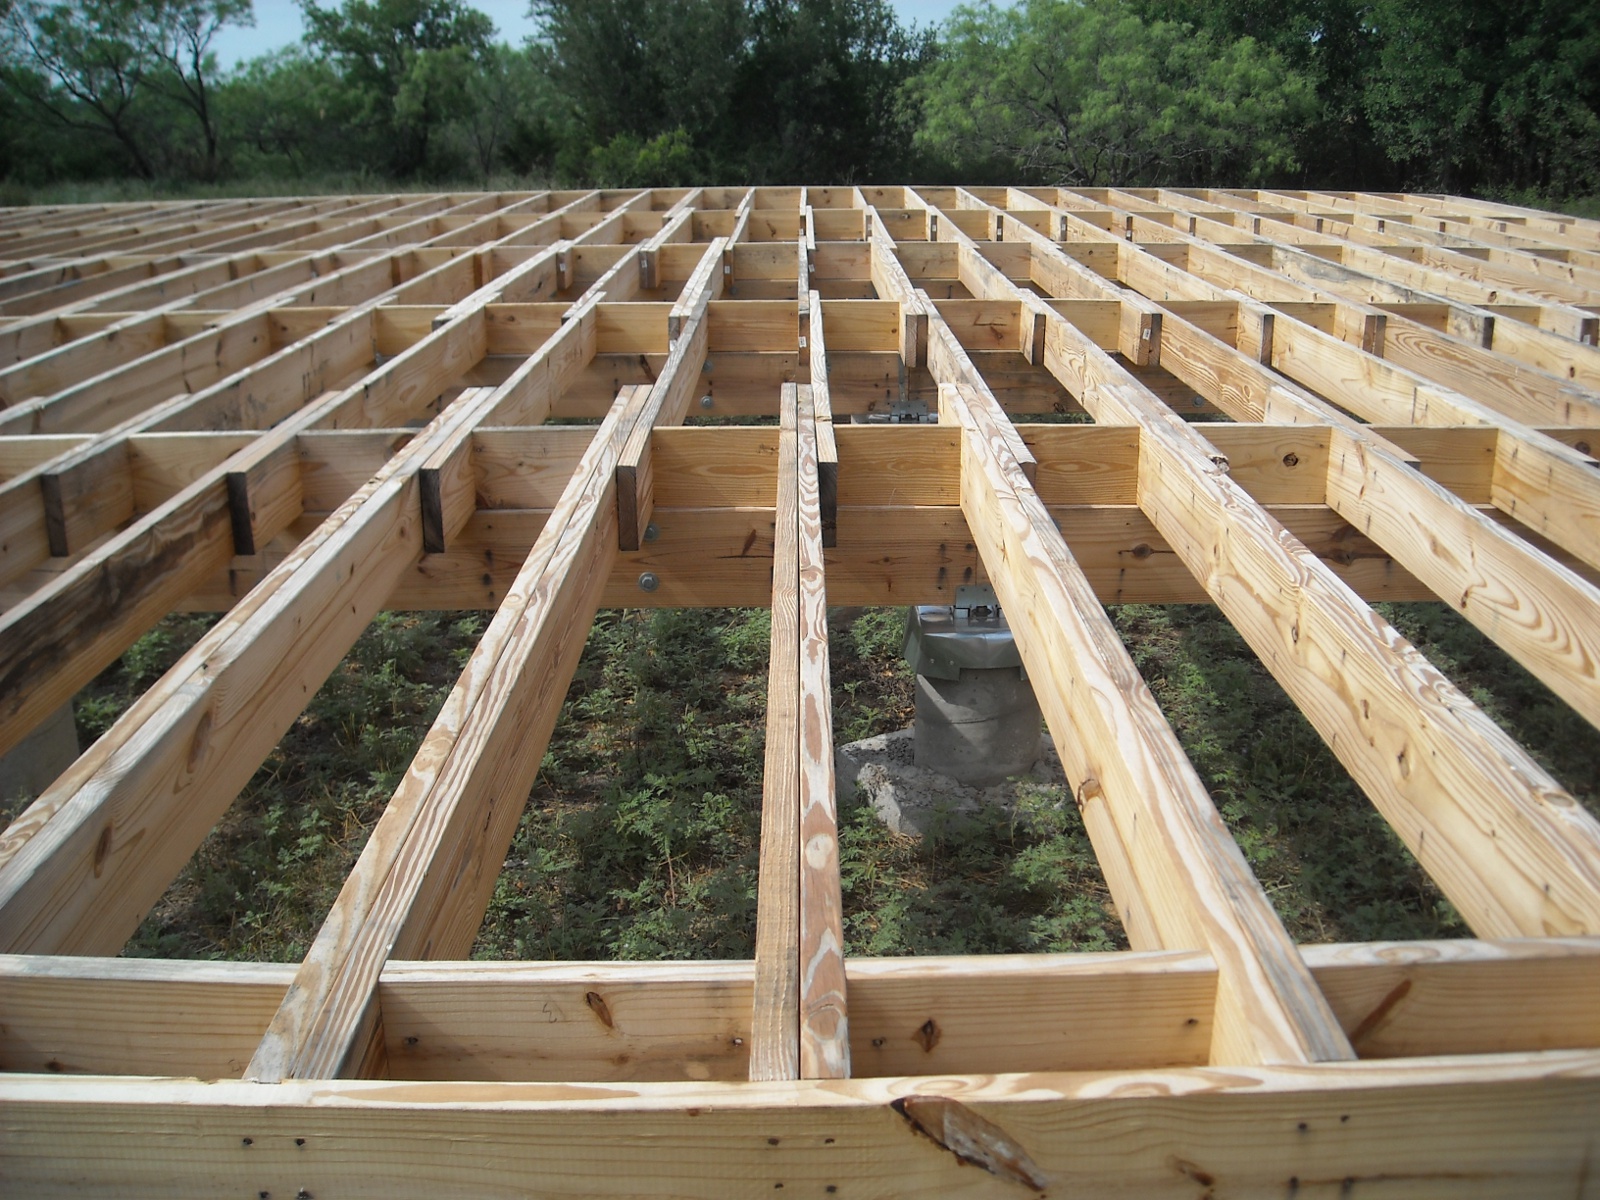
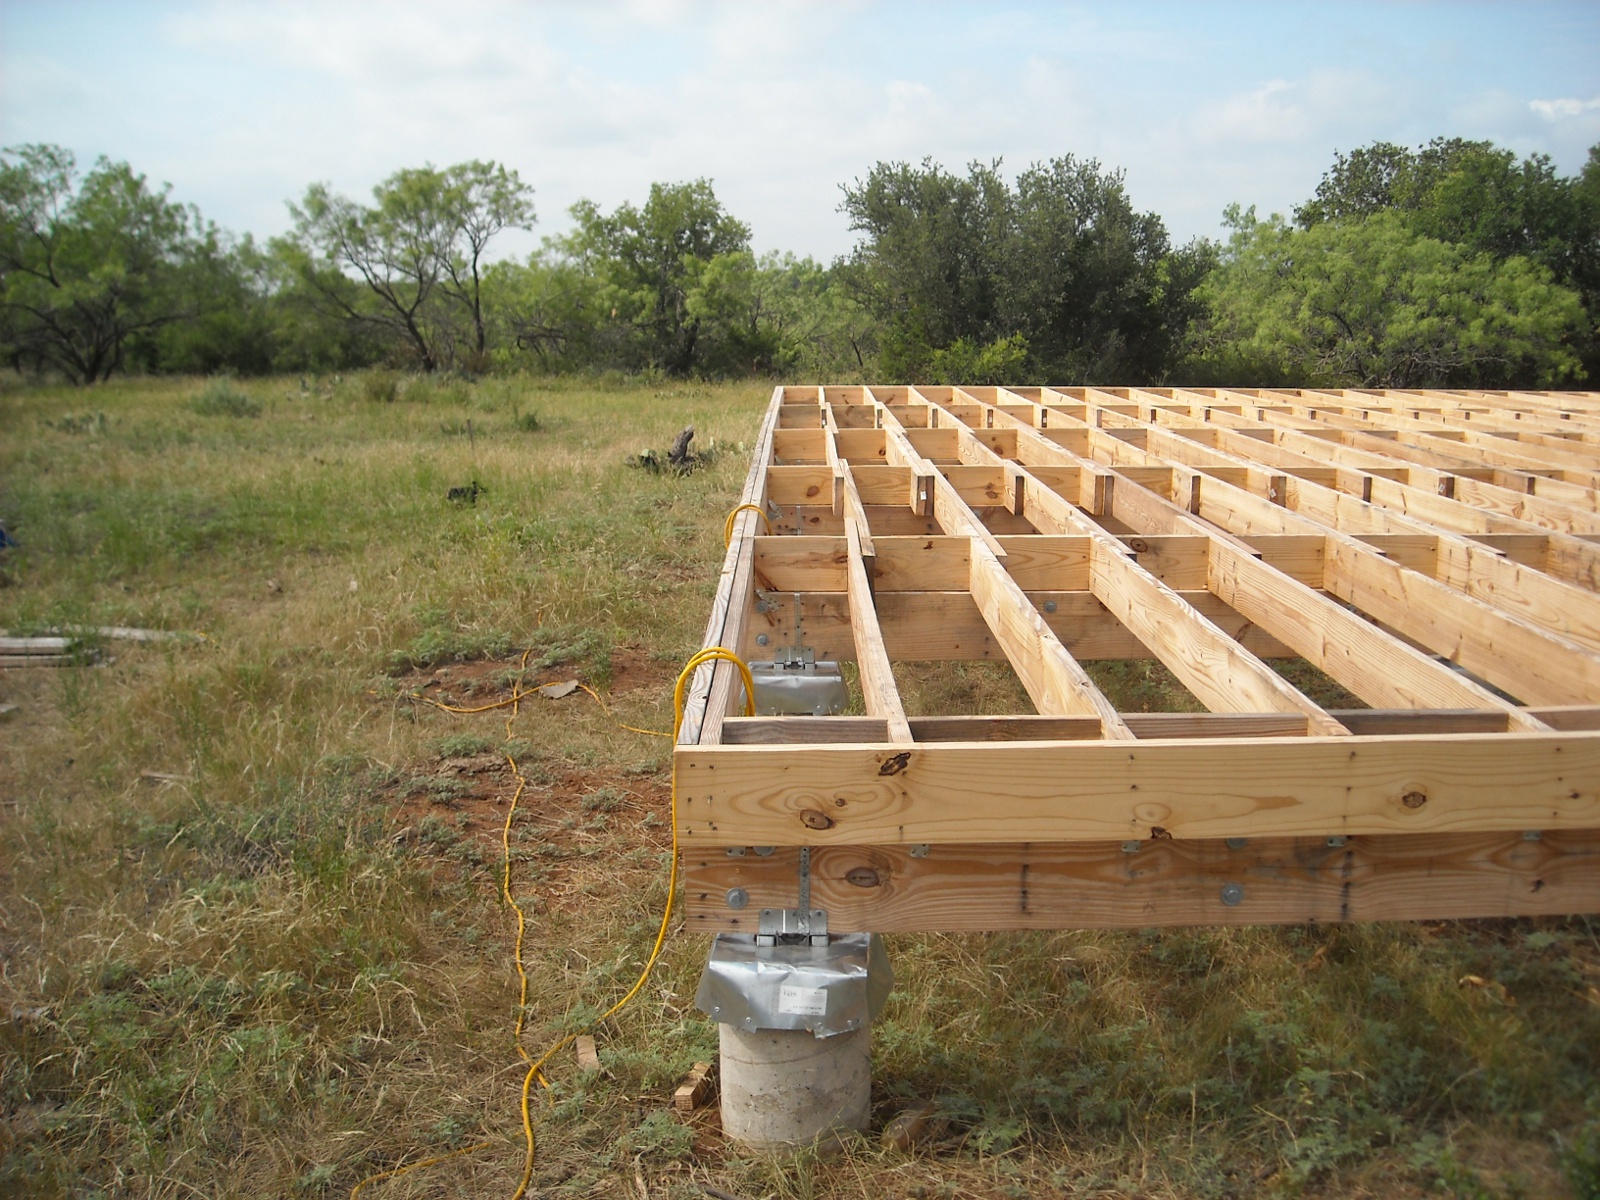
To help against wind lift and to better secure the joists to the foundation, I attached each joist where it crossed each beam with hurricane clips:
And here are the joists completed…
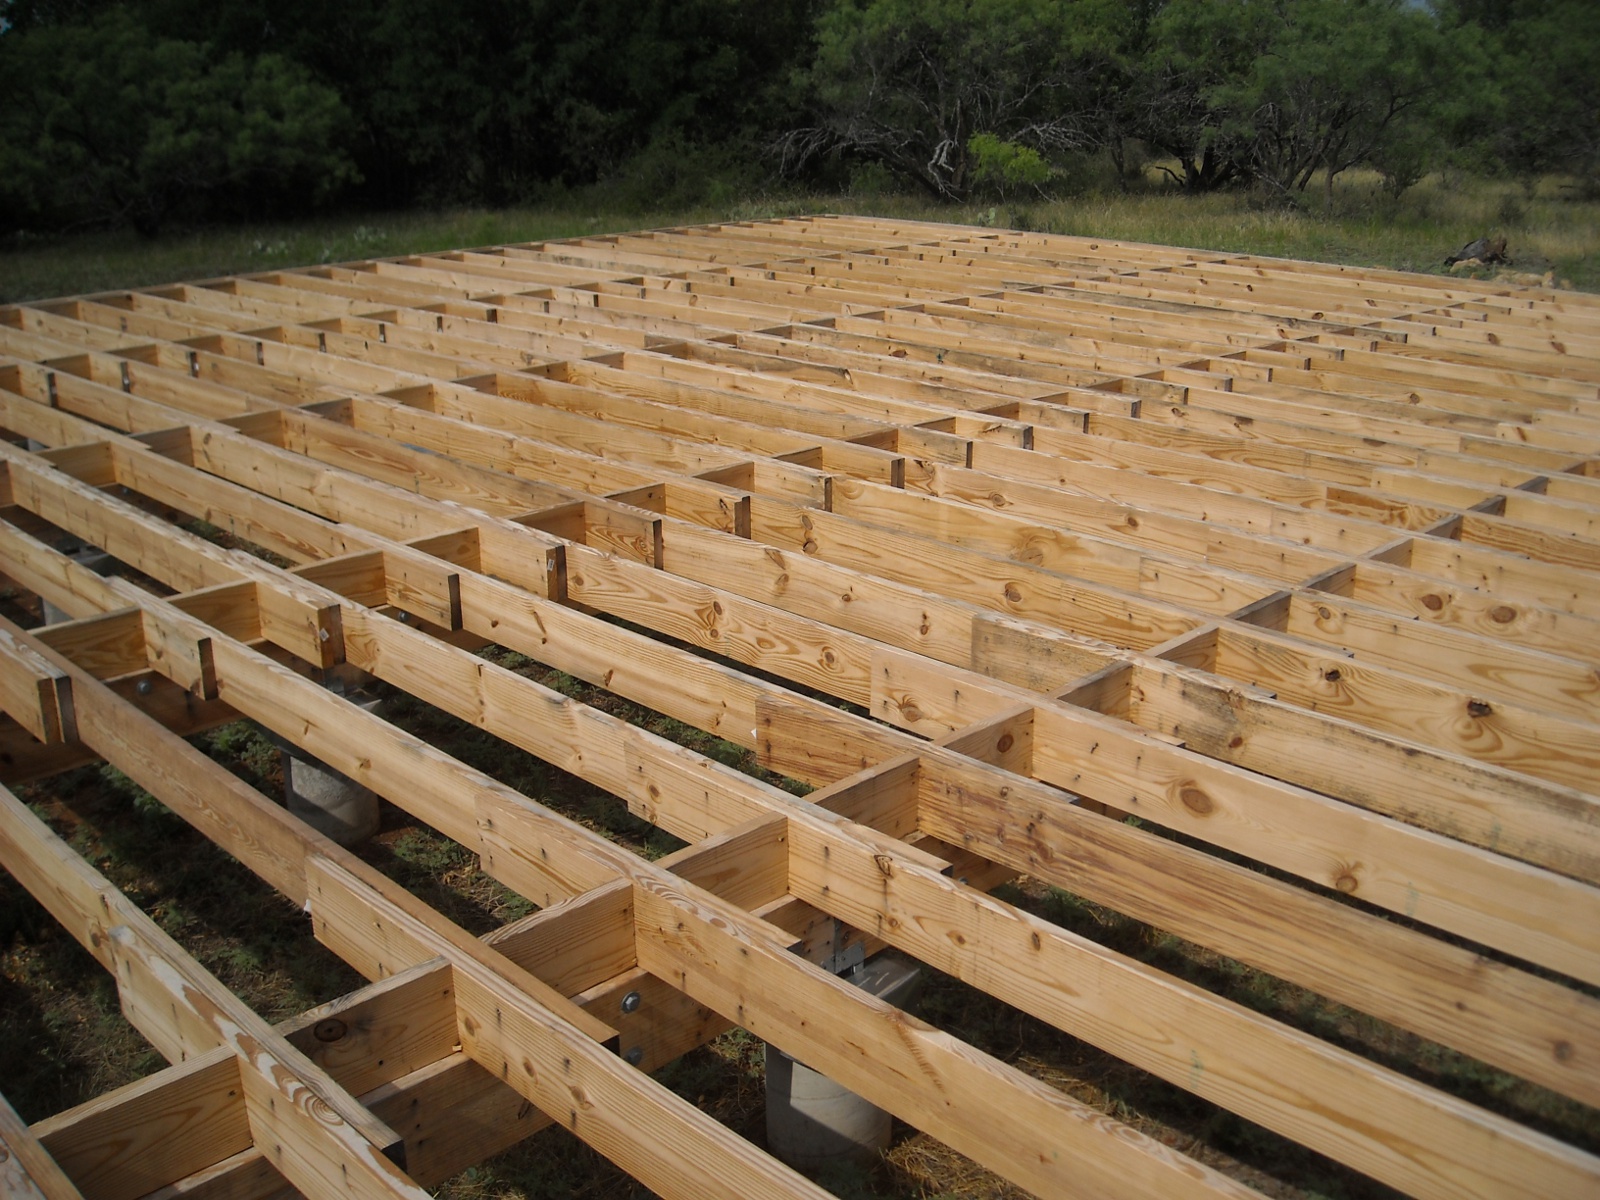
…facing South…
…and facing West:
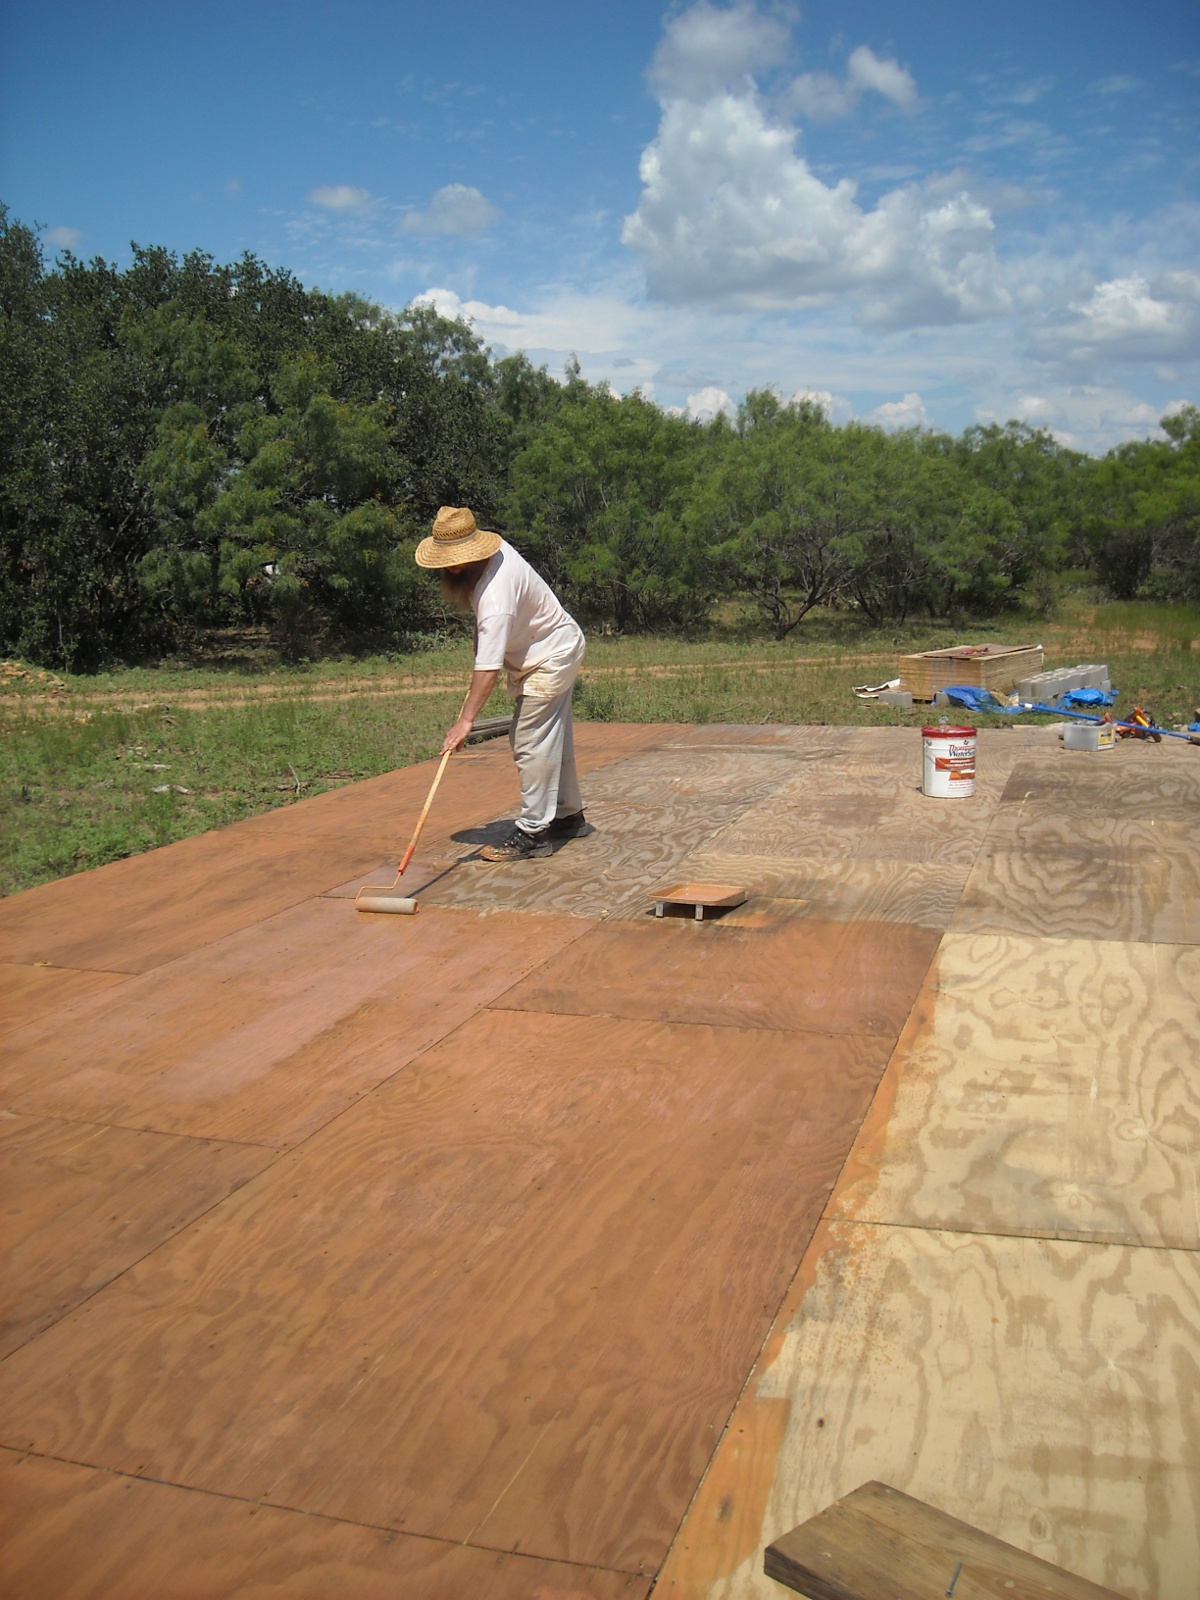
Subfloor
For this, I chose 3/4 inch tongue and groove plywood; the tongues and grooves fit together to make the places where the boards span floor joists much more stable. I also heard it was good to glue them to the joists and use screws, so I used external Liquid Nails for the glue and 3 inch deck screws to secure them, placing screws 8 inches apart on the board edges and 1 foot apart at the internal points on the joists. The board would be fastened down short end to short end across the whole platform, making a “course”; and each course would be staggered from the previous one by half the board.
When I first started, I didn’t really think through which long end type I should place against the first outside corner, the tongue side or groove side of the board. Well, I chose groove side, because it didn’t seem right to use the tongues side. Well, this stroke of genius started me on a path where with each subsequent course I was trying to fit the groove into the tongue. Needless to say, it was quite difficult, although I finally did get into a pattern where I’d loosen the screws next to the tongue of the previous course and use the mini-sledge hammer to knock them up and loose from the glue so they would flex better when I was trying to slide the groove onto the tongue. I also learned to clean out the groove and clean the tongue so nothing was in the way of them coupling. All of this worked ok until I learned from those much smarter than me that you could hit a board against the opposite site to force the tongue and groove together. I thought I had tried it before; but when I tried it again, it worked great. Of course, by then I only had about a course and a half left. 🙂
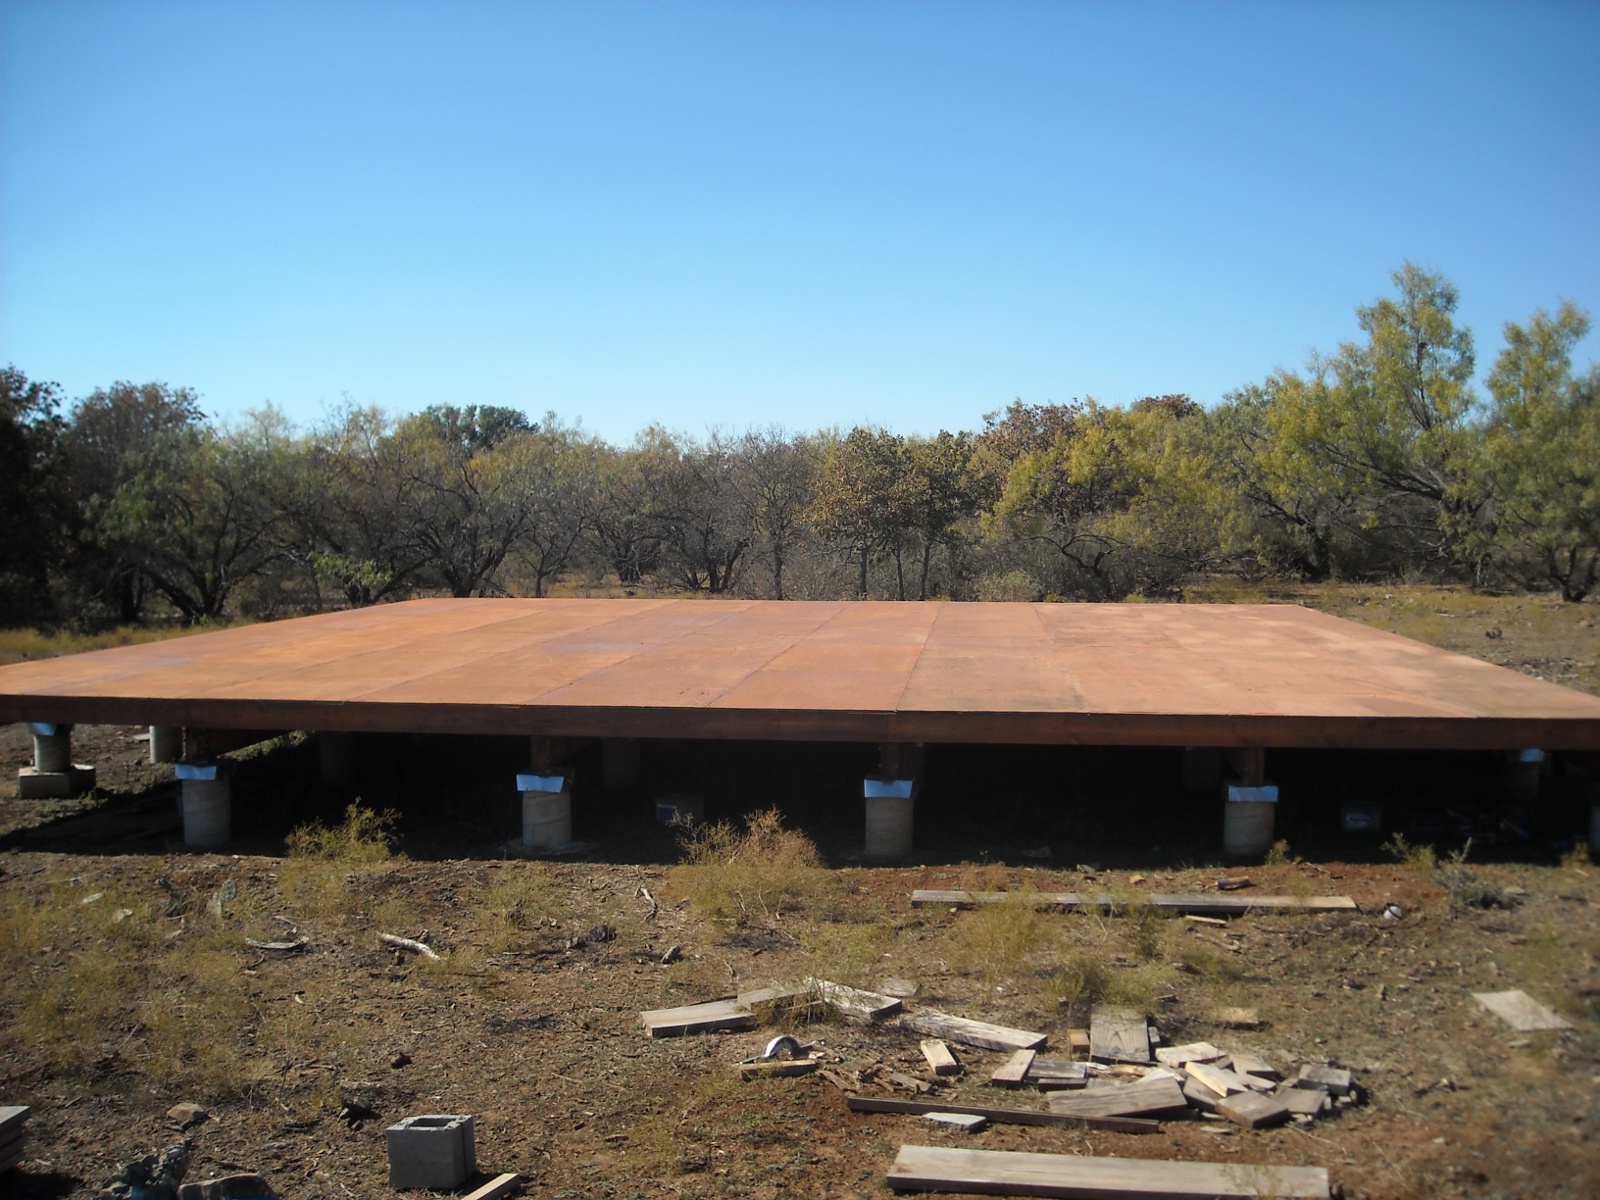
At any rate, given how long it took to get the floor on, I figured it was going to be a while before the house is dried in, so we painted the subfloor with water sealer, tinted cedar color (just to make it darker as a personal preference). Notice the stagger pattern of the boards from course to course:
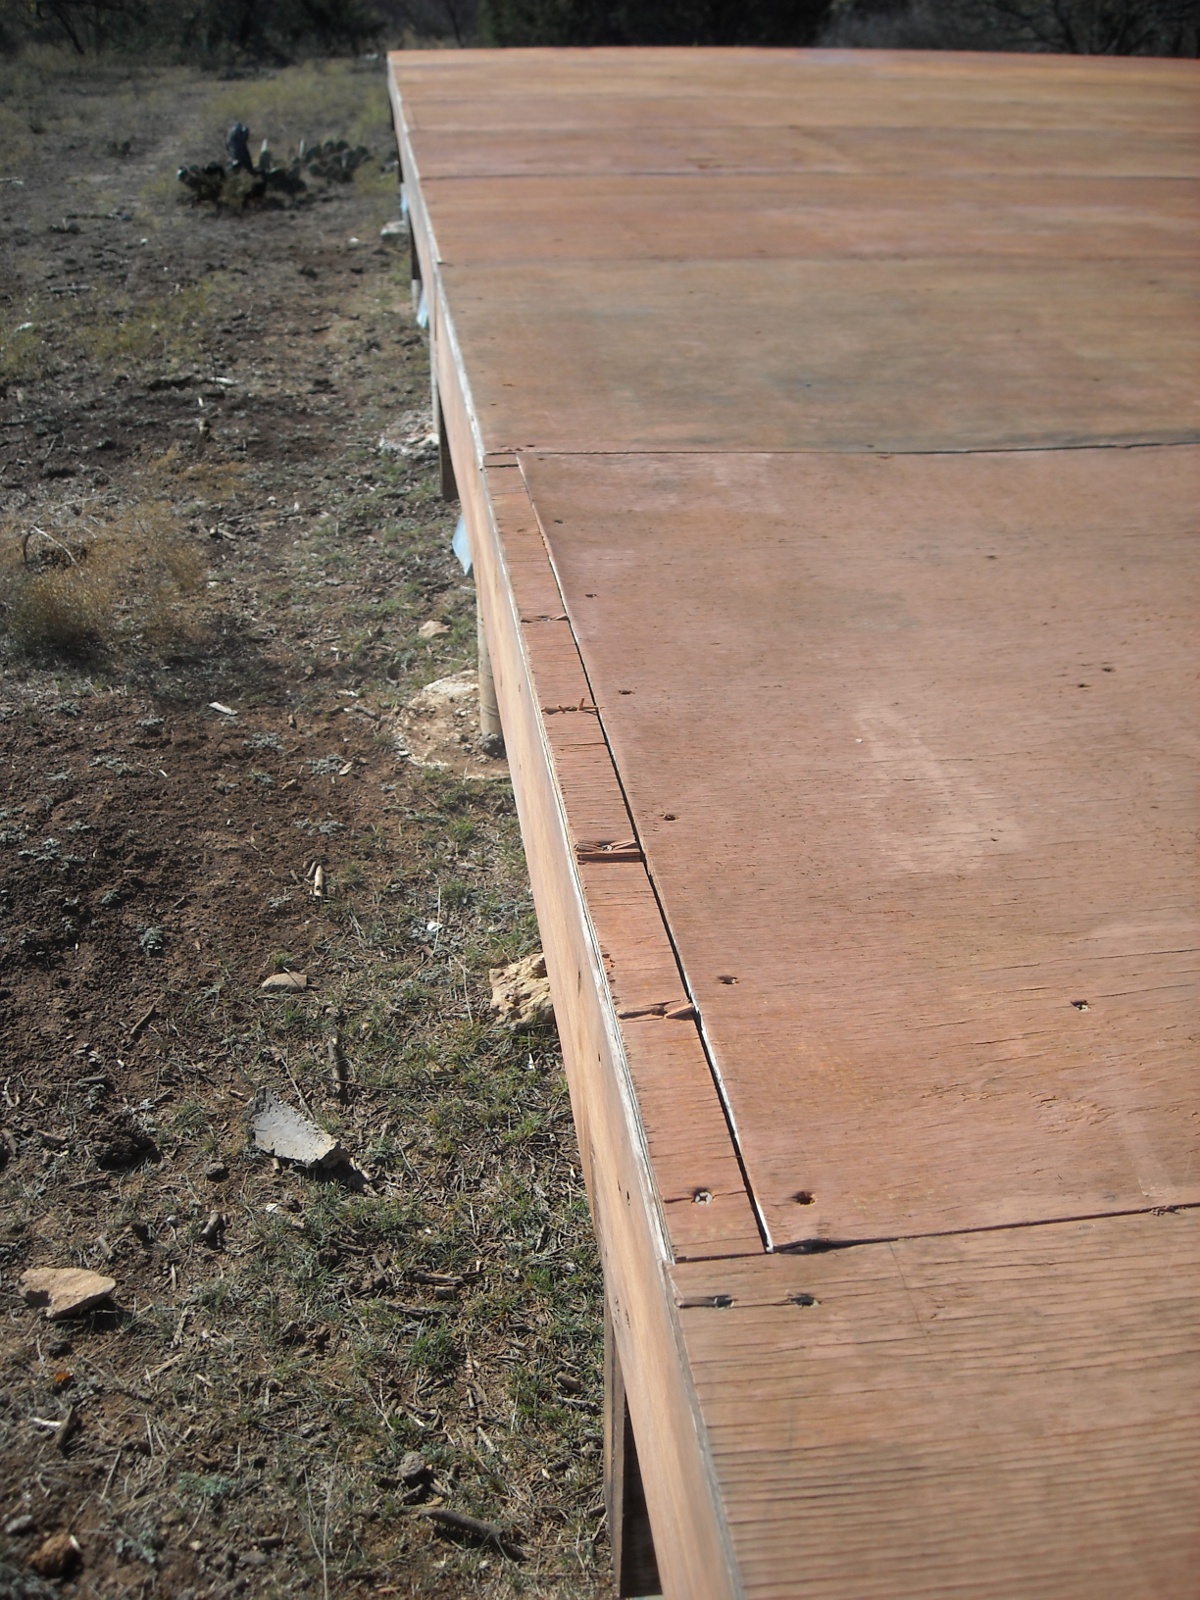
Here is a course where the boards were shifted 1 1/2 inches to accommodate the overlapping of the floor joists, and I cut off the other overhanging end of the last board of this course and brought it over to this end to fill in the gap:
And here is the platform finished. Thanks to Sue for all of her helping me get the boards in place, and for painting the rest of the floor and repainting my terrible painting job!
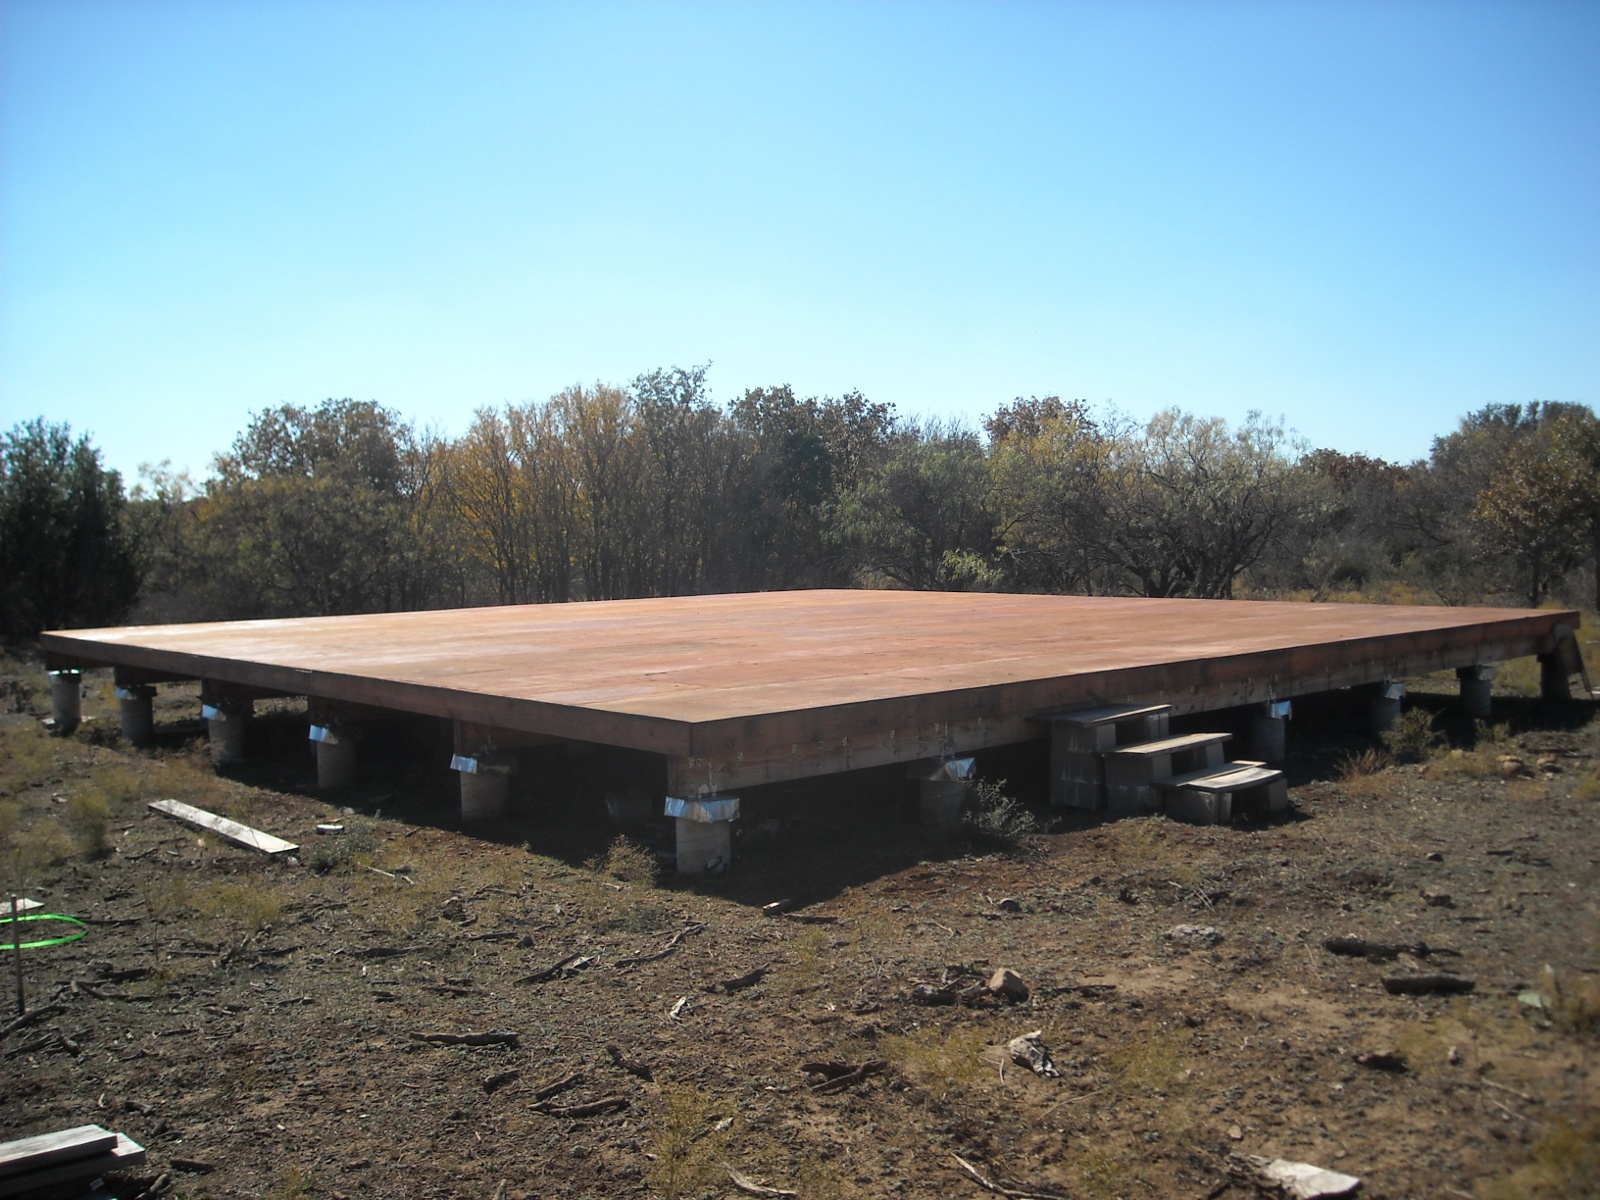
Even though it took several months, it’s finally done; and we thank the Lord for the continued progress on the house.
— David