The Sifford Sojournal

Our journal of what we pray is our sojourn of life along the narrow way, even the old paths, submitting to the Bible as a light unto both.

Page 72 of 93

Homemade Top Bar Bee Hive

In our desire to live separated from the world, we need methods of food preservation; and one of the methods is via sugar. One of most practical ways we could obtain sugar is from honey, which of course comes from bees. Well, in our hopes to be able to produce honey, for its preservation use and for its health benefits, we needed a bee hive. We had heard top-bar hives were better than regular stacked hives, in ease of use for us and the bees; and so rather than purchase one, I found a design on the Internet, and decided to try to build one. The following is the process based on the design provided by at Backyard Bee Hives.

Here are the sides and bottom. As per the instructions, the angles were 13 degrees:

Homemade Top Bar Bee Hive Side and Bottom Pieces

And here are the sides and bottom put together. I used 1 1/2″ wood screws and wood glue. Also, notice the window hole — I cut this out before joining everything together:

Homemade Top Bar Bee Hive Side and Bottom Together

For the window, I cut a piece of plexiglass to fit over the hole (I used similar plexiglas to what I used on our solar food dehydrator). In working with the plexiglas, I pre-drilled a small hole, and then bored it out just slightly using a larger drill bit, the same size as the head of the wood screw, to allow the declining angle of the head of the wood screw to fit almost exactly in, making the top of the head of the screw flush with the plexiglas:

Homemade Top Bar Bee Hive Top View with Plexiglas Window in Place

And here’s a close up:

Homemade Top Bar Bee Hive Close Up of Plexiglas Window

This is a view of the front side, where you can see the entrance area at the bottom:

Homemade Top Bar Bee Hive Front Side

After getting the main box together, it was time to build the top bars. To make these, I ripped (using a table saw) 1x4s to the width of the top bars, and then cut those “strips” of 1×4 to the width of the hive box. These would be the top of the top bars. For the bottom of the top bars, I ripped 2x wood at probably somewhere around 26.5 degrees I believe for a 1 1/2″-wide top bar (you would need to figure the angle out based on the width of a top bar) down one direction and then down the opposite way, which basically created long strips of the pointed top bar bottoms (with the point running down the middle of the top bar); and then I chopped the end of those at 13 degrees (beveling each in opposite directions) to be able to fit inside the top of the hive box, accounting for the width of the sides of the hive:

Homemade Top Bar Bee Hive Top Bar Pieces

And here they are put together. I glued them and used wood screws:

Homemade Top Bar Bee Hive Top Bar Bottom View
Homemade Top Bar Bee Hive Top Bar Top View

Here is the false back that’s part of the design. Moving the false back up to the last bar with comb on it during the Winter creates a smaller space in the hive to help the bees stay warmer:

Homemade Top Bar Bee Hive False Back

And here is the false back and some of the top bars in place. I had to file down some of the bottom parts of the top bars to get them to fit into the sides of the hive box:

Homemade Top Bar Bee Hive with False Back and Some Top Bars in Place

And then here is the hive with all of them in place, including the front and back handles that book-end the top bars. For those, I installed one handle first, placed all of the top bars in place not too tightly, and then installed the other handle up against the top bar next to it:

Homemade Top Bar Bee Hive with All Top Bars in Place

I changed the lid design a little, making it gabled instead of just flat. This was more complicated, but allows for the use of 1x wood for the top instead of plywood, and hopefully will allow the rain to run off easier:

Homemade Top Bar Bee Hive with Lid On

In joining the boards at the roof peak, I drilled pilot holes from one board to the other, and drilled out the hole a little more with a larger bit to allow the head of the screw to sink farther in; and for this part, I used 3/4″ wood screws:

Homemade Top Bar Bee Hive Lid Joined with Screw at the Peak

I also angled downward the tops of the edge pieces of the hive top to allow for better water run-off:

Homemade Top Bar Bee Hive Lid with Angled Edges

And here’s a picture of the end of the lid:

Homemade Top Bar Bee Hive Lid Side View

Once built, to weatherize it, I painted all of the external parts with water sealer. After that was dry, I caulked the lid on the outside and inside to help keep water from getting into the inside of the hive:

Homemade Top Bar Bee Hive Painting with Water Sealer
Homemade Top Bar Bee Hive Underside Painting with Water Sealer

Once painted, I attached the window cover with hinges:

Homemade Top Bar Bee Hive Side Window Hinges

Here it is open:

Homemade Top Bar Bee Hive Side Window Open

I also added wood latches I cut to keep the door closed. I originally tried aluminum butterfly latches, but those were pretty flimsy and bent easily:

Homemade Top Bar Bee Hive Side Window Latched Closed

We are grateful to the Lord for allowing the provision of this hive; and we pray we are able to husband bees well, to His glory, for preserving food, and having more bees to keep our gardens and trees pollinated.

— David

Tractor Fixin’

The last time we blogged about our tractor, it was in pieces after a rear axle had sheared and the axle casing had cracked apart when trying to chisel-plow a field here on the land.

Well, the Lord, in His mercies and will, saw fit to allow us to find replacement parts at a fairly local tractor salvage yard; and so after I was able to go get them, Mr. Gillis, a local friend of the community, graciously offered some more of his time; and we began to work on putting it all back together.

We used the engine hoist to pick up and maneuver the new axle (the combination of the axle and housing really made that piece heavy):

Preparing to Install Farmall 806 Tractor Axle

Here we are trying to position it. Notice that we had placed a new gasket, which I had to obtain from a local Case-IH (the company that now owns Farmall) dealer, in position (the new gasket is the greyish outline on the tractor where the axle casing goes):

Positioning Farmall 806 Tractor Axle for Installation

Mr. Gillis had me cut the heads off of a couple of bolts so that we could use them as positioners, sliding the axle onto them to get it into place while holding the axle up against the tractor. The first time we slid the axle on the bolts, we unknowingly did it out of position; and then the new axle casing appeared as if it was the wrong part! But after getting the holes aligned correctly, it was the correct part (thankfully!!):

Installing Farmall 806 Trator Axle

And here is the replacement axle in place. Notice, though, the large hole behind the chain in the front of the axle casing (you can see it in the above pictures a little better):

Replacement Farmall 806 Tractor Axle in Place

Well, that large hole in the front is where the drive gear goes. We thought it went in after the axle went on; but once the axle was bolted, we realized we couldn’t get it to fit in, which meant removing the axle again. Once on the ground, we still couldn’t get it into place, and then realized that the main “bull gear” (which is the large gear shown in the last picture of the “Tough Tractorin'” blog post above) needed to be removed to get the drive gear in place. However, that couldn’t be removed without removing a new replacement bearing we had pounded into place onto the axle. Sadly, removing that bearing didn’t go too well; and I ended up cracking the casing; and so, we just broke it off (it took over an hour to do that), and had to get a new bearing (which meant stopping for the day that day). Once we got a new bearing, we put the drive gear and bull gear in place, installed the new bearing, and were once again ready to go. You can see in the picture the drive gear in place now:

Farmall 806 Tractor Axle with Drive Gear Installed

And so, we reattached the axle, and then started putting everything else back. Here you can see the axle and the brakes re-installed (the brake drum went over the drive gear):

Farmall 806 Tractor Axle and Brakes Installed

And last but not least, we put the wheel back on using Mr. Gillis’ front-loader on his tractor and a chain:

Farmall 806 Tractor Axle Replaced and Wheel Installed

And there you have it. When I first drove it after all of this, the center cap of the brake drum had pushed out and disappeared, and there was a small amount of smoke and flakes coming out of it as I would drive. I eventually figured out one of the brake pads had slid onto the drive gear crooked; and with a little bit of pounding effort, I was able to straighten it out, install a new center cap; and the tractor seems to be working just fine.

We are thankful to the Lord for allowing us the continued intermediate means of the tractor as we endeavor to work the land so as to be able to separate further from the world. I would like to put forth a big push this year to try to get our fields under control, including getting our upper field in a perennial pasture grass, which in my estimation requires the use of a tractor; and so, hopefully we’ll be able to do that, as the Lord wills. Once again, we are grateful for God’s graces and mercies in these temporal provisions. And thanks also to Mr. Gillis for his time and effort.

— David

Providence’s Perpetuation Provisions: New Chick, and More Chicks

One of the hens we got last year went broody some time in December, and sat on eggs in our barn for weeks on end, including through the big cold front that went through in February. Well, just recently, I went to put a little food and water next to her as I would do each evening, and from underneath her I heard a “cheep-cheep”! With William, our cat, running around, we knew we had to get her into our mini-chicken tractor (see the middle of that blog post); and so we moved her and the chick in there; and here is a little video of them together in the mini-tractor. (I say in the video we first heard the chick in the mini-tractor; but that was incorrect, as we first heard it in the barn, and then moved the hen and chick into the mini-tractor from there):


We don’t know what breed the little one is, so it’ll be interesting to find that out eventually, Lord willing.

New Araucana Chicks

Also recently, a lady in a nearby town had some new pullet chicks available for purchase (she indicated that for the most part we can know they are females by the fact that they have even-length feathers on their wings; she said it may not be 100%, but has worked well for her in identifying the sex of the chick); and since we were looking for a few more female chicks (using the wing-length method, we think the hatchling is a female), and since this lady’s would be about the same age as our new hatchling, we thought we might pick them up and put them in with the mother hen and the new chick, hoping the mother hen would adopt them. Well, that didn’t work at all — the mother hen actually attacked them pretty violently; and so, since our new hatchling was at least a week and a half old, we decided to pull the mother hen out and put her back with the rest of the flock before adding the new chicks with the hatcling. This seems to have worked pretty well, as the chicks all seem to get along, although the mother hen has spent a lot of time around the mini-tractor trying to get back with her chick.

Here is a picture and a video of the new young flock. The new chicks are Araucana breed, which lay green eggs; and we picked up all 10 of them that she had:

New Flock of Araucana Chicks and New Hatchling


We are grateful to the Lord for granting a dedicated broody hen, and the bringing forth of a new chick; and we pray the broody instinct was passed along to this new chick. We are also thankful to God for allowing the provisions of the other new chicks, and we pray He grant that they become productive resources here.

— David

David’s Digest: Quick Quiz

Quick quiz:

Who invented Agrarianism?

Answer: God

Before the fall: Gen 2:15 – “And the LORD God took the man, and put him into the garden of Eden to dress it and to keep it.

After the fall: Gen 3:19,23 – “19 In the sweat of thy face shalt thou eat bread, till thou return unto the ground; for out of it wast thou taken: for dust thou art, and unto dust shalt thou return. 23 Therefore the LORD God sent him forth from the garden of Eden, to till the ground from whence he was taken.

Who invented Industrialism?

Answer: Man

Jer 17:9 – “The heart is deceitful above all things, and desperately wicked: who can know it?

Prov 4:23 – “Keep thy heart with all diligence; for out of it are the issues of life.

Prov 14:12 – “There is a way which seemeth right unto a man, but the end thereof are the ways of death.

Agrarianism or Industrialism: it’s God’s way or the highway.

— David

End of the Garden Tomatoes (Red and Yellow, Green and Bright, They Are Precious in Our Sight)

Our 2010 Spring garden was faced with much adversity, in that, it was plagued with grasshoppers and overcome by drought. We had very few tomatoes to harvest over the entire Spring and Summer months. But thank the Lord for His graces and mercies: come Fall, the grasshoppers began to die out, cooler temperatures came, and God sent a couple of good rains. We were thrilled when we started to see flowers start to bloom and eventually grow fruit all over our six, overgrown, previously empty, tomato plants:

Spring Garden 2010 Fall Tomato Crop on the Vine

As Autumn progressed, we started to put blankets over the tomato plants but could tell they were probably not going to be able to ripen on the vine with the prevalent cooler weather patterns. I was able to harvest three large baskets of unripened tomatoes and put them in our summer kitchen building:

Spring Garden 2010 Fall Tomatoes in Baskets

I knew they would rot if I left them as-is in the baskets, so I spread them out wherever I could find room. Here…….

Spring Garden 2010 Fall Tomato Crop on Rolling Cart Shelves

Here……

Spring Garden 2010 Fall Tomato Crop on Another Rolling Cart Shelf

And more here!

Spring Garden 2010 Fall Tomato Crop on Table

I checked on the tomatoes pretty much daily and grabbed the ripened ones to use in salads, sandwiches and other dishes. Man, there is nothing like the taste of a garden tomato! I had to keep a close eye on them because they can rot when you blink! And if they are touching in any way, it seems the rotting can be contagious. Our pigs ended up eating their share of rotten tomatoes, but at least they didn’t go to waste:

Spring Garden 2010 Fall Tomatoes Ripened in Basket

When I had a goodly amount of ripened tomatoes, I went ahead and preserved them by making some tomato-apple chutney. Yum! For anyone who is interested, here is the easy recipe from the Ball Blue Book of Preserving:

Tomato-Apple Chutney (yields about 6 pints, but you will probably yield more if you are generous with the ingredients)

2 1/2 quarts (about 12 large) chopped, peeled, cored tomatoes (I did not peel or core mine)
1 quart (about 5 medium) chopped, cored, peeled apples (I did not peel mine)
3 cups brown sugar
2 cups (about 1 large) chopped cucumber
1 1/2 cups (about 1 1/2 medium) chopped onions
1 1/2 cups (about 2 medium) chopped sweet red peppers
1 cup raisins
1 hot red pepper, finely chopped (I used a jalapeno pepper)
1 clove garlic, minced
1 tablespoon ginger
1 teaspoon salt
1 teaspoon cinnamon
3 cups vinegar (I used apple cider vinegar)

Combine all ingredients in a large sauce pot. Simmer until thick. Stir frequently to prevent sticking. Ladle hot chutney into hot jars, leaving 1/4-inch head space. Remove air bubbles. Adjust two-piece caps. Process 10 minutes in a boiling-water canner. (Be sure to check for any time or weight adjustments based on altitude)

(Recipe variation: For a milder chutney, remove seeds from hot pepper)

(Note: When cutting or seeding hot peppers, wear rubber gloves to prevent hands from being burned)

Here are all the ingredients combined and ready to be simmered:

Tomato-Apple Chutney Ingredients Ready for Cooking

And here it is after simmering, ready to be poured into clean, hot canning jars.

Tomato-Apple Chutney Simmering in Pot

I have found chutney is really tasty with rice dishes, as a garnish or topping to meat or anything to which you want to add a sweet/sour savory tang or “pizazz.” I am thankful to have found these chutney recipes to assist in preserving many of our garden veggies and orchard fruits:

Tomato-Apple Chutney Preserved in Jars

There came a point in the Winter where the rotting was increasing and the ripening was taking a long time, so I decided to attempt lactic fermentation with the remaining green tomatoes:

Spring Garden 2010 Fall Tomatoes Unripened

I combined the green tomatoes, chopped onion, chopped garlic and chopped green peppers (I think those are all the ingredients I used). You can put most any combination of garden veggies together for lactic fermentation:

Spring Garden 2010 Fall Green Tomatoes and Vegetables Chopped Up for Lacto-Fermentation Preservation

I put it raw in canning pint jars, along with two teaspoons of canning salt in alternating layers, and filled the jars to within one inch head space with water. Then I put the tops on and……..that’s it! Lastly, I placed them down in the root cellar. Over the course of days to weeks, it develops that tangy fermented taste that is sooooooo good for your gut. It actually makes a great salsa, and we also put it on our salads.

We thank God for His perfect timing in providing this late tomato harvest and for His faithful provision:

Spring Garden 2010 Fall Green Tomatoes and Vegetables in Jars for Lacto-Fermentation Preservation

Susan

A Mulching We Will Go

One thing about living out here in untamed territory is that everything is on the dirt. This makes for dirty clothes, dirty belongings…dirty everything. And then when it rains…well, you know the equation: dirt + water = mud.

Dealing with the mud around here has been an interesting experience. It gets everywhere (like the dirt); we have to park cars up at the front of the land in advance of rain to be able to go to town; and you get to slog around in it sometimes for an extended period, which actually isn’t so easy for days on end. Anyway, these things in the end can be a means of revealing a lack of graces in our lives, which should cause us to pray on bended knee for forgiveness and for the proper graces of patience, contentment, etc.

I wouldn’t have it any other way. 🙂

However, from a practical standpoint, there are some things that can be done to help with problems that occur from things like dealing with mud. One thing I did was add gutters to our Summer kitchen and cistern, which has helped keep water from collecting around them — water which sometimes leaked into the stairway of our root cellar. Also, our barn’s North lean-to is actually slanted slightly uphill; and so, when it rained heavily, especially from the North, the whole North lean-to area would flood, which would also leach under the barn’s concrete footer, soaking the floor near the footer on the inside of the barn. Well, I figured this could eventually cause problems with those areas of the foundation. But what to do?

Michael some time ago came up with the idea of hauling in free mulch that was available from a local town’s landfill, and using it for any pathways and areas where people needed to walk in the rain. This was a great idea, as it ended up working very well for him.

And so, I was able to finally transport some loads here (which sadly weren’t quite free anymore, but not too expensive) to begin filling in the North lean-to area, and around the Summer kitchen and root cellar:

Landscaping Mulch in Flatbed Trailer

The hay pitchfork worked best:

Hay Pitchfork and Tools for Laying Landscaping Mulch

And here are some pictures of the coverage. This is the beginnings of laying it out:

Beginning to Lay the Landscaping Mulch

Here is the mulch around the root cellar:

Landscaping Mulch Around Root Cellar

And between the cistern and Summer kitchen:

Landscaping Mulch Between Cistern and Summer Kitchen

With the first flatbed trailer full, we filled most of what you’ve already seen, and started in on the North side lean-to:

Landscaping Mulch Beginning on North Side Lean-to

With two more loads, we were able to complete the whole area under the overhang:

Landscaping Mulch Under North Lean-to Complete

It has worked out really well for us too — we can walk around those areas now, even when it is raining; the root cellar leaking is much better, as is the inside of the barn floor.

We’re thankful to the Lord for granting this idea, and for the provisions for the mulch and help in continuing to improve the homestead.

— David

It Was a Little Chilly Outside

So, we usually try to get a blog post out quicker than this; but this last week has been interesting. We just went through probably the coldest weather we’ve experienced since moving out here 5 1/2 years ago. It was a doozy, for us anyway. It was originally supposed to only last a couple of days, but it stretched out to three full days with temperatures between the upper single digits to lower 20s, with only on day four us hovering around the freezing mark. Also, it was breezy or windy most of the time, and we had rain right before and snow during; and with the winds, the wind chills got to below zero. After our cold weather training trip (see the “Preparation and Education” section of that link) of a few years ago, in preparation for any future trips, I obtained some extreme cold-weather clothing, like polypropylene long underwear, socks, glove inserts and balaclava, and some lined coveralls. Those polypropylene accouterments are the best, and have really helped Sue and me.

Now, while we’ve been able to figure out some of our own cold-weather clothing issues, some of our animals, and the situation we have available for them, aren’t really set up for these kinds of temperatures. We lost a goat in the cold last year; and we currently have just a few-month old chicks, which we’ve already lost 2-3 because of me exposing them to 20-degree weather — I thought because they had their feathers they were ok, but apparently not with that much cold. And so, we spent all day Monday preparing for the arctic front that was due to come in that night.

Longhorns

Before I get into the other animals, I have a little story. Two and a half weeks before the cold front, we found our most traditional-looking, original breed Longhorn cow, Amistosa, laying down on the left-over hay on our upper field, where we have been putting their hay bales, and not getting up. The next morning she was still there, and when I brought out range cubes to see if she would come and get some, given she’s a range-cube hog, she didn’t get up; and then I figured something was wrong. Soon after, she did stand up, but was very evidently hurt in her left front leg, as she almost fell forward into the ground just trying to stand up. We watched her limp around, and saw she was at least able to move, but then found her 60-70 yards away laying down again, this time on the outside of the berm that makes up our pond. I was able to get her to stand up, and then again later that night, with the help of several of the guys. We tried to get her to move with the herd as they were heading toward our upper field again, so that she would be with the herd and nearer us, thus hopefully providing her protection from critters, and away from the pond so she wouldn’t stumble in and drown. I wanted to keep watching her that evening, and instead of finding her with the herd, she had headed the other direction, and was in a grove of trees. I brought her some range cubes, and left them, and came back later, only to find her not there. I looked around, and she had moved to a little bit more of a secluded place, between a large juniper tree and some over-growth. And she had laid down again. I tried getting her up, and even with the guys again, but she wouldn’t stand up. Well, I figured she knew best where to place herself (as part of her God-granted and sovereignly-directed instinct); and so, we started bringing her hay and water.

After several days of this, with her only switching her body from side to side at various times of the day, I decided to see if the vet would come out to look at her. Like I said, she is probably our best looking cow as far as Longhorn traits, and it was very possible she was pregnant. He did come out, tried to get her to stand up, examined her, etc. To make a long story short, he decided she probably needed some better mineral nourishment, given the grass on the land was eaten down, that she was indeed about four months pregnant, and that it was most likely she wasn’t going to get up again, as typically they don’t. He also suggested some feed, and just suggested we try to keep her going, if we wanted. With that information, I had to decide if we were going to put more money into her, or just butcher her, and then basically lose the calf too. Given there was hope, I decided to keep going.

And so, we bought the feed, fed her with that, and continued with the hay and water and cleaning up after her. We also bought some loose minerals in case the rest of the herd was suffering from lack of minerals, but apparently they were generally ok, as they really didn’t spend much time eating the minerals (all of which I believe goes to show the hardiness of the original-breed Longhorns, even with very little native food).

Fast-forward to Sabbath day, 15 days after the last time she walked, and 3 days before the arctic front was due. I had previously asked some of our Longhorn experts (who figured she was just injured and not suffering from malnutrition), and I had asked our local feed-store guys if they had heard of our situation before, and they had but indicated 99% of the time they don’t get up. Well, I figured then that I needed to start trying every time I was around her to get her up, because the longer she stayed down, the worse she was going to get. That midday, I tried to get her up, and she stood up! I thanked the Lord, and called for Sue, who was pretty excited and thankful when she saw her. I coaxed Ami to walk to get the food, and she did, but she was very wobbly, and soon laid down again, although her left leg didn’t seem to be giving her trouble. I also got her up again that evening; and then next day, after giving her a taste of the food, and taking it about five feet away, she decided to get up on her own, and go to the food! Thanks to God again!

Step forward to that Monday before the storm. I was trying to think of ways we were going to be able to protect her from the wind and cold, but before I really had to put a plan into action, she was gone! I found her in some other thickets a little ways away, laying down; and when I went to try to find her with some food that night, she ended up finding me. At this point, she was sort of on her own now as far as the weather; and so we prayed for the best.

Again, to shorten things, the next day in the snow, I found her across the property standing; and I think by the next day, she was on the front field at the hay bale eating with the rest of the cows.

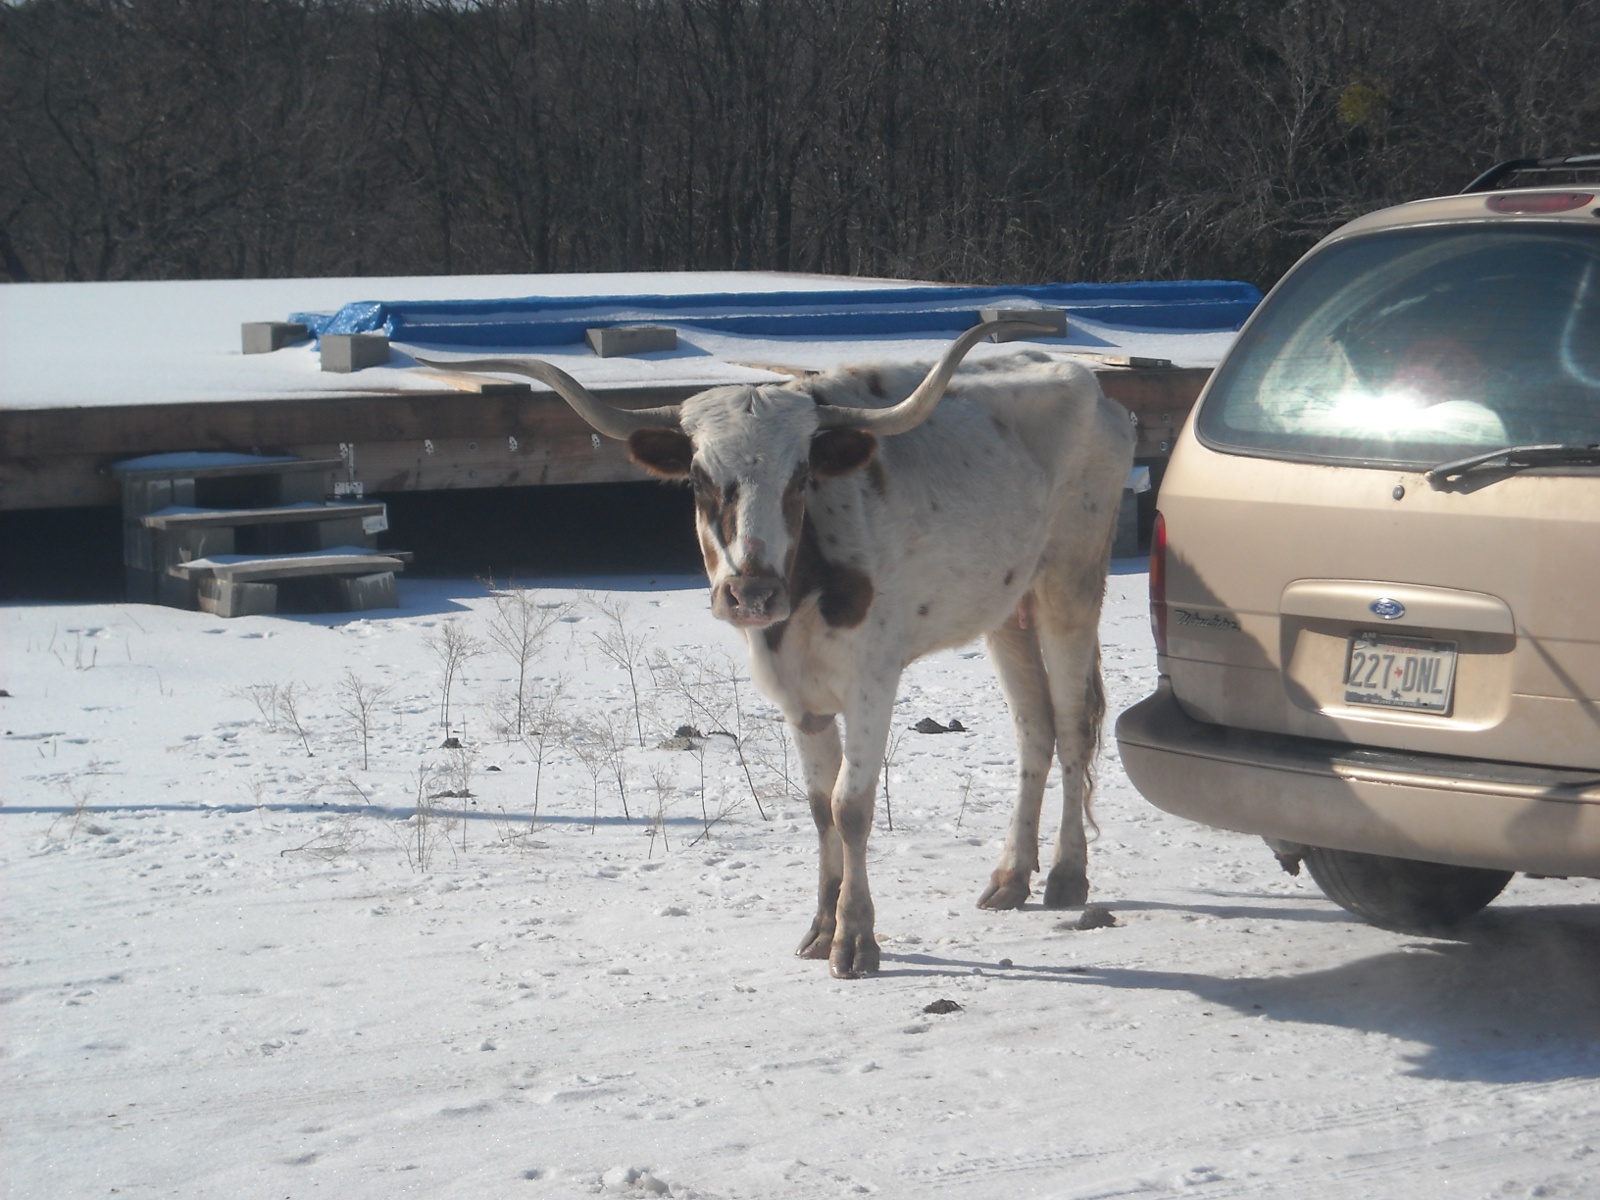
Here she is after the storm, waiting for some feed:

Longhorn Cow Amistosa Standing After Laying Down for Over Two Weeks

And so, we are most thankful to the Lord for granting her healing, that we didn’t lose her or the calf, and that the Lord granted her to be mobile before the freezing weather. God is most gracious and merciful.

Arctic Weather Around the Farm

Now, God IS most gracious and merciful, regardless of what happens; and it’s more evidence of His graces and mercies when He reveals those attributes in some form of grace and mercy He extends us. And He granted many during this storm.

Here are some of the things we did in trying to keep the animals going. But even though we did these things, the outcome was of course always in God’s hands:

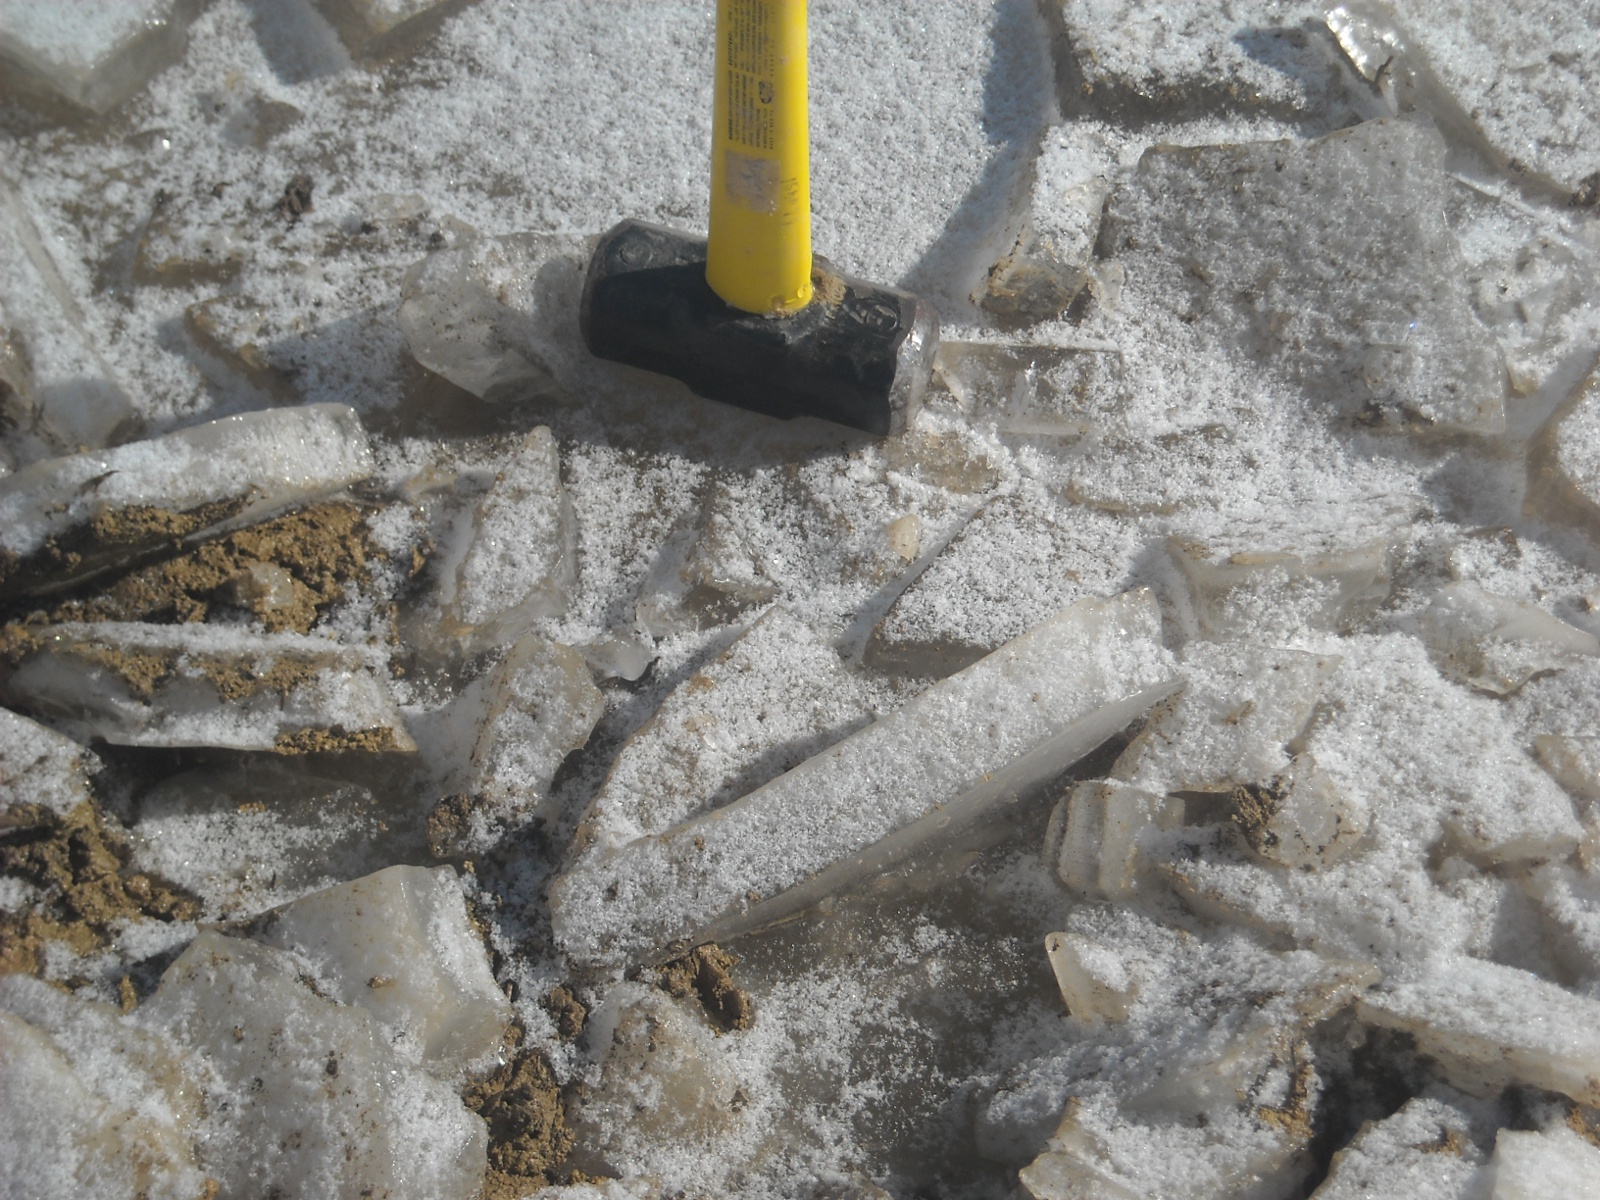
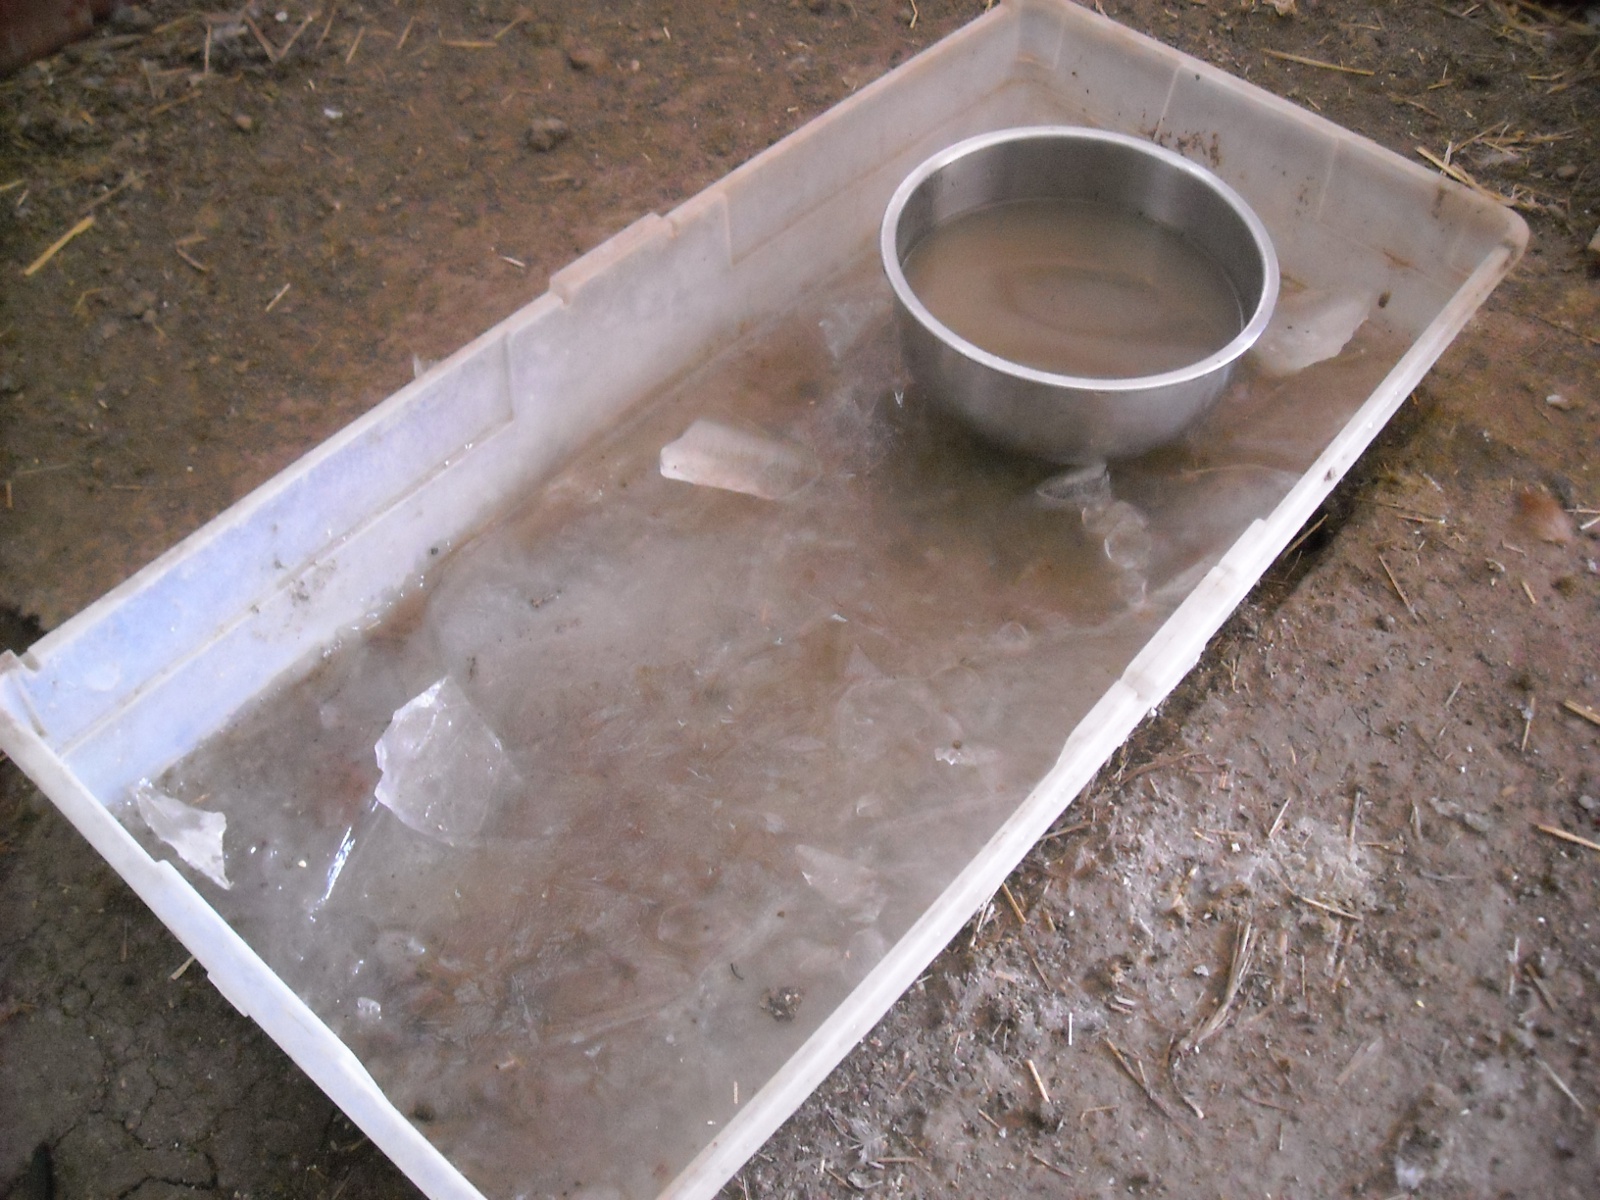
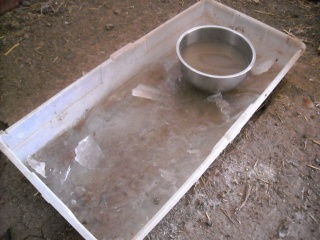
  • The pure Longhorns are a tough breed, and I figured we didn’t have to do too much with them, except make sure they had hay and hopefully water. And so, we put bales out before and during cold for that; and each day I would go down to our pond to try to sledge-hammer through the ice. Here’s a picture of how thick it was one day:

    Frozen Pond Ice Thickness

    One night, several of the Longhorns and calves spent the night on the hay area where the bales usually are, which is an open field; and one of our group’s milk cows did too. Well, with the below-zero wind-chill temperatures, she didn’t fare well, and they sadly ended up having to shoot and field dress her to get some meat off of her before she died, while the Longhorns, even the calves, although shivering, had gotten up and walked away. Again, I believe it just shows the hardiness of the pure Longhorn breed.

  • The pigs we brought a little extra food, and we’d haul out warm water for them to drink. They were often thirsty when I got out there with the water. And they seemed to make it fine.
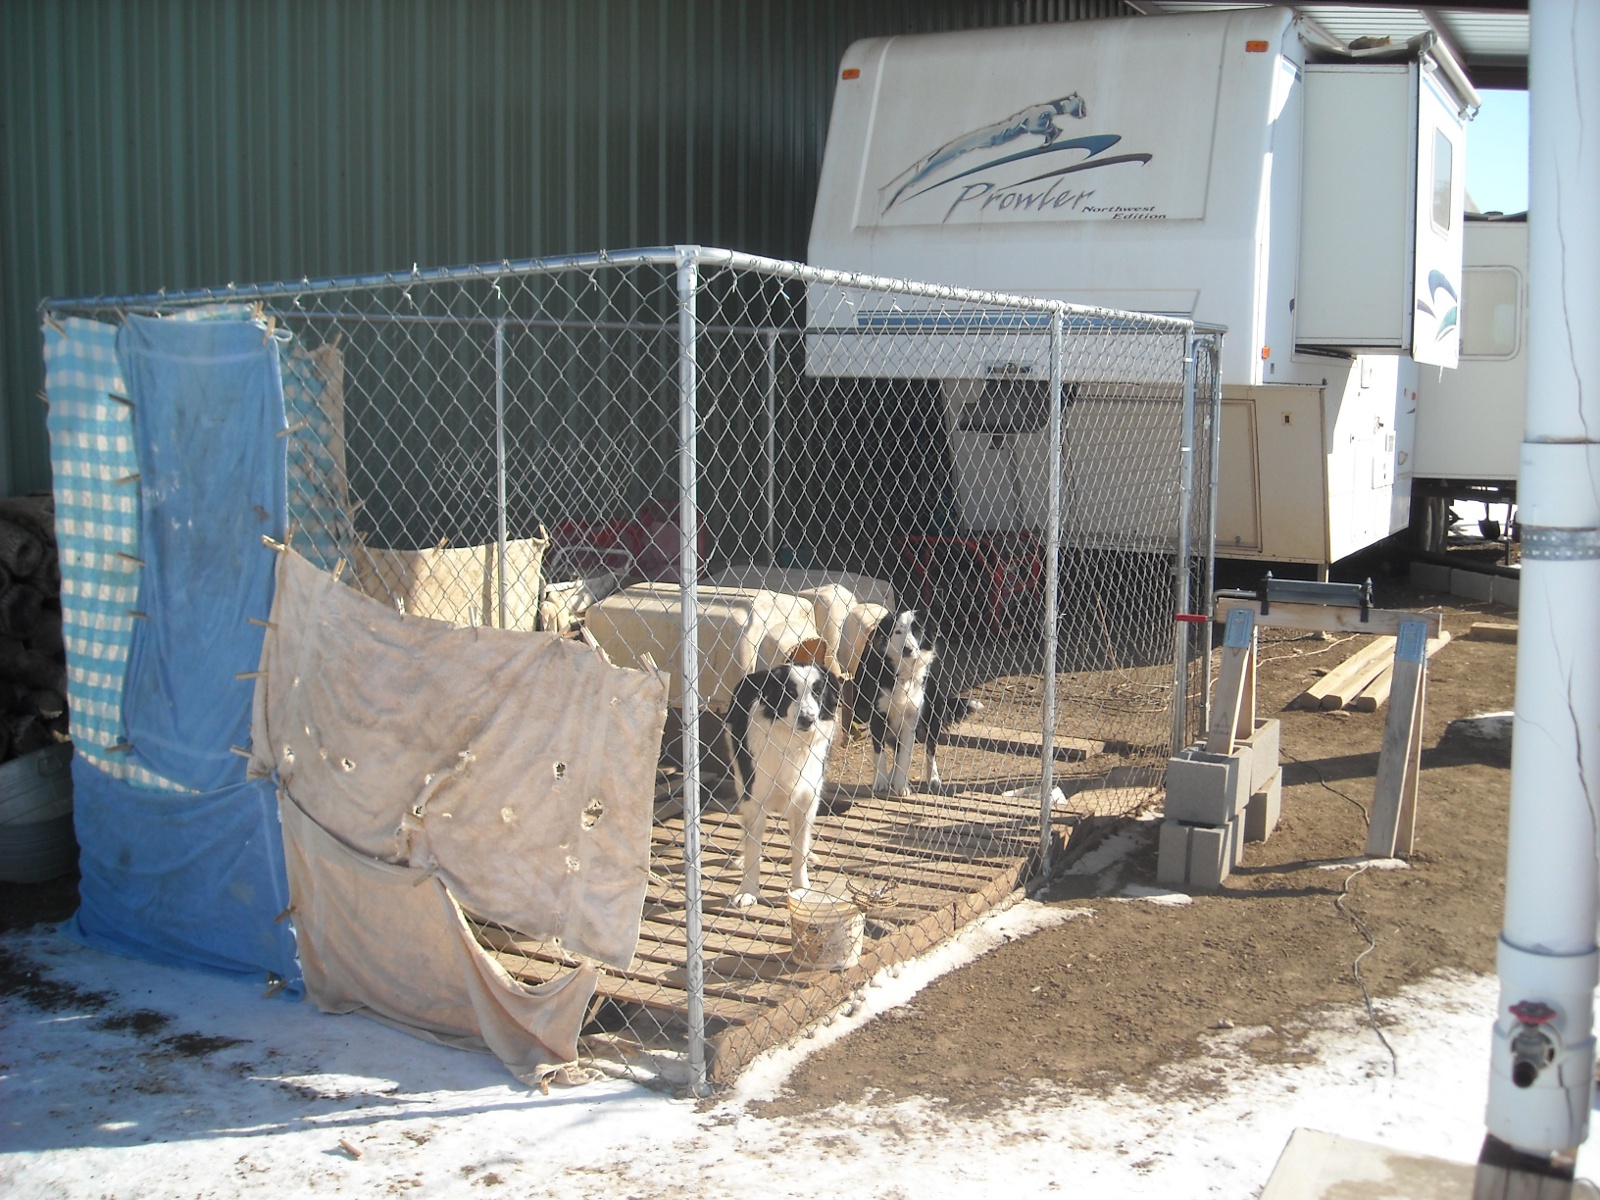
  • For the dogs, we moved their kennel under the barn overhang in front of the camper; and they seemed to fare very well, and didn’t seem to be really cold at any time:

    Border Collies Brodey and Nessa in Kennel Under Barn Lean-to

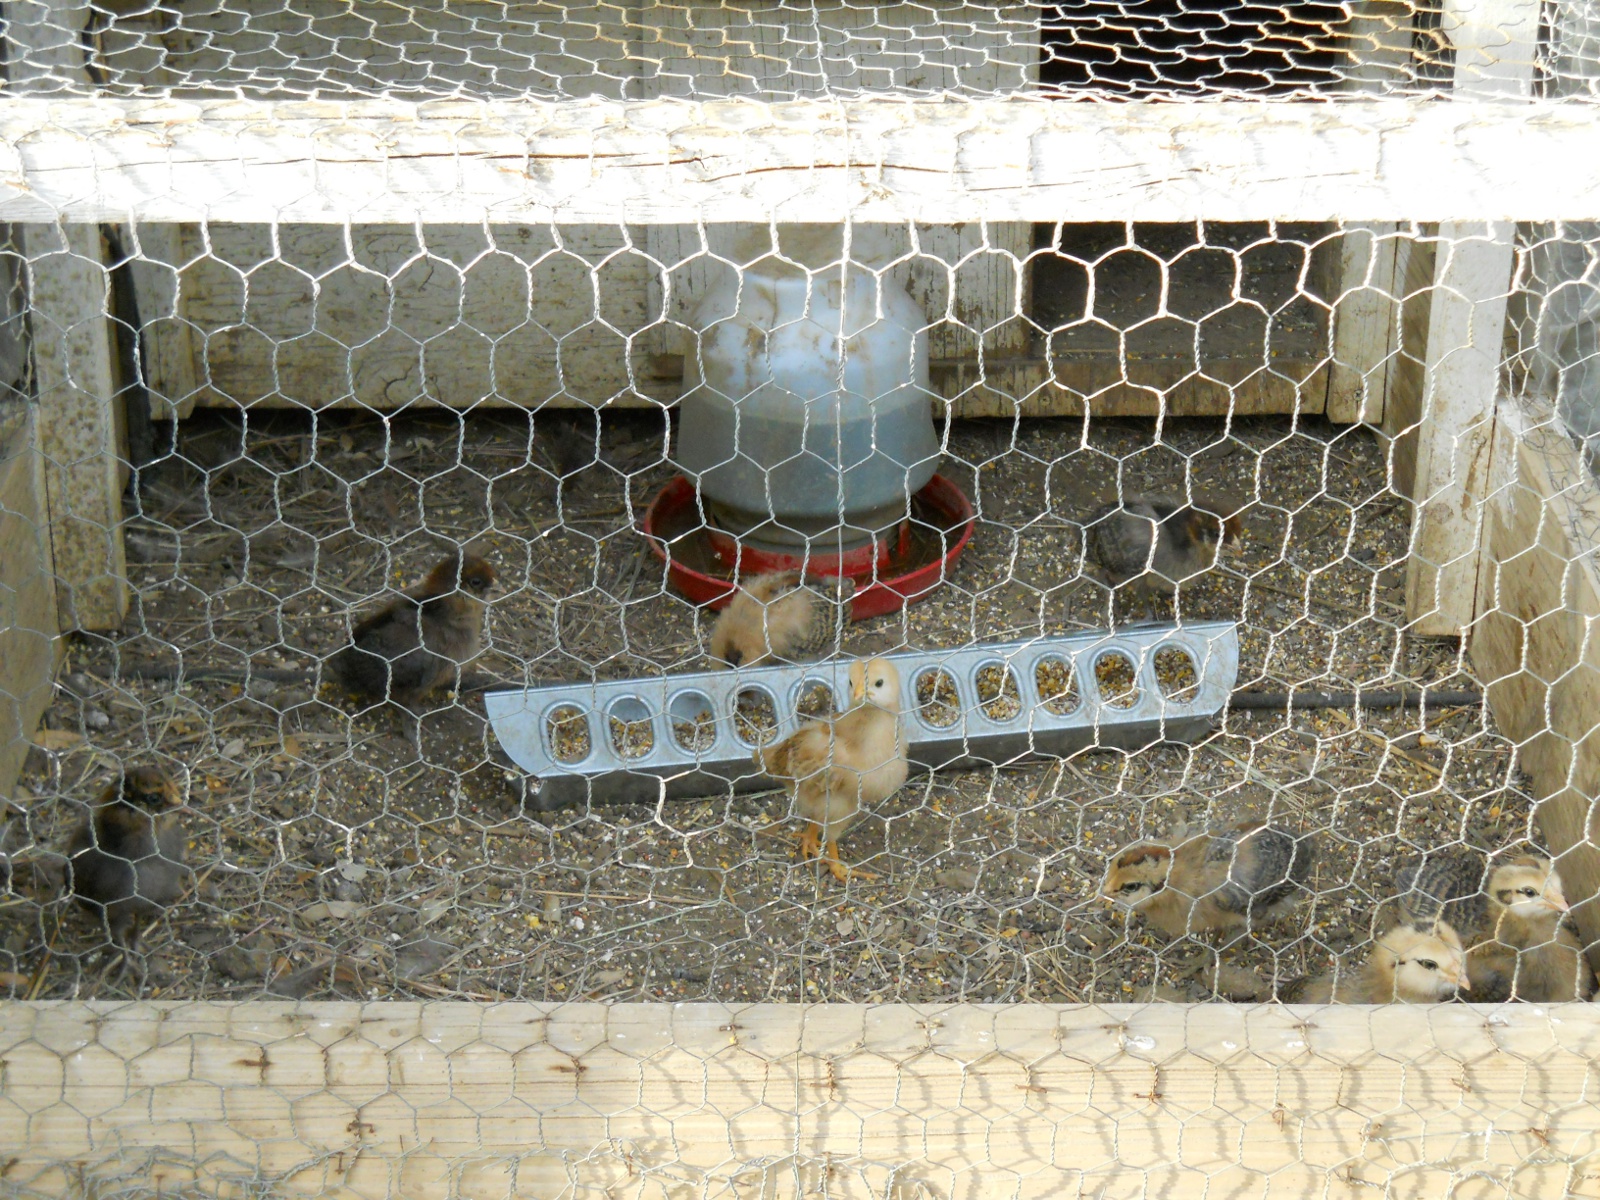
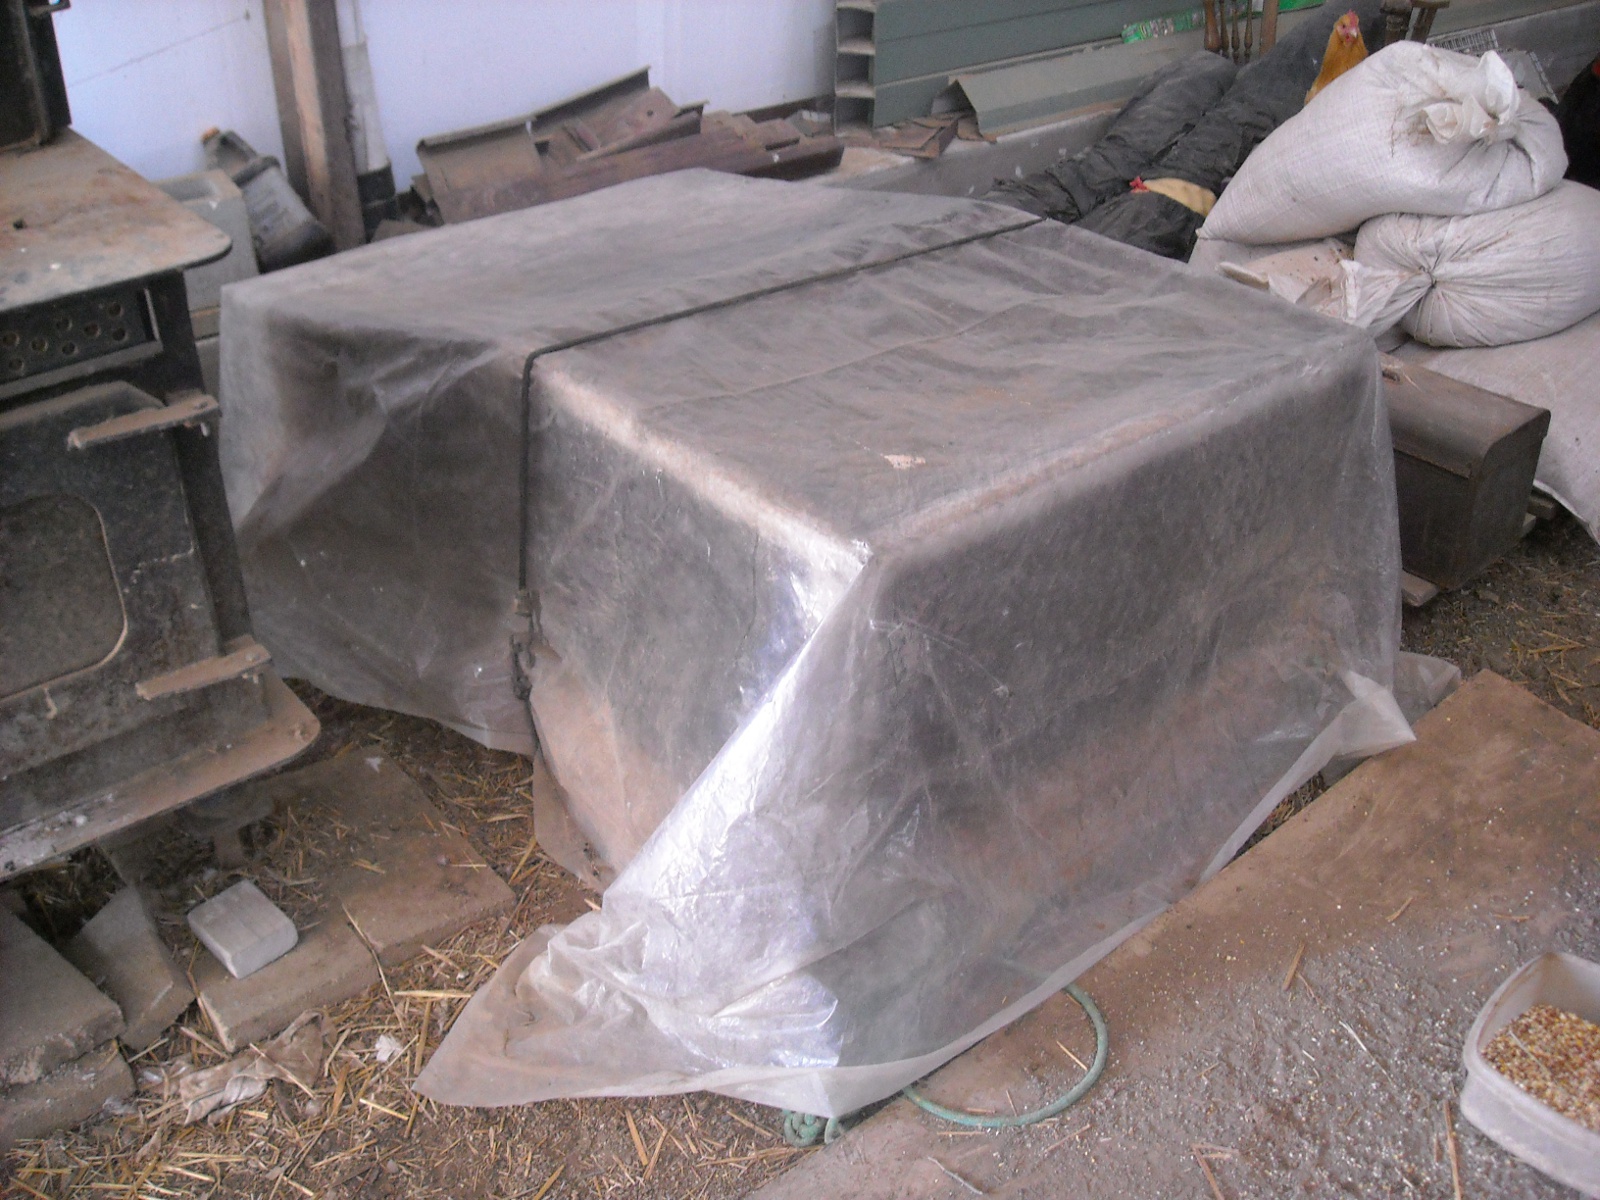
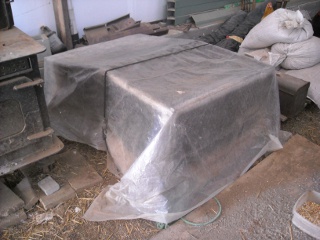
  • Our big chickens didn’t even come out of their coup the first day, so we just kept them in the whole time, bringing food and water. However, we have chicks we’re raising right now (which in retrospect was not such a great idea to be doing during the Winter). They are in our mini chicken tractor, which Sue had the great idea to cover with clear plastic, which is what we do when the weather is somewhat normal:

    Clear Plastic Over Mini Chicken Tractor

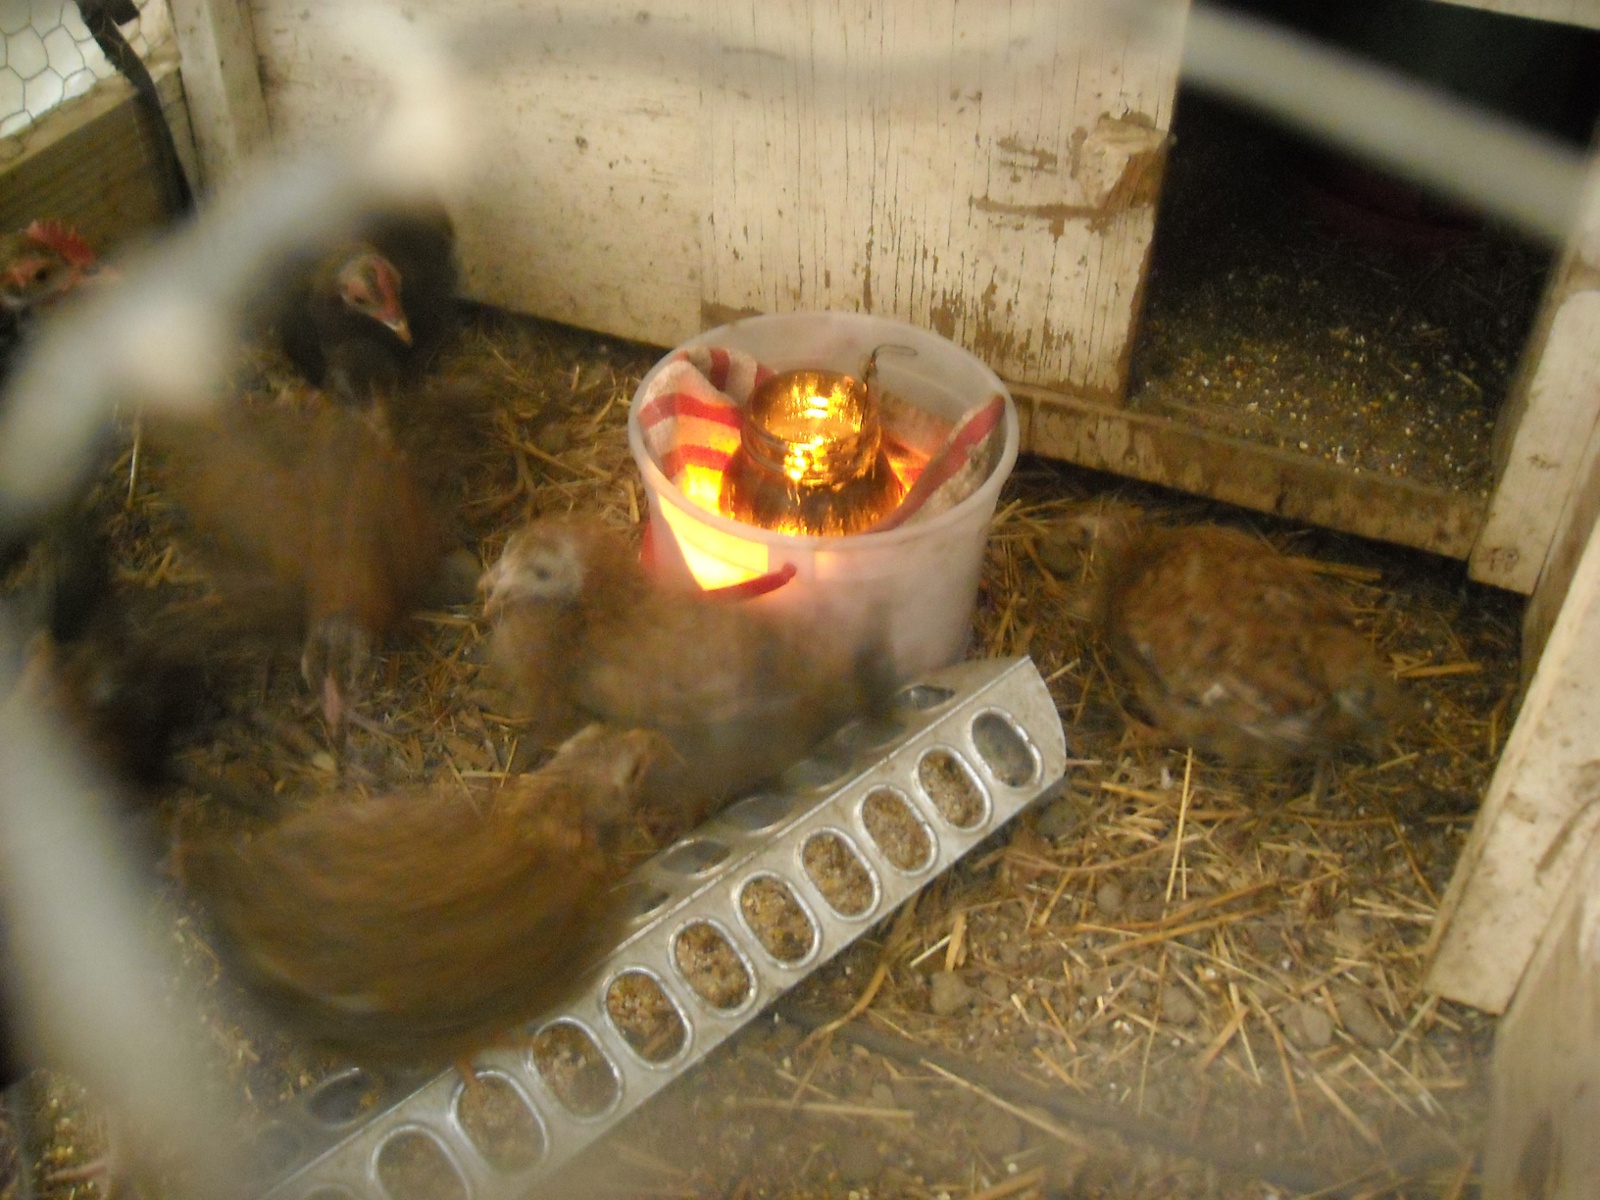
    For the dangerously cold days and nights, we now bring the covered mini tractor into the barn; and during the days we set up a homemade fat lamp to burn in their little open yard area. Here’s a picture of that, which, with the moisture from probably their breath, turns it into a quite warm sauna bath in there:

    Fat Lamp in Mini Chicken Tractor

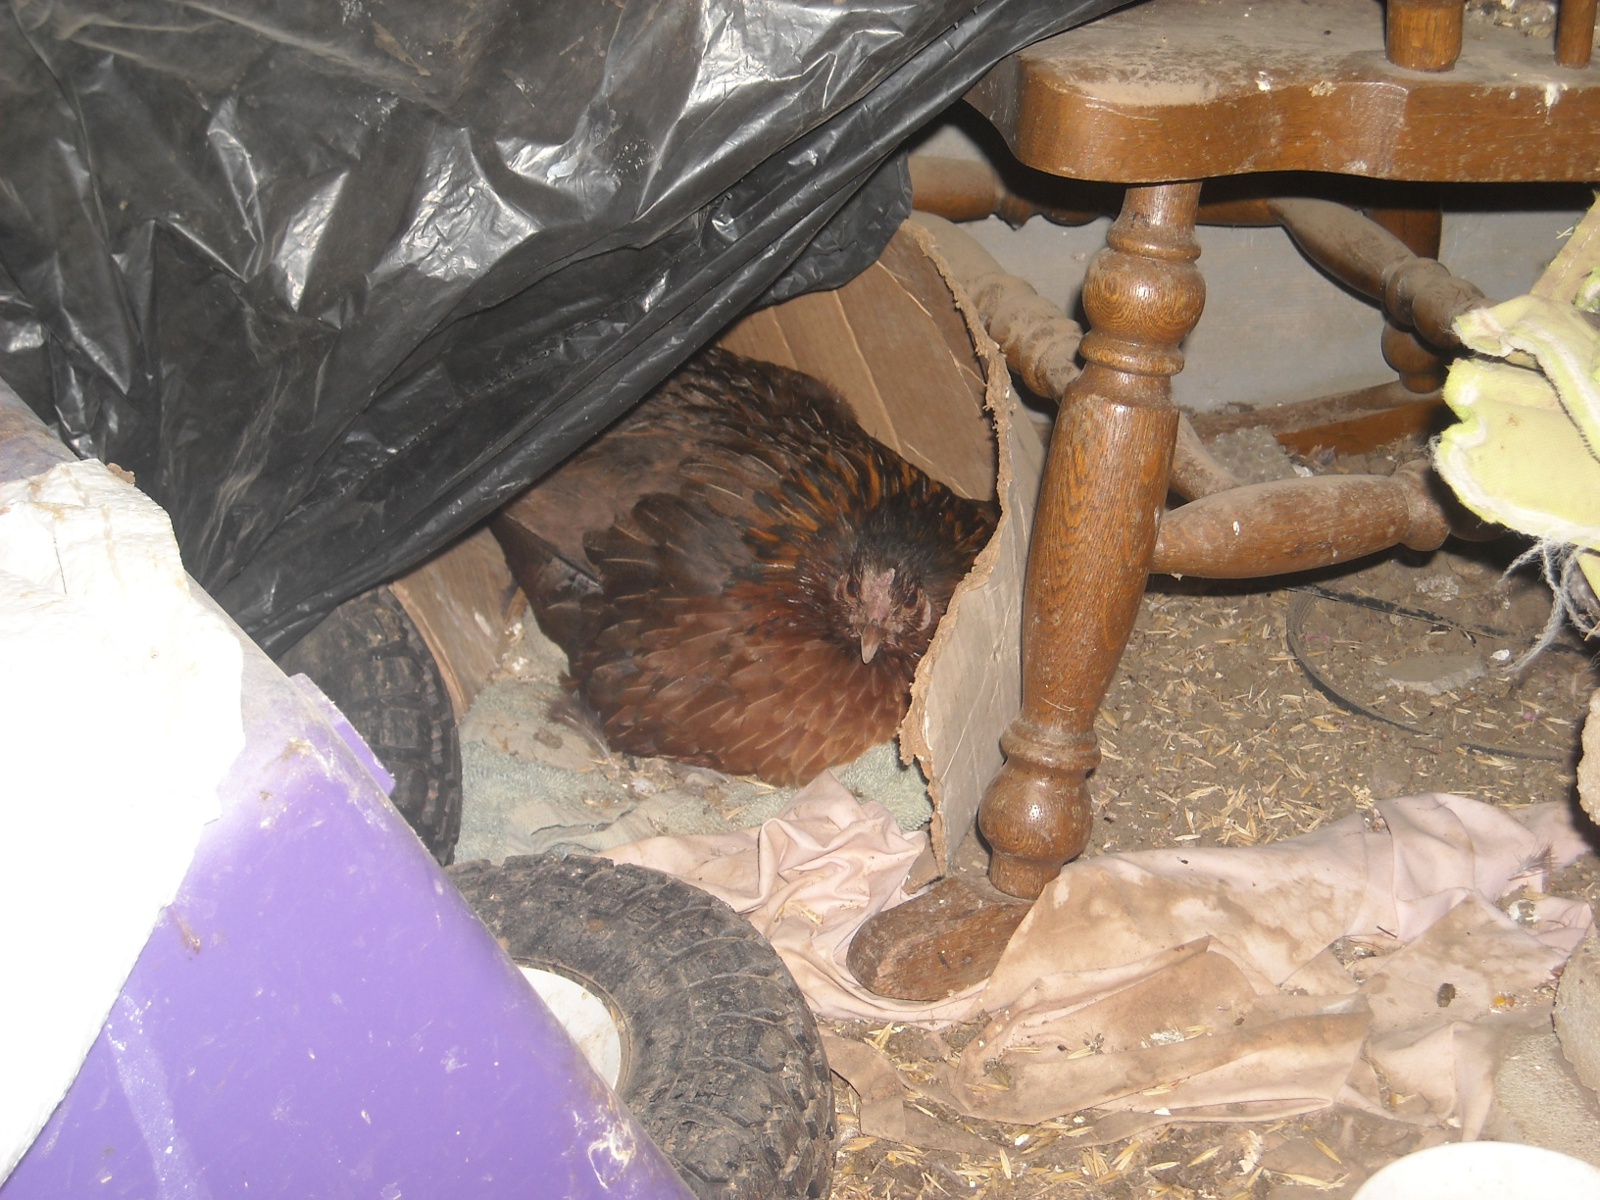
    We have also had a broody chicken sitting on eggs in the barn for who-knows how many weeks now (we put some new eggs under her a week and half or so ago), and she seems to have not been phased by the cold:

    Broody Chicken in the Barn

  • After spending the first day front-first into the North winds, Gigi, our goose, started hanging out in the barn; and so, we then just closed her in there. It was cold in there too, as evidenced by her water in the barn being frozen; however, with those down-comforters geese wear, she had no problems:

    Gigi the Goose's Water Frozen in the Barn

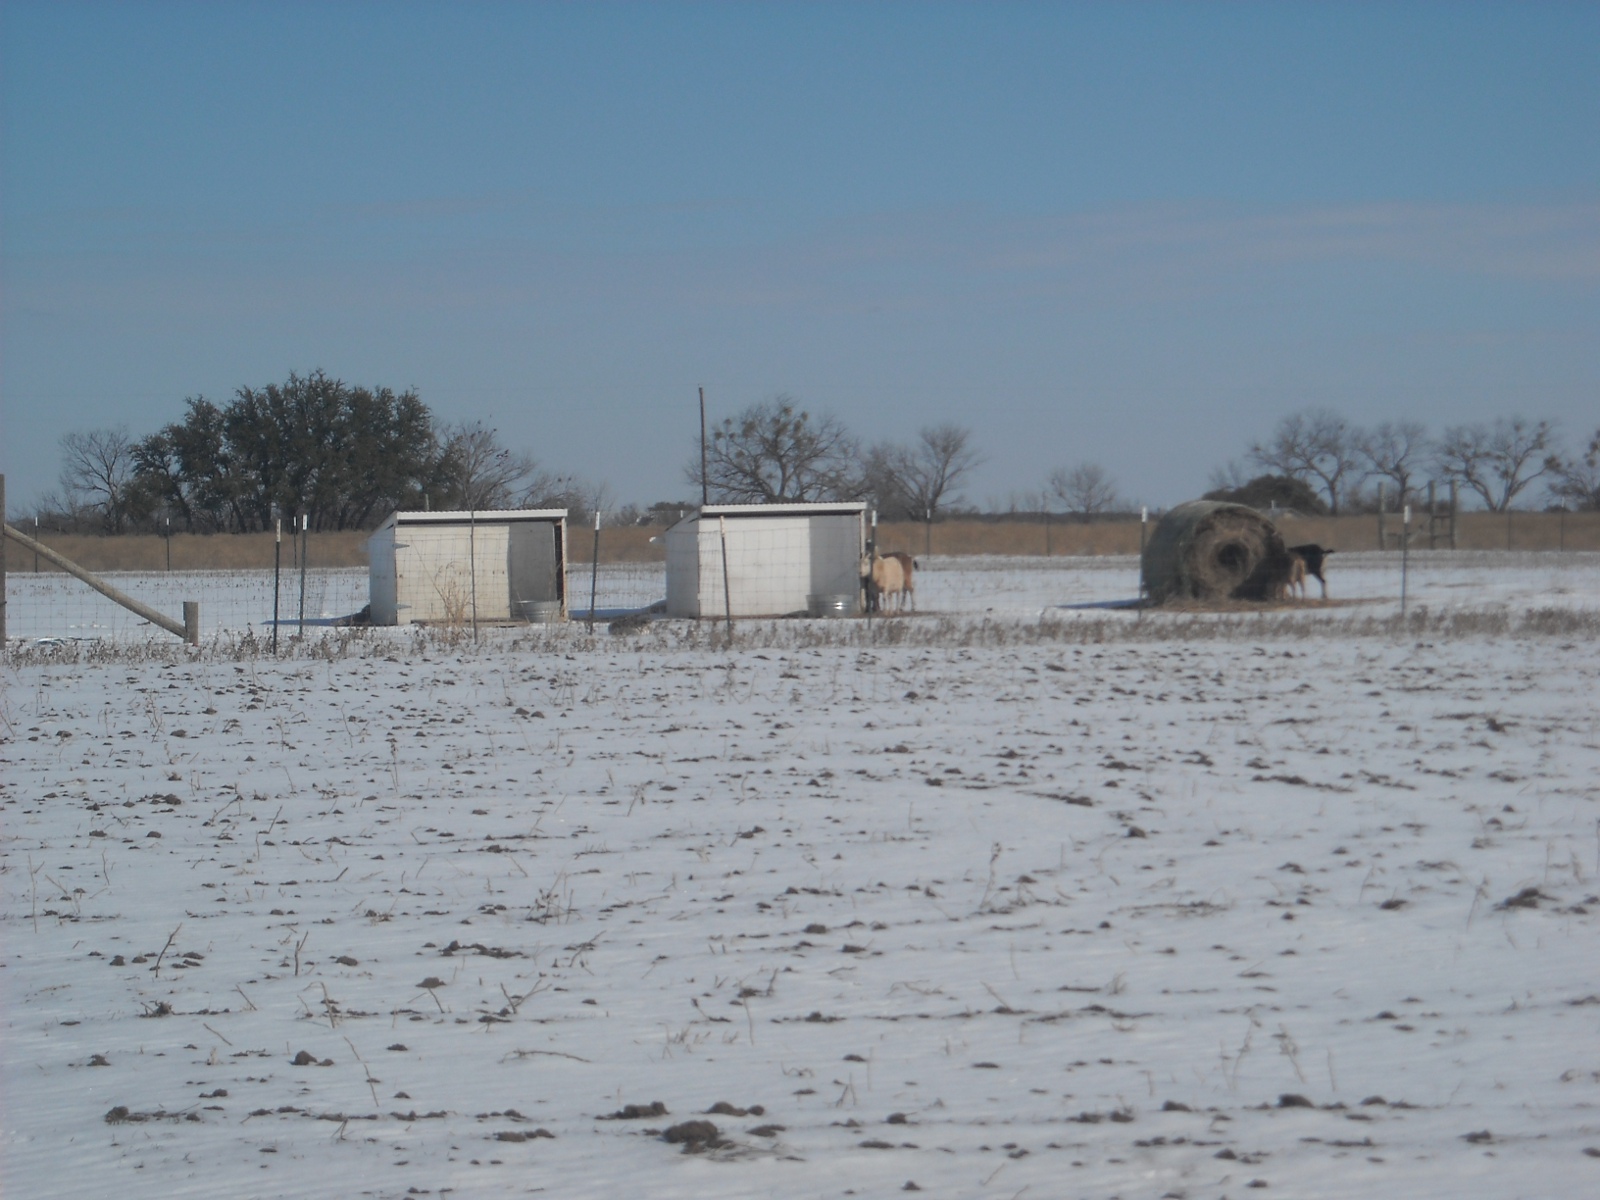
  • For the goats this time, we had started to feed them a little more feed a few weeks previously, to generally help with colder weather; and during this cold snap, we kept them fed two to three times a day as needed; and for the most part, except to let them out a little at the “heat” of the day (when it was 18 degrees!), we kept them boxed in their sheds. We had replaced all of the hay in their sheds before the cold came, and we also put blankets in the sheds. During the frozen days, we would bring out warm water a couple of times a day; but I noticed with the goats, the first thing they always wanted in the morning was food (whereas the pigs wanted the water). There was some shivering, but thankfully they all made it through. Here are the goats and sheds after the storm:

    Goats and Goat Sheds After Arctic Storm

    We hope to one day have a place in the barn set up to bring animals in as needed for this type of weather.

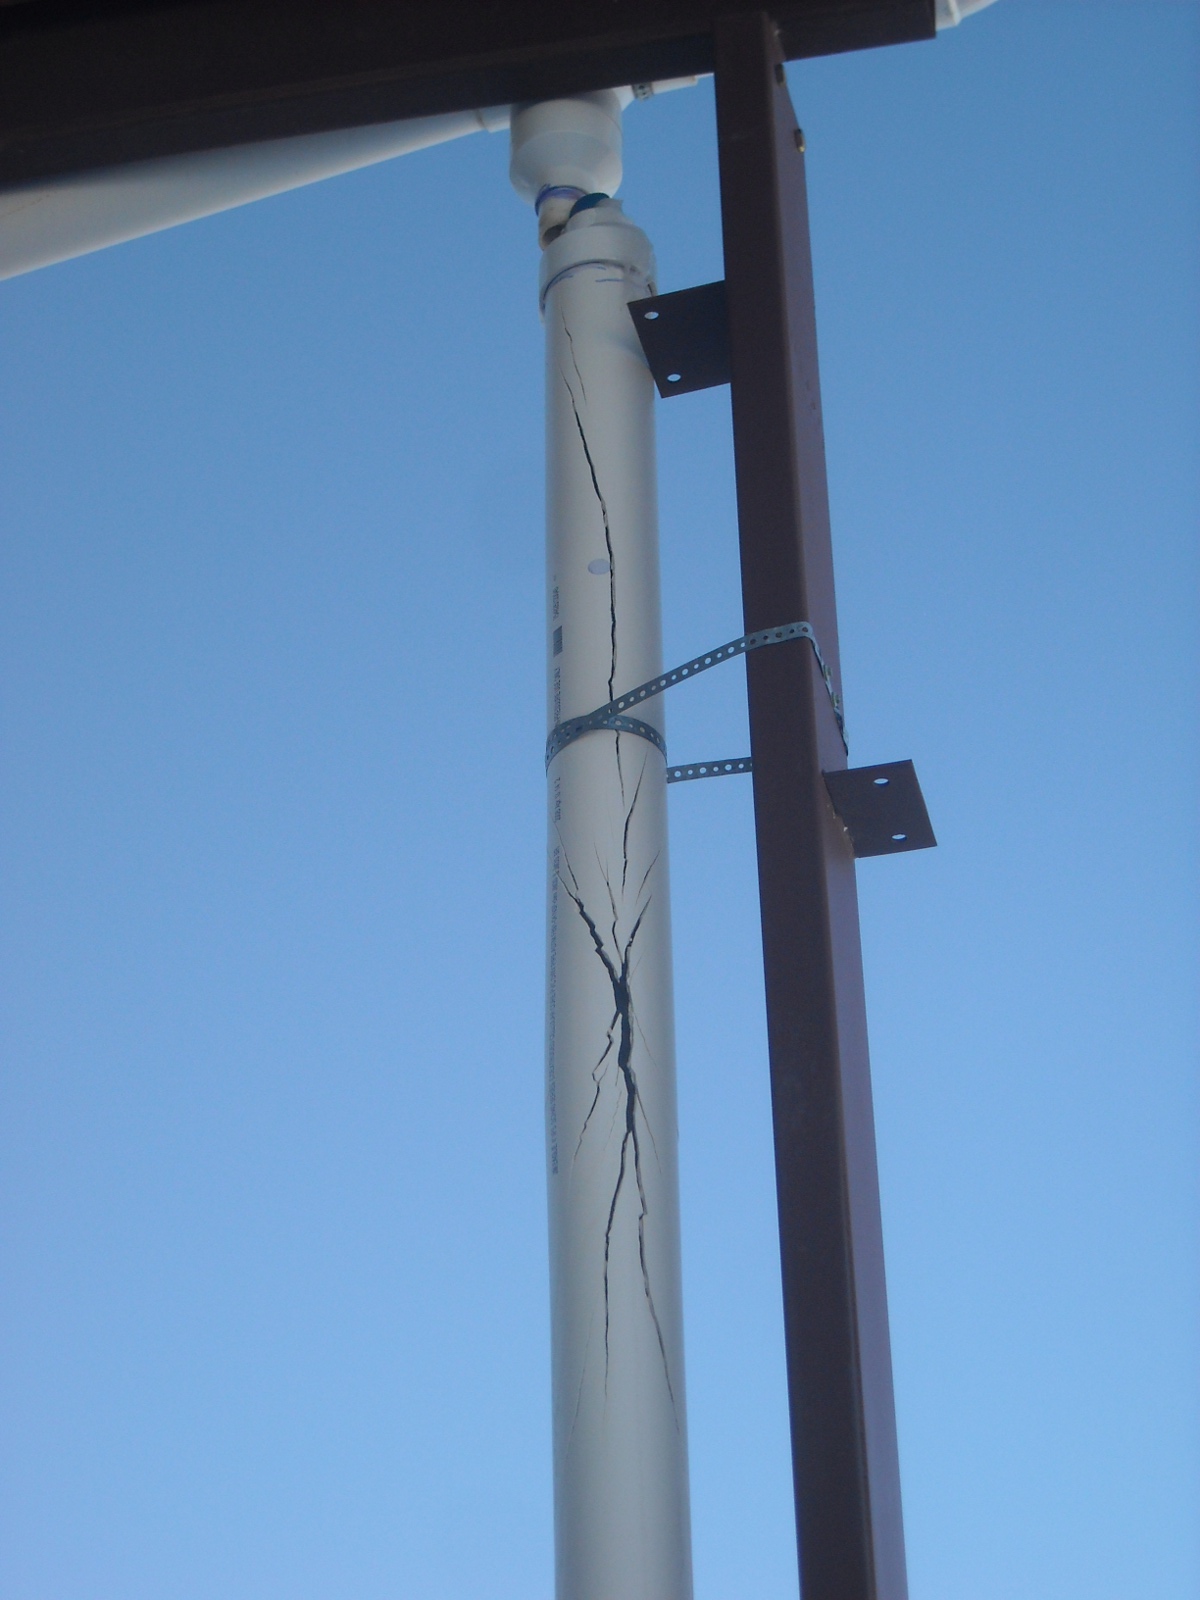
One thing that didn’t go so well for us was the roof-washer parts of our catch water system from the barn that feeds the cistern. With the rain that fell, and the quick freezing temperatures, and me not being quicker on the draw, the water in the roof-washer pipes froze, and split them all apart. Here are some pictures:

Upper Part of Catch-water System Roof Washer Cracked from Being Frozen
Lower Part of Catch-water System Roof Washer Cracked from Being Frozen

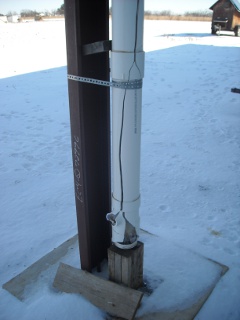
One of our other roof washers expanded and popped connectors out, but it survived it seems because they weren’t all glued. I think I may try a similar strategy when I put together the new roof washer pipes next time, Lord willing.

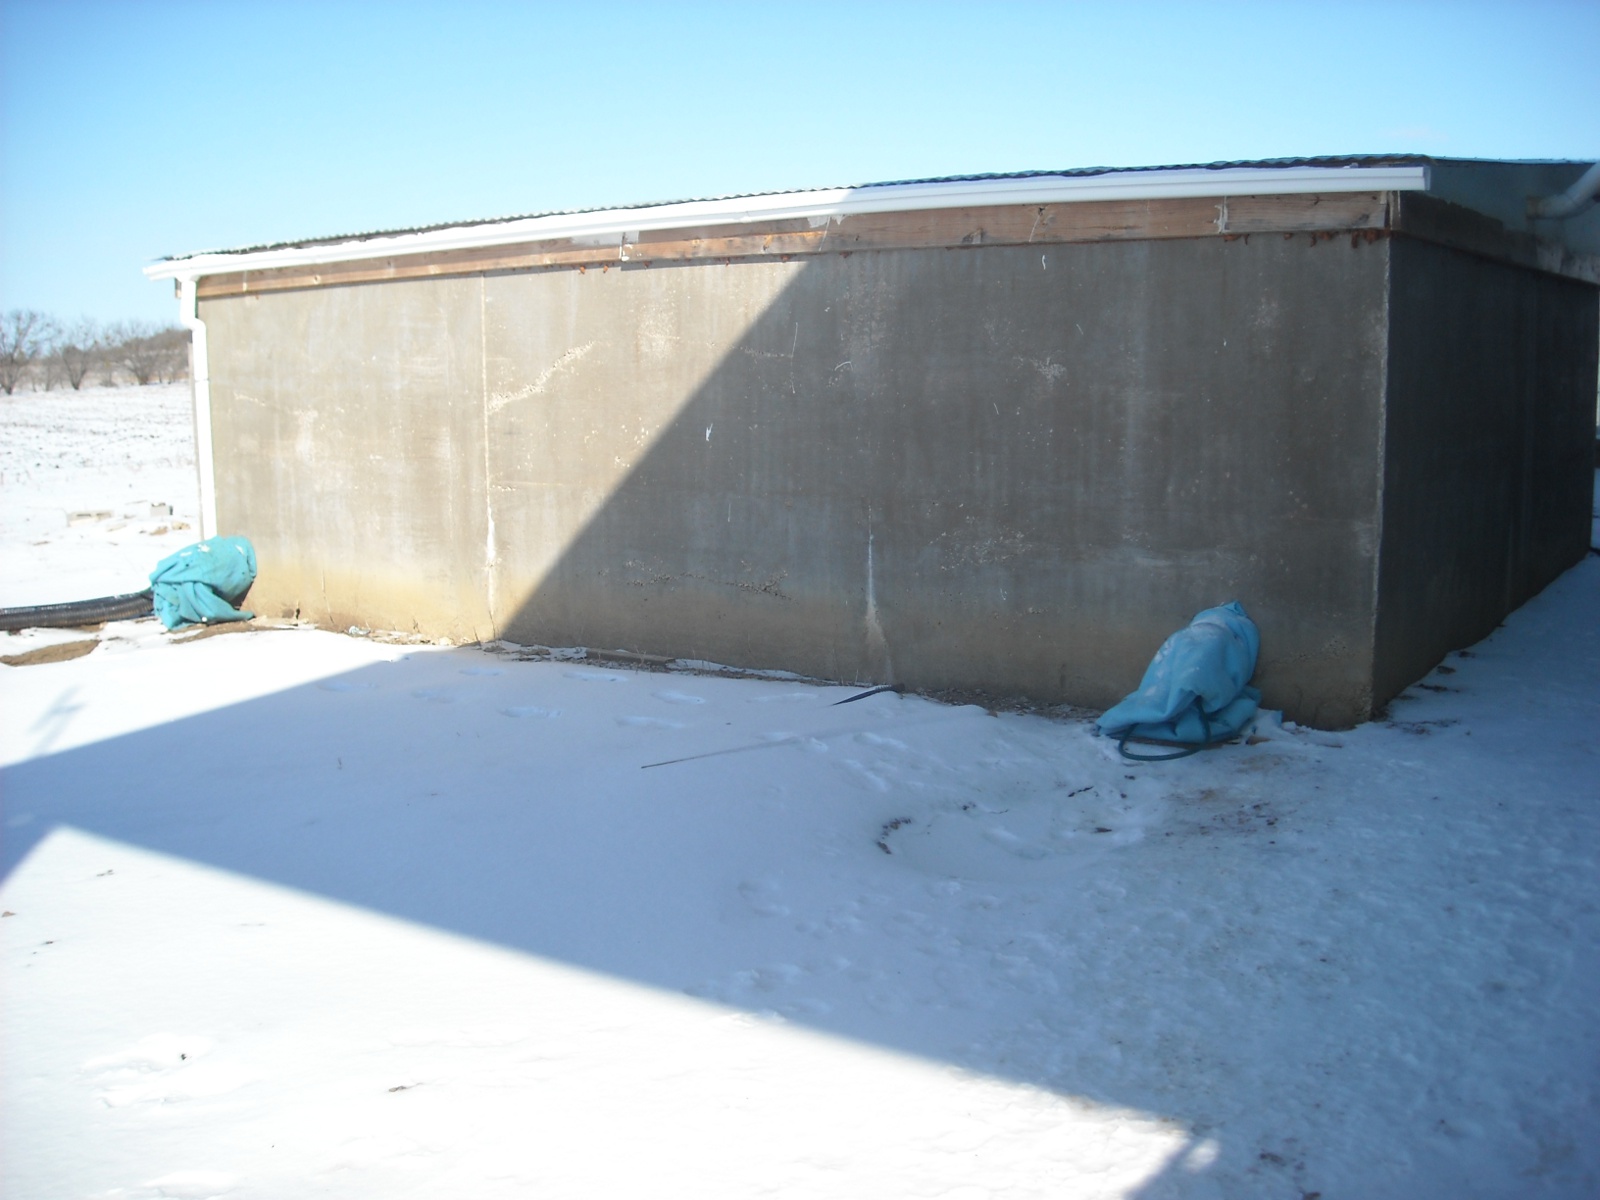
We did, however, cover the cistern spigots with blankets, which allowed us to retrieve water from the cistern, even with the temperatures being what they were. These spigots also face South, into the Sun, out of the North wind:

Cistern Valves Covered with Blankets

For our camper, we have a small propane heater, which, for times like this, just sort of takes the edge off, although we often saw our breath; and at night, we’d basically wear our outdoor clothes to bed under the comforters, which actually was quite warm. And William, our cat, spent most of his time inside with us. 🙂

One of the things we’ve learned to do for situations like this: the condensation in the camper eventually freezes the door latch, and so we spray it with cooking oil spray (I assume just about any oil would work), and that has helped keep the latch from sticking.

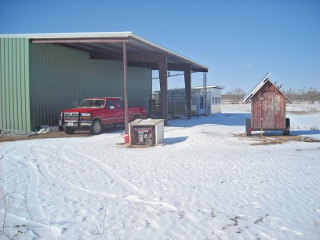
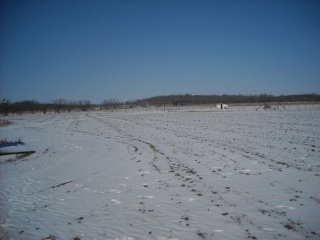
Here are some other pictures of the scene:

Barn Lean-to After Arctic Storm
Field After Arctic Storm

Well, that about sums it up. All in all, it was a rough one, and we worked pretty much non-stop each of the cold days, and not all of the community folk’s animals made it. However, we are very grateful though to the Lord for His continued provisions, and His many continued graces and mercies, and for His help through this difficult time of weather.

— David

« Older posts Newer posts »