The Sifford Sojournal

Our journal of what we pray is our sojourn of life along the narrow way, even the old paths, submitting to the Bible as a light unto both.

Page 64 of 92

Turnips & Wheat 2012 – Update II

Since our last update on our turnips and wheat, the turnips basically dried out; but we are grateful to the Lord for what He granted in them in being able to feed our pigs with them.

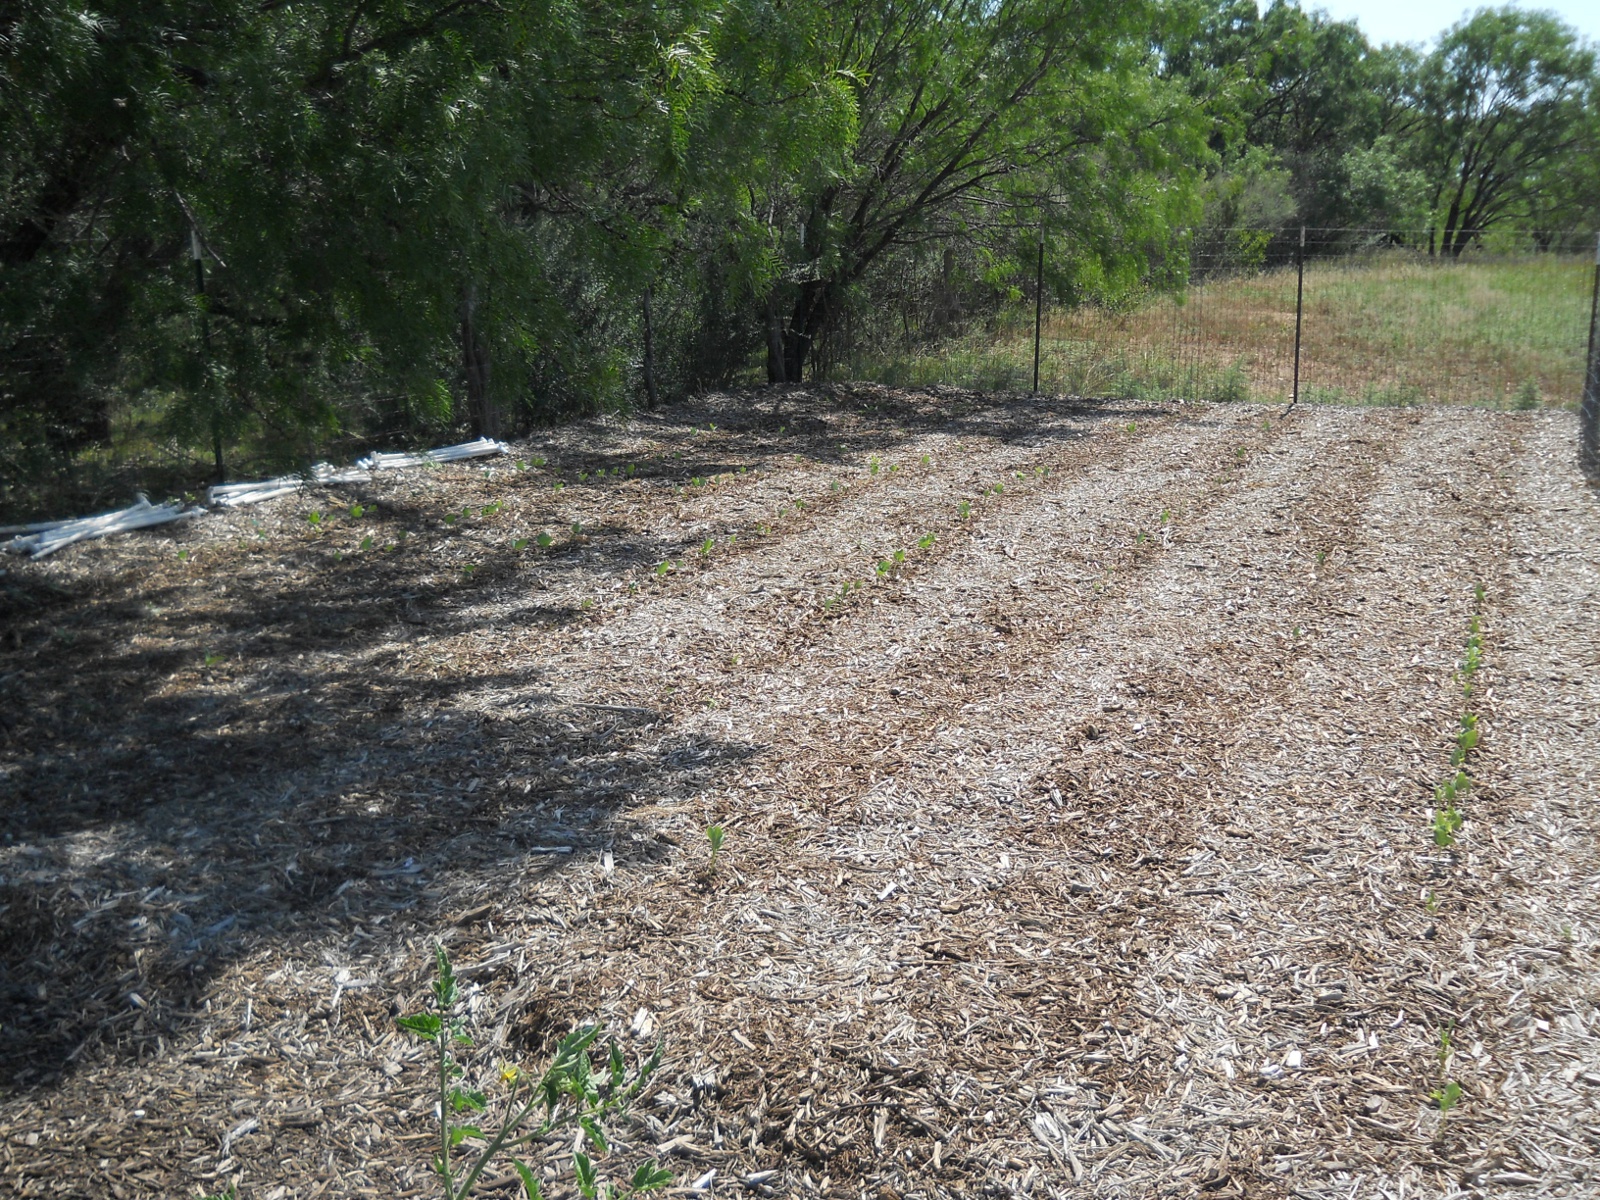
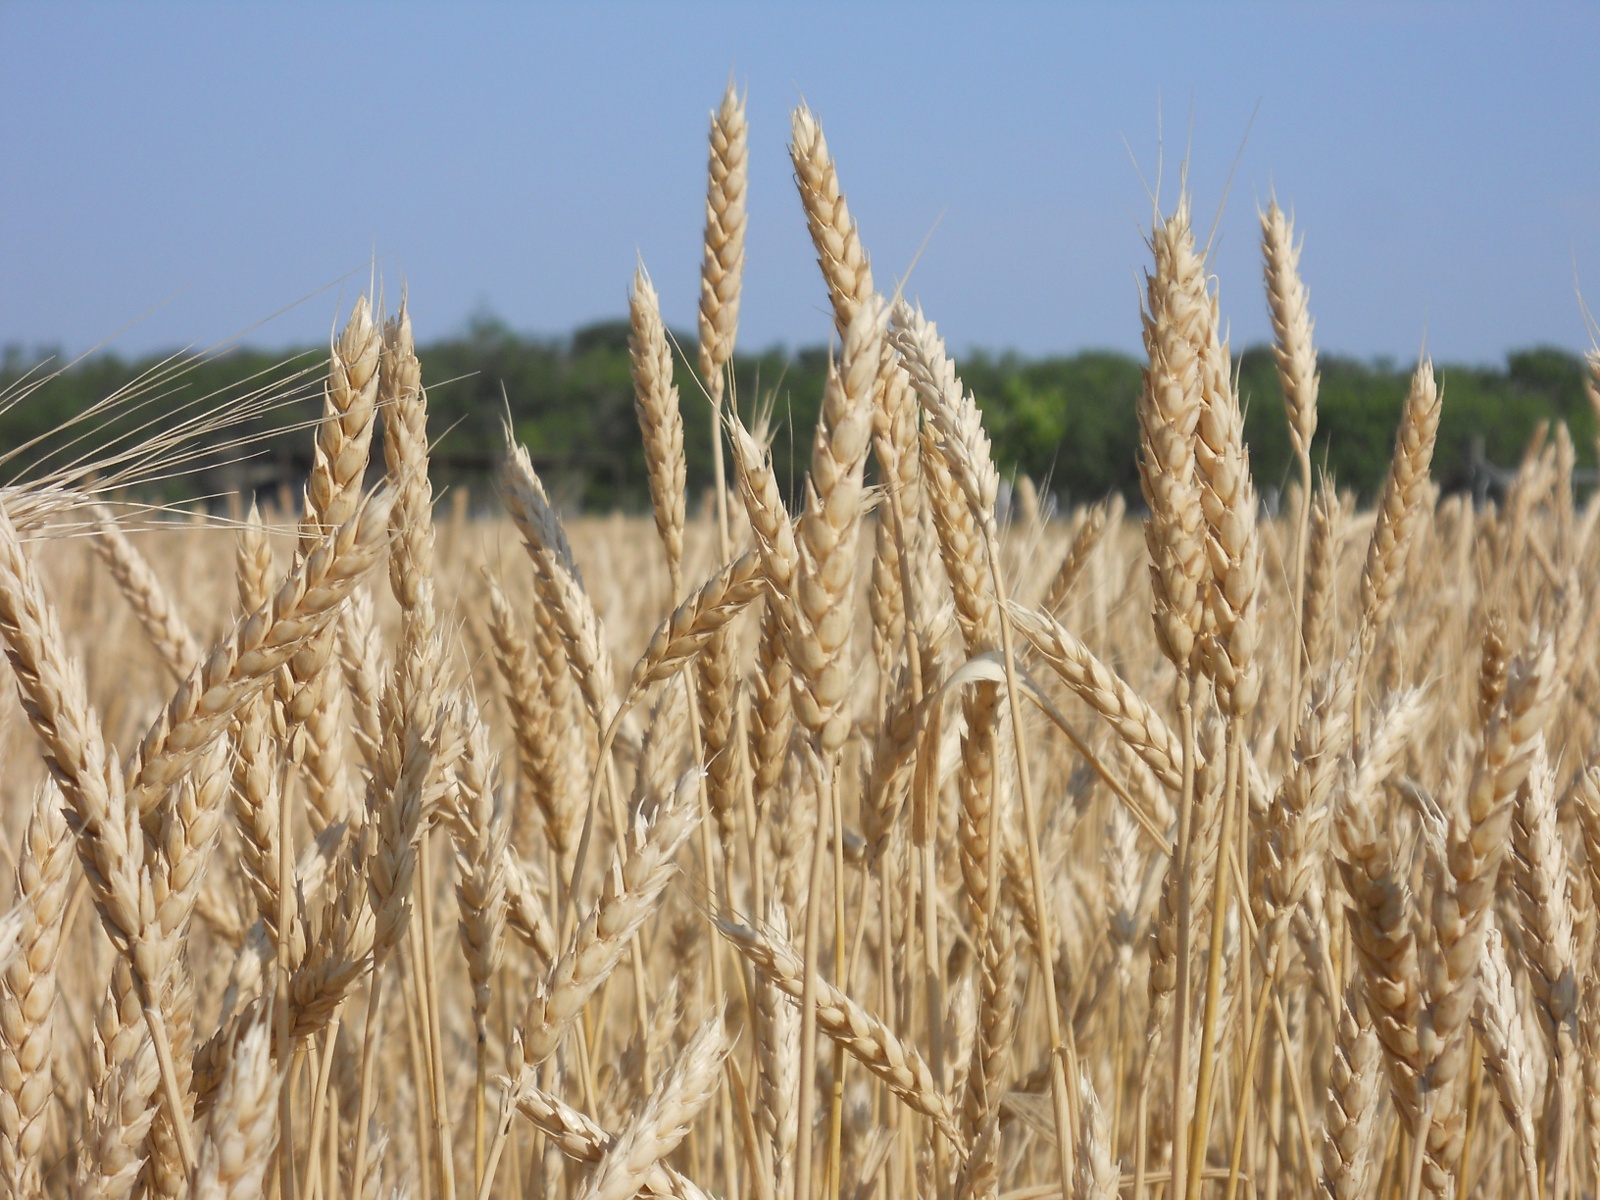
But the wheat continued on its process. Here is what the wheat field looked like back in April. You can see how high it had grown in the second picture:

2012 Wheat Crop in April
2012 Wheat Crop Waist High in April
2012 Wheat Crop Wheat Heads in April
2012 Wheat Crop More Wheat Heads in April

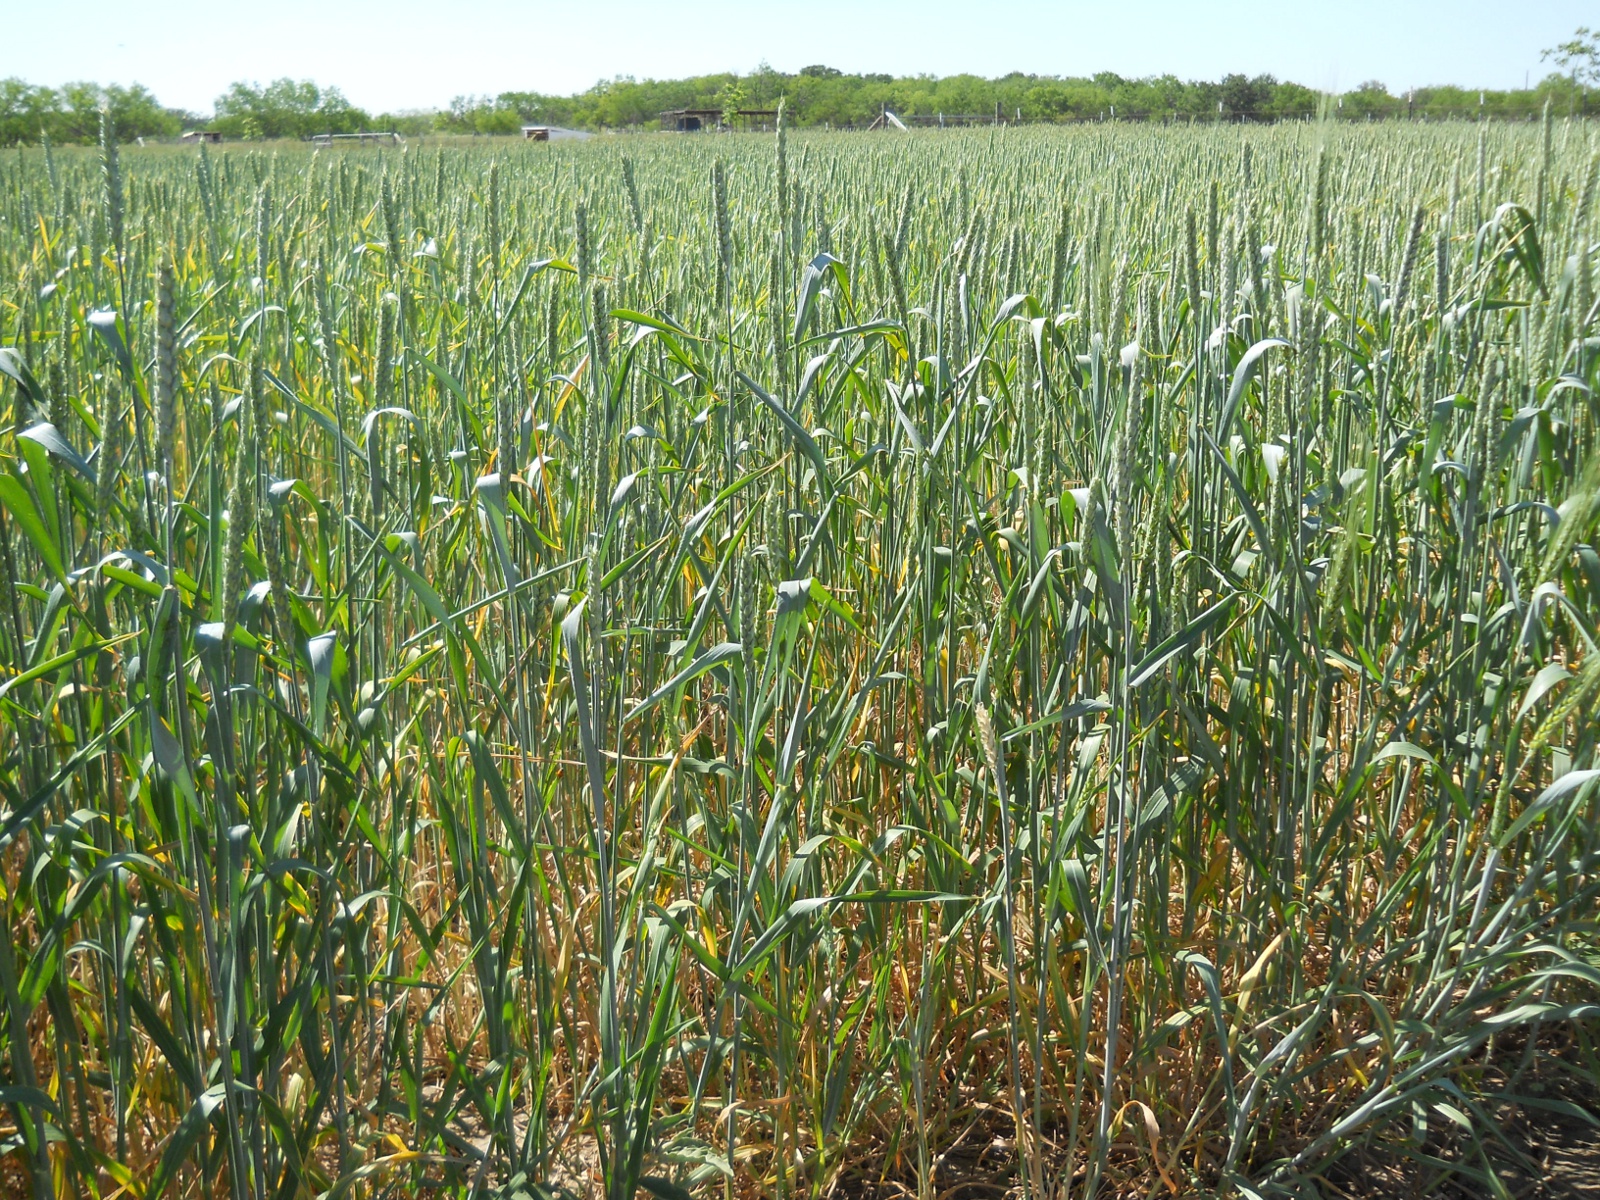
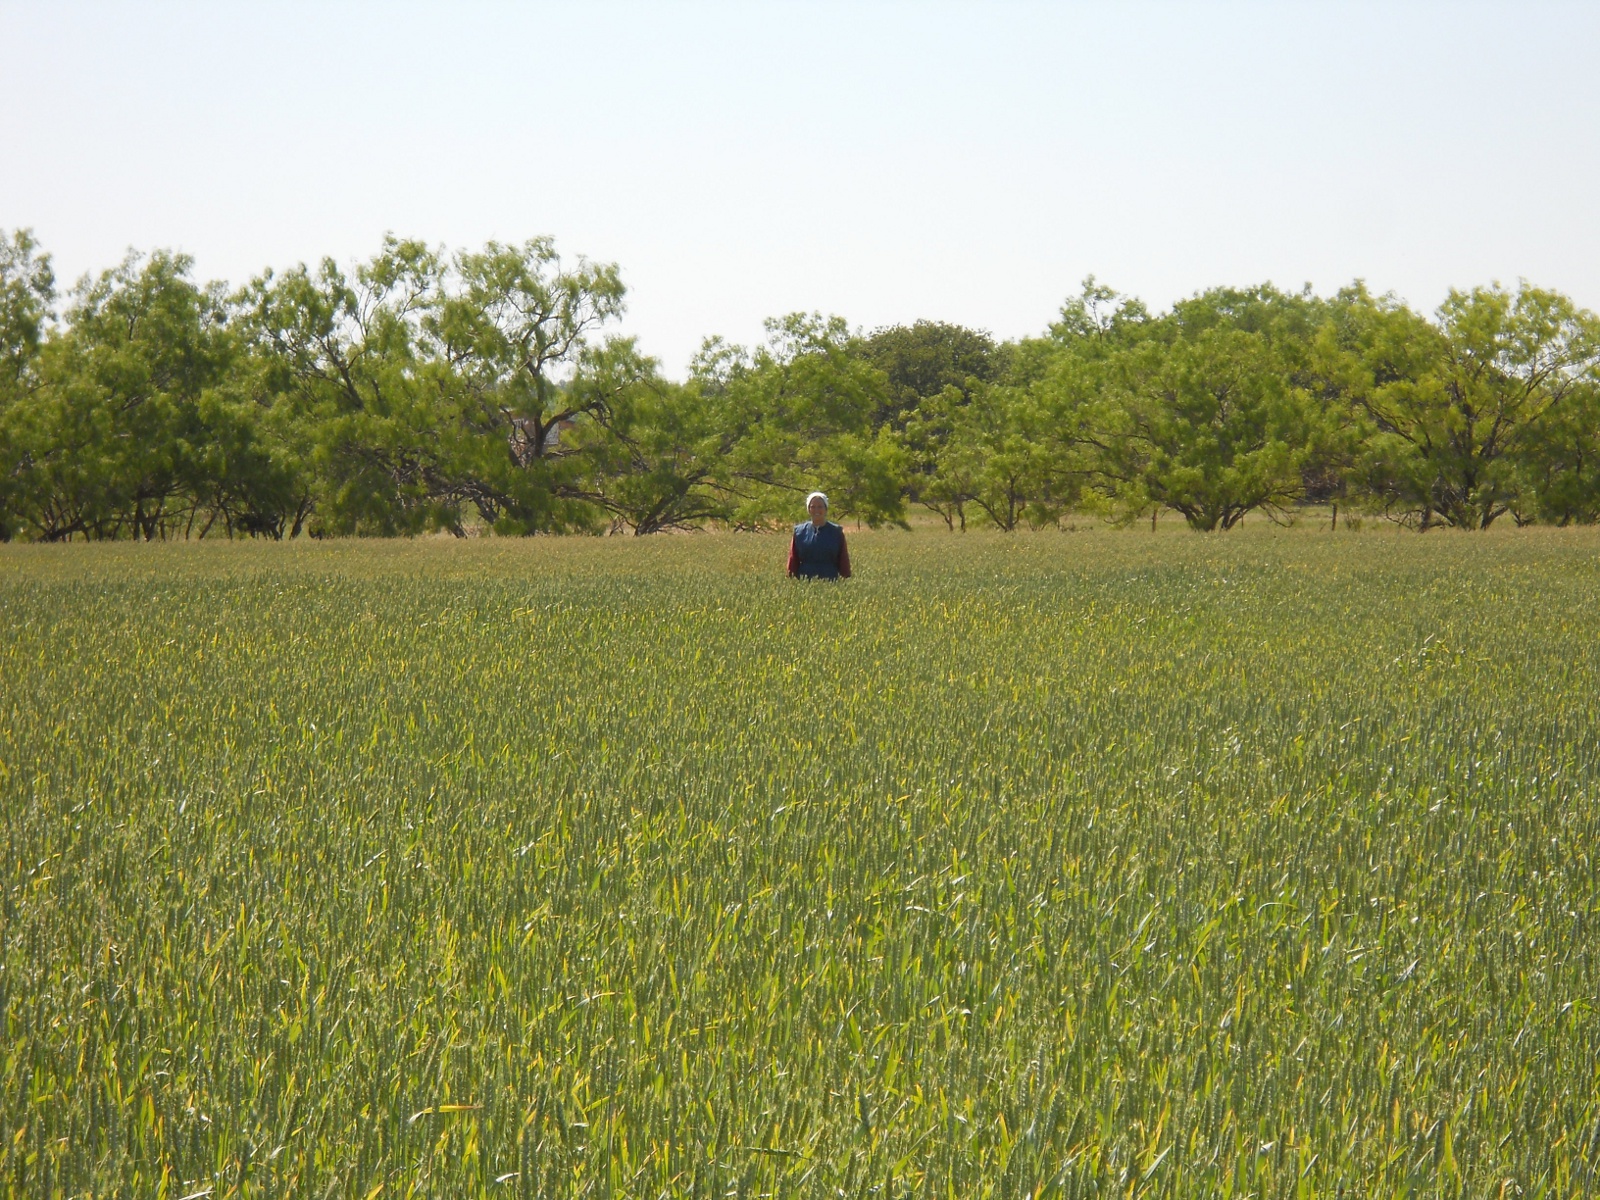
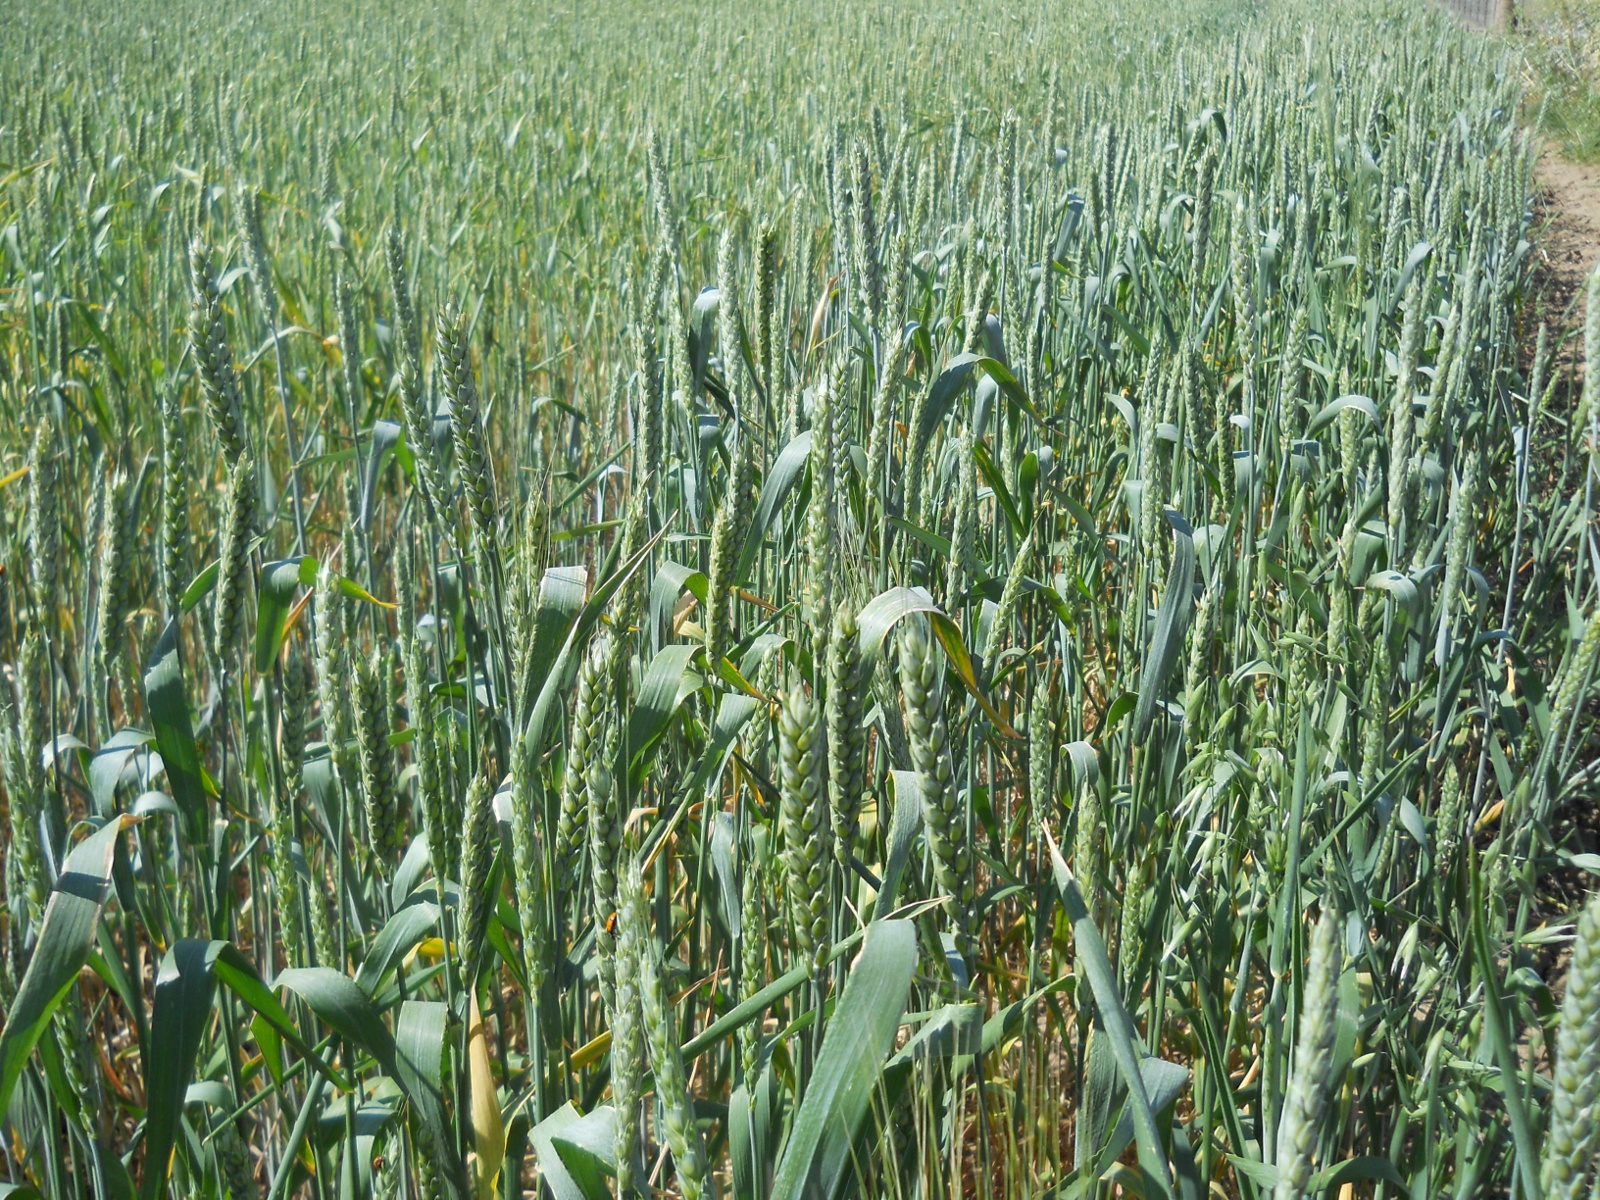
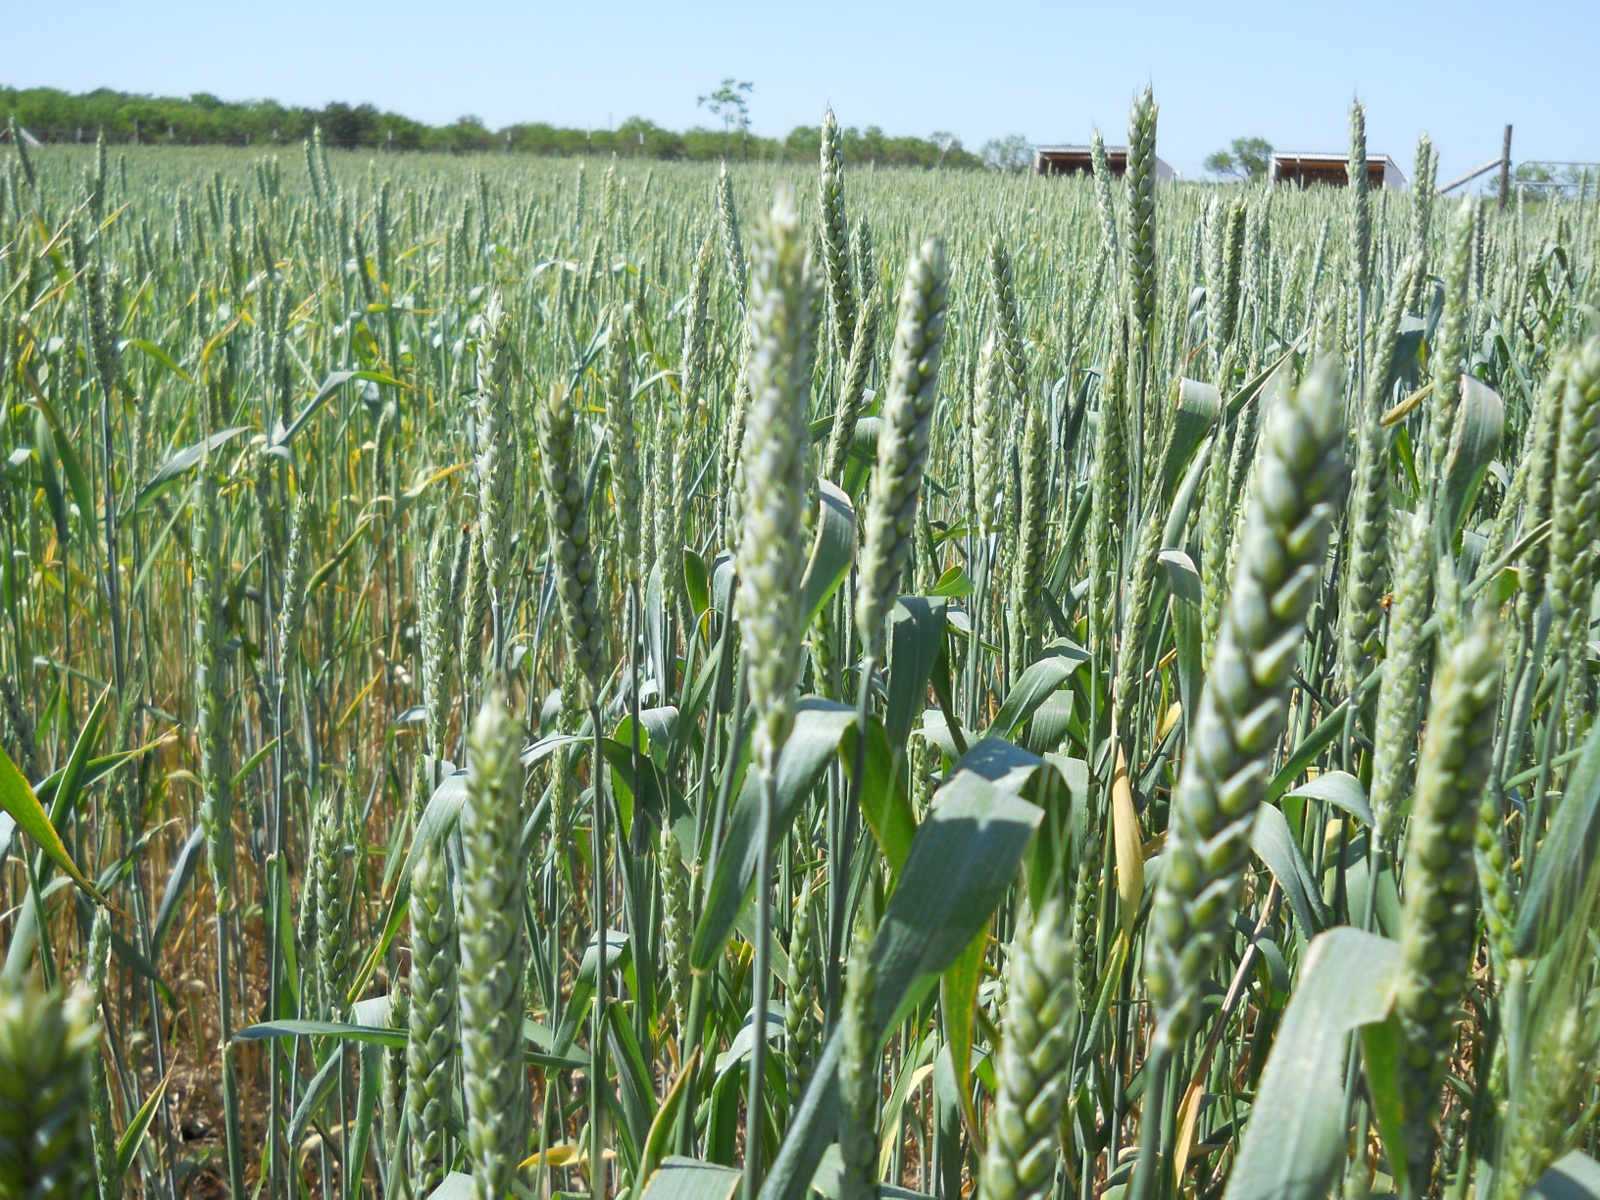
Fast forward a little over a month, and here is what it looked like. A beautiful gift from God!

2012 Wheat Crop in May
2012 Wheat Crop More Wheat Heads in May

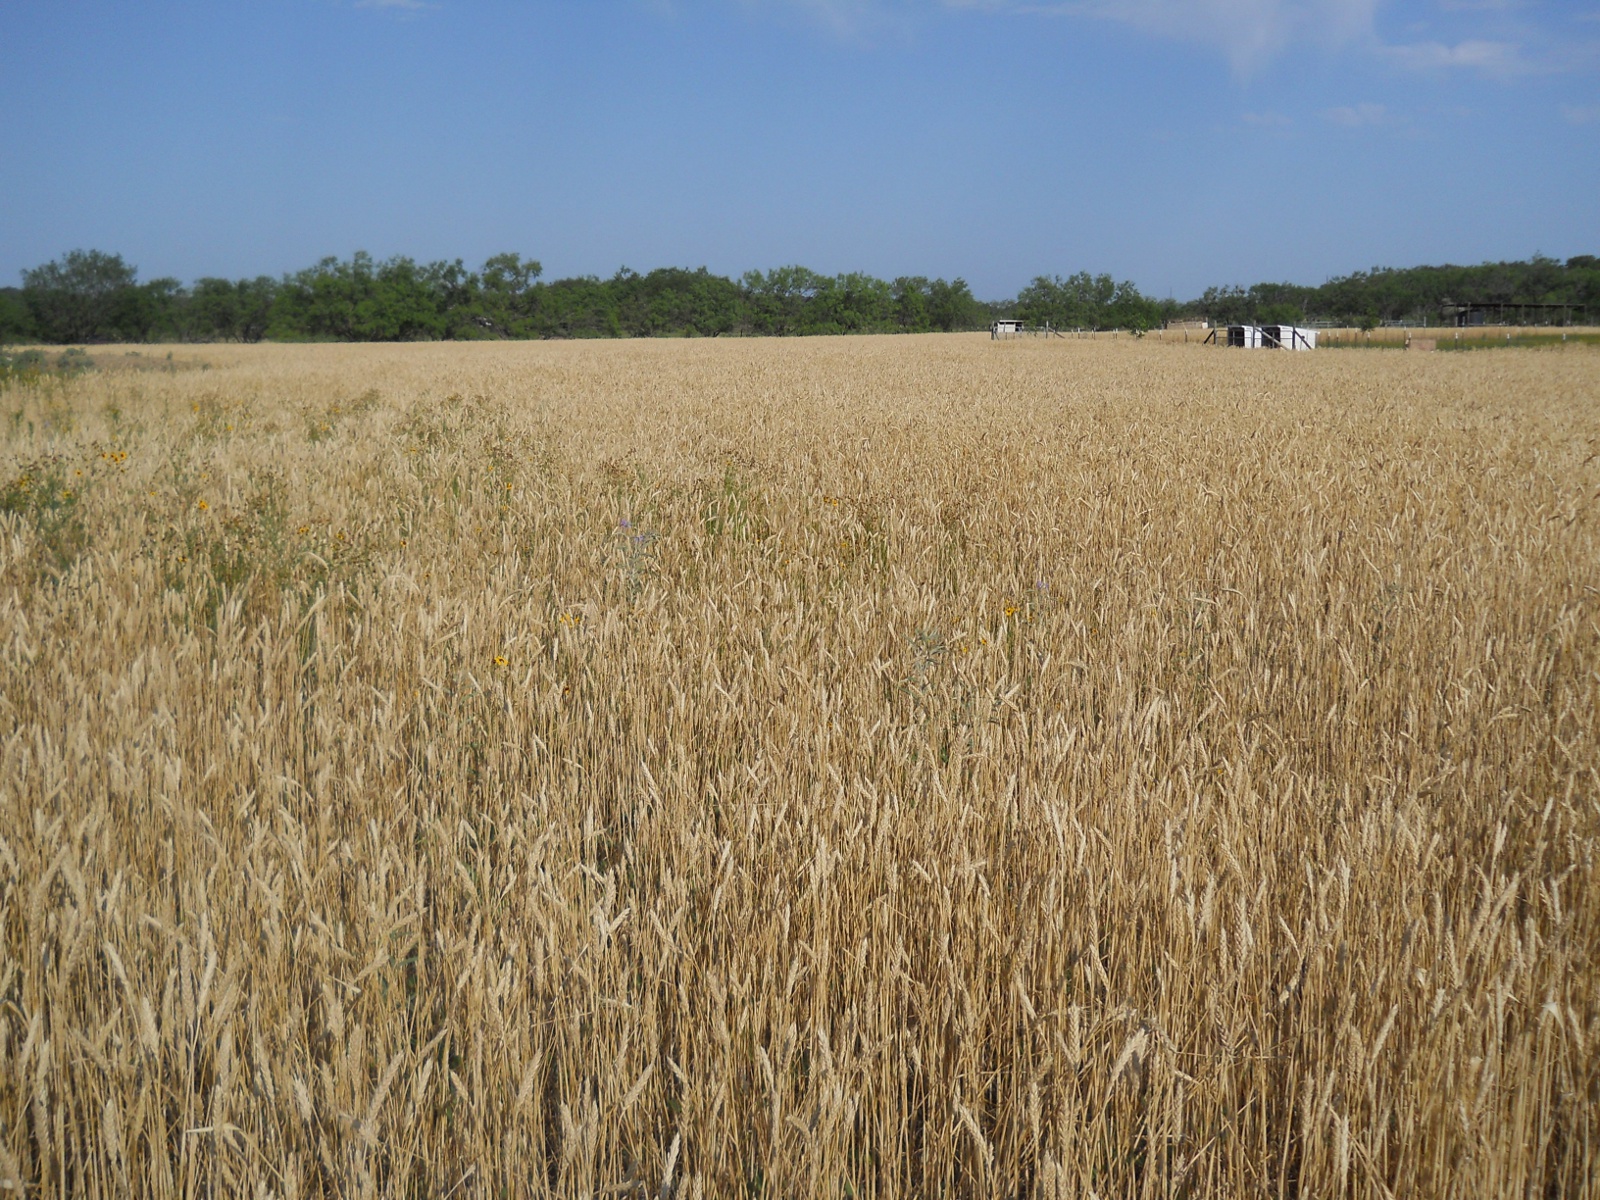
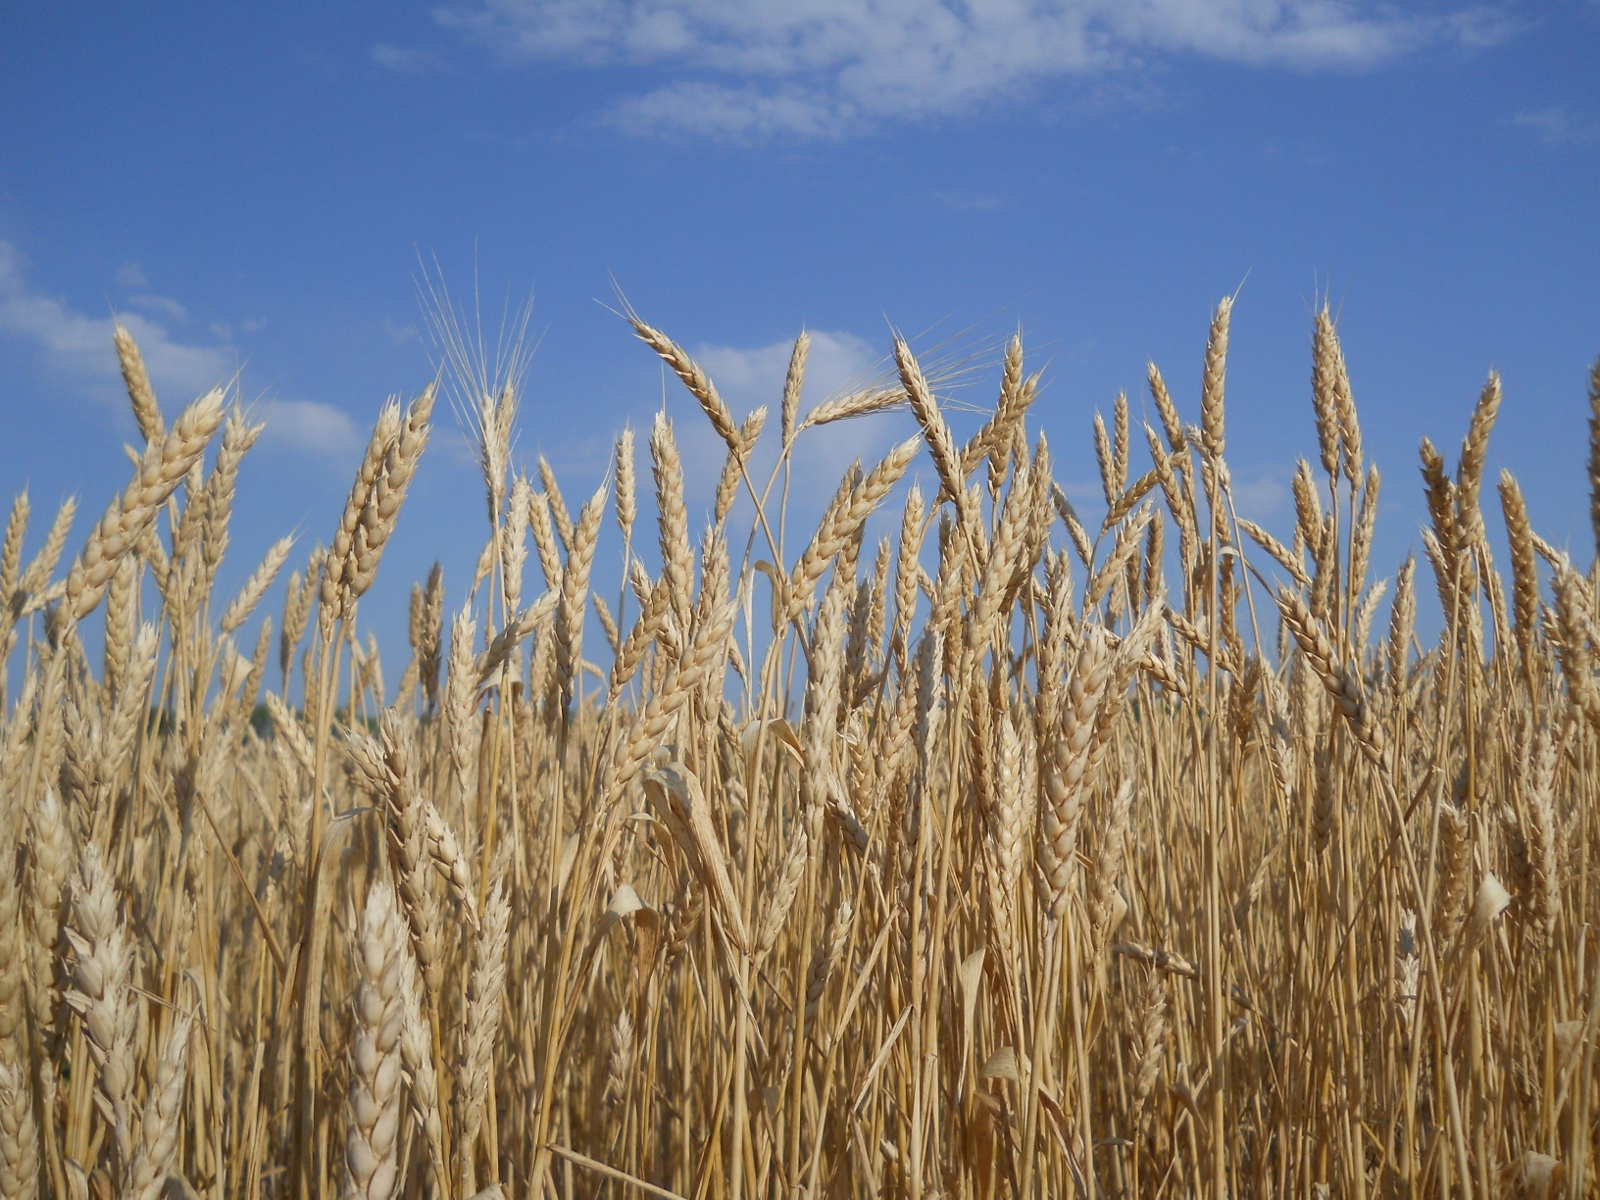
And then it was time! The harvest! This is something we had been looking forward to basically since we moved here — being able to harvest a crop. There is also much to learn spiritually from the wheat harvest, the wheat being the saints of God.

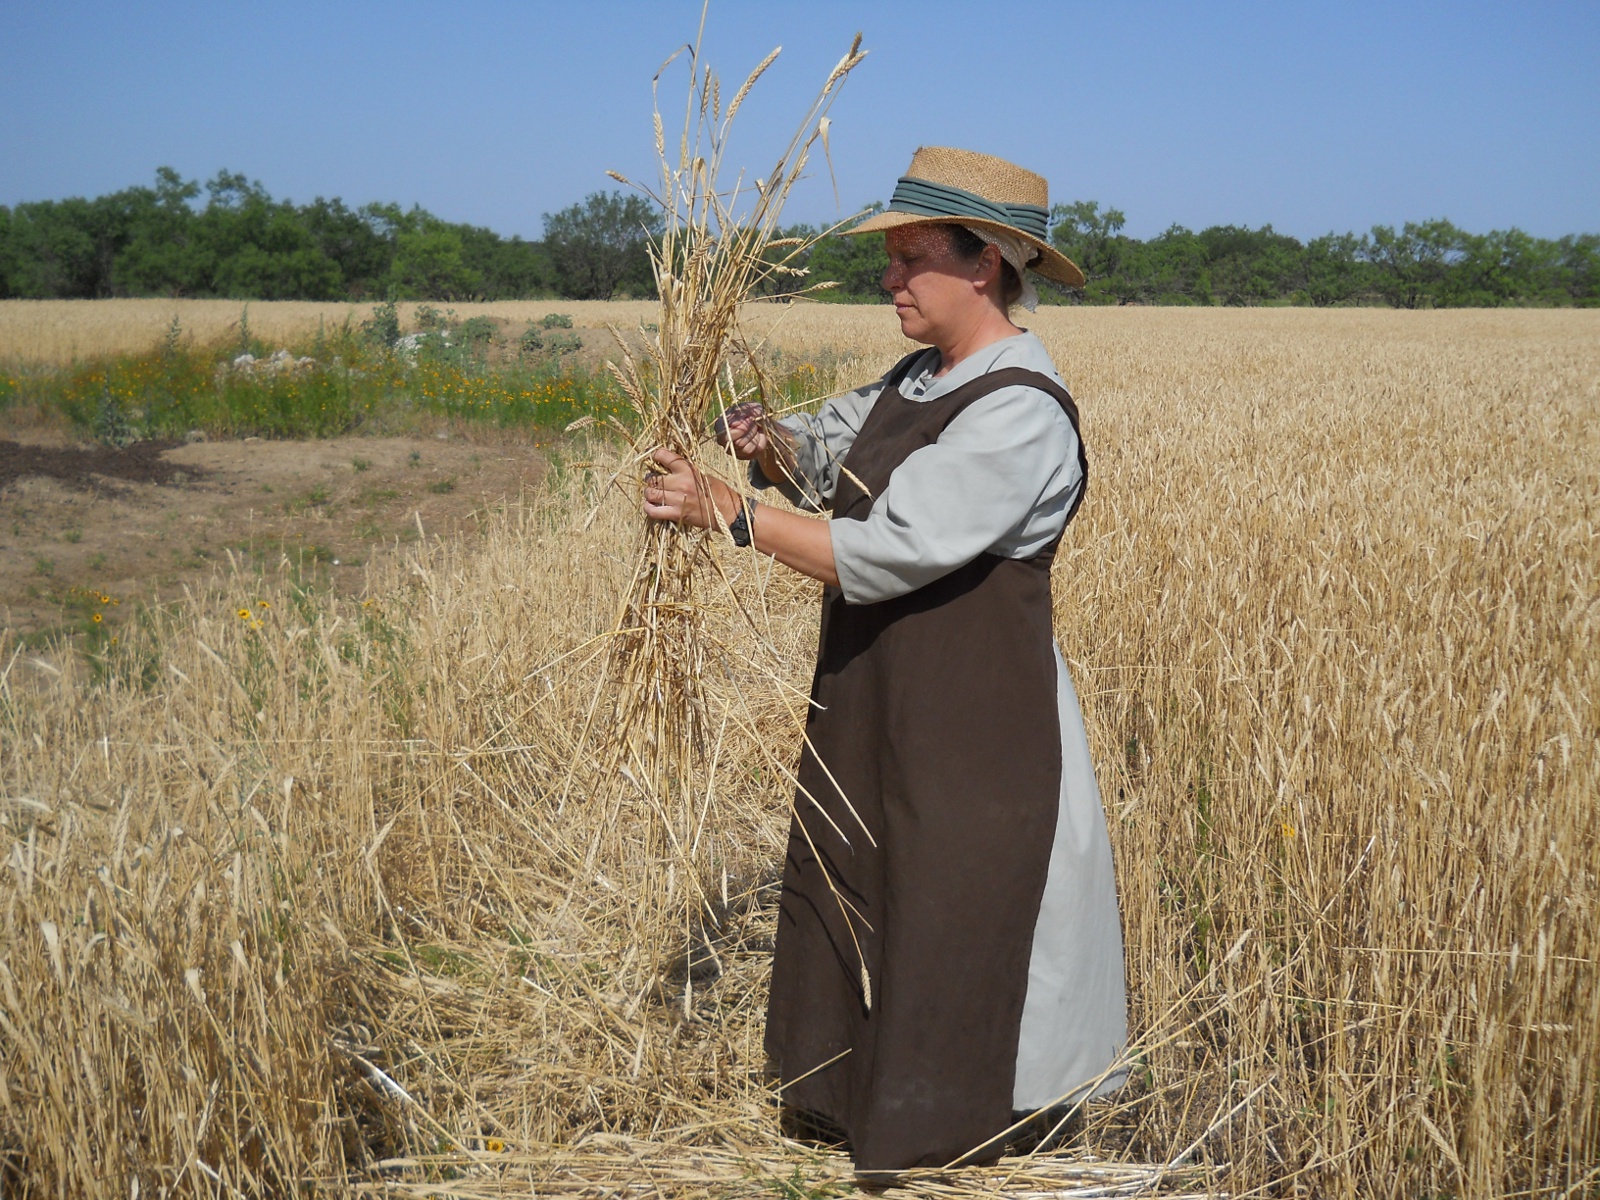
First was to cut it and tie it into sheaves. I tried using a scythe for reaping (God harvesting the souls of His people); but it ended up leaving the wheat on the ground in somewhat of a chaotic fashion (which could just have been a lack of technique); and we found that having all of the heads together in one place is better for the threshing process; and so Sue used a sickle, which worked well. We tied them using weeds or twine. The whole time out there are got “Bringing in the Sheaves” stuck in my head:

Tying the 2012 Wheat into Sheaves

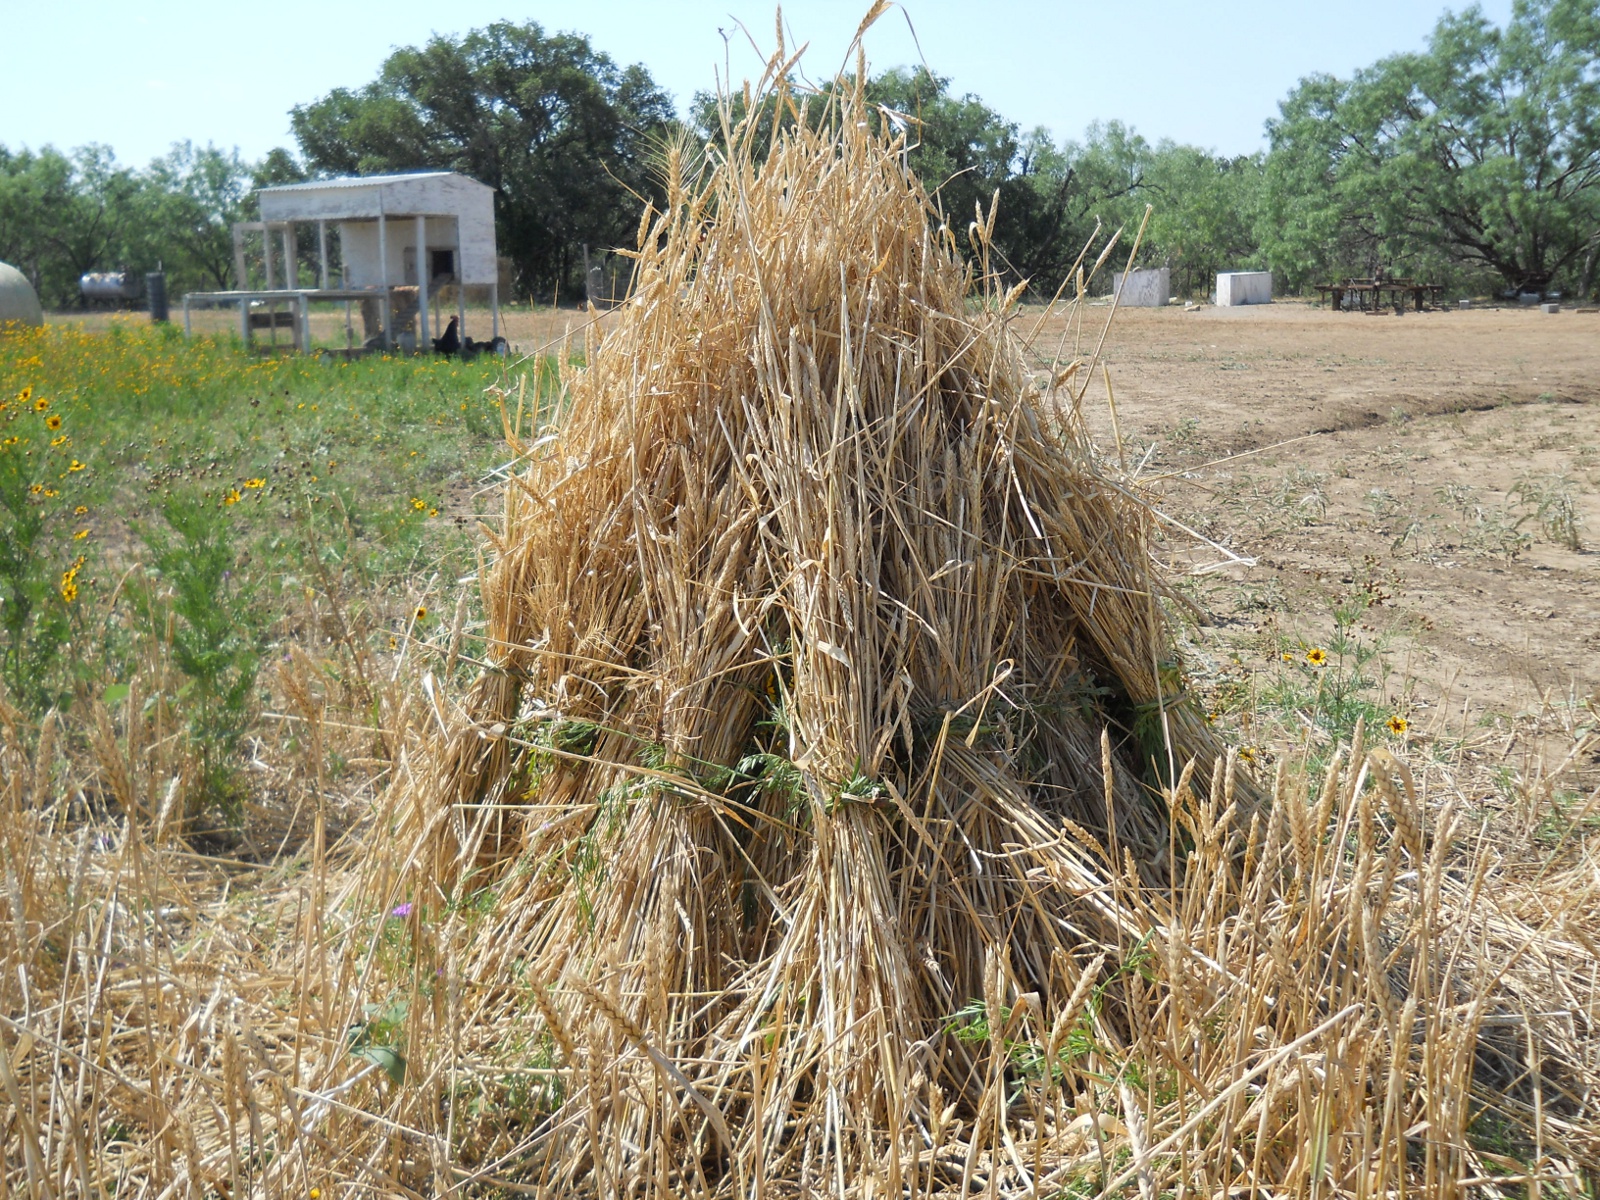
And then stacked them into stooks to dry (God gathering His saints together):

Gathering the 2012 Wheat Sheaves into Stooks

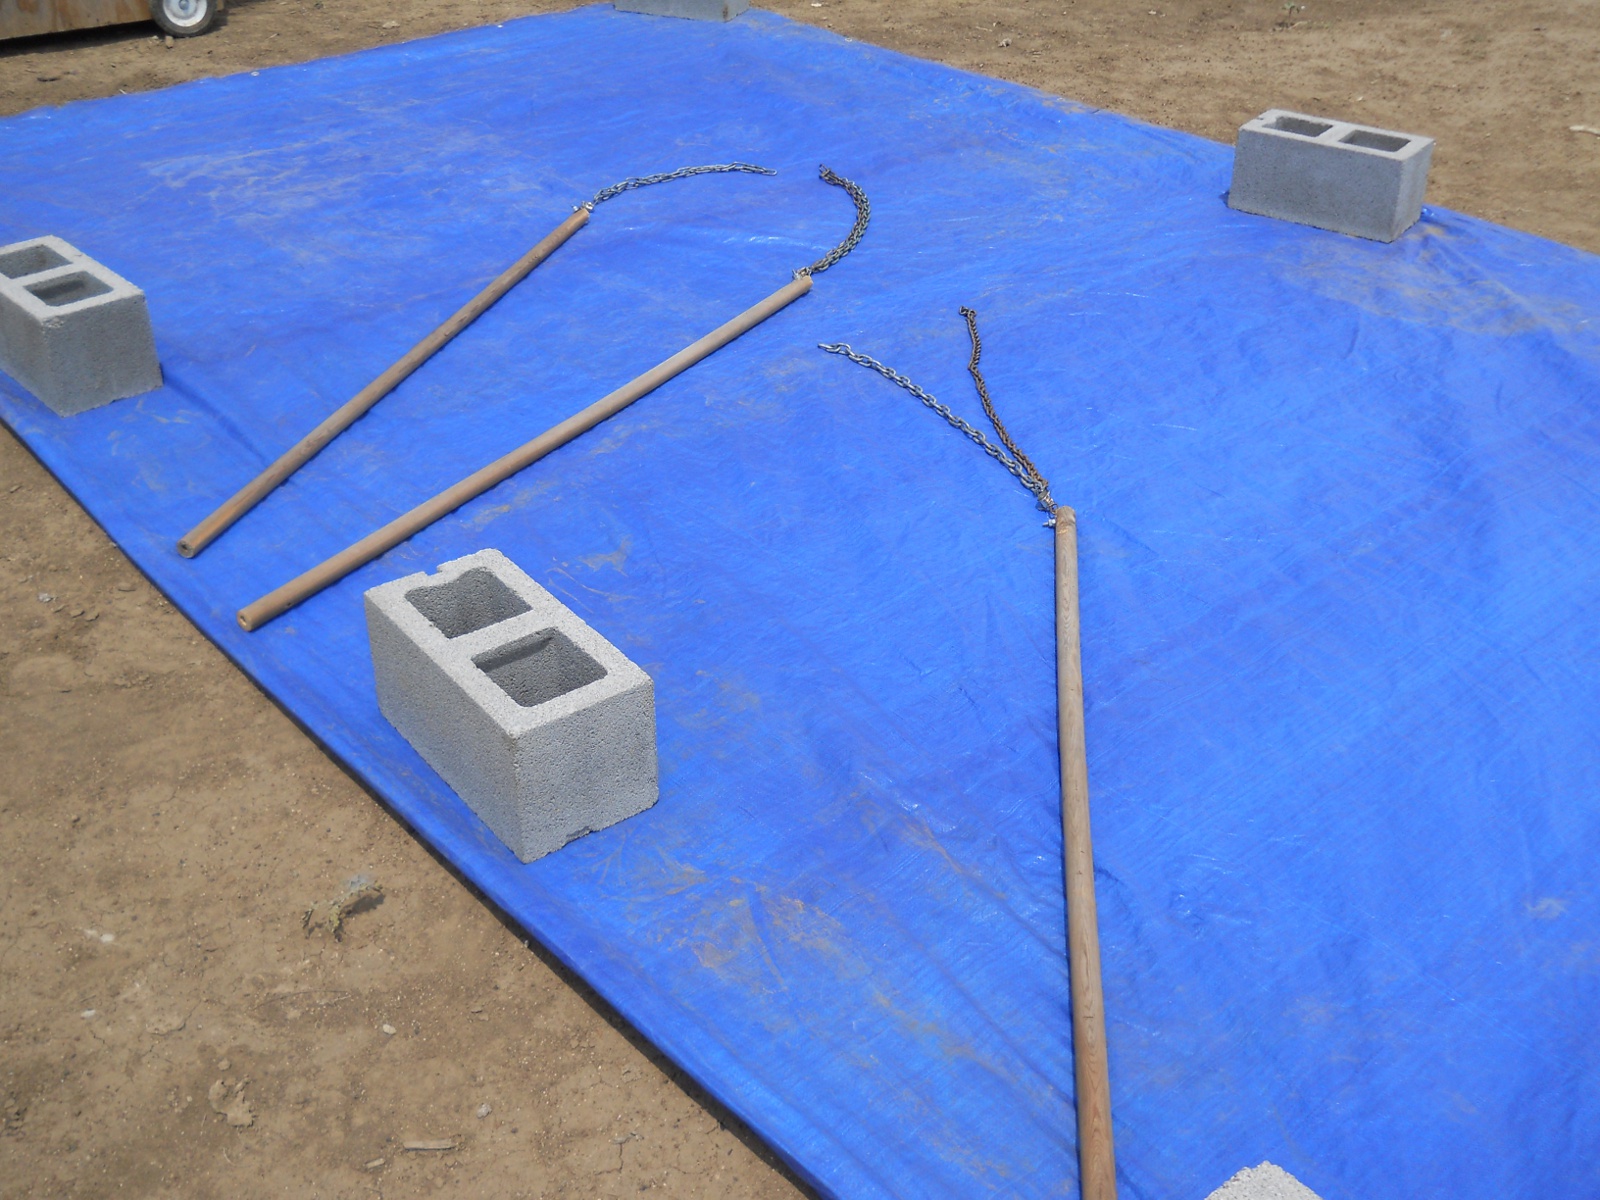
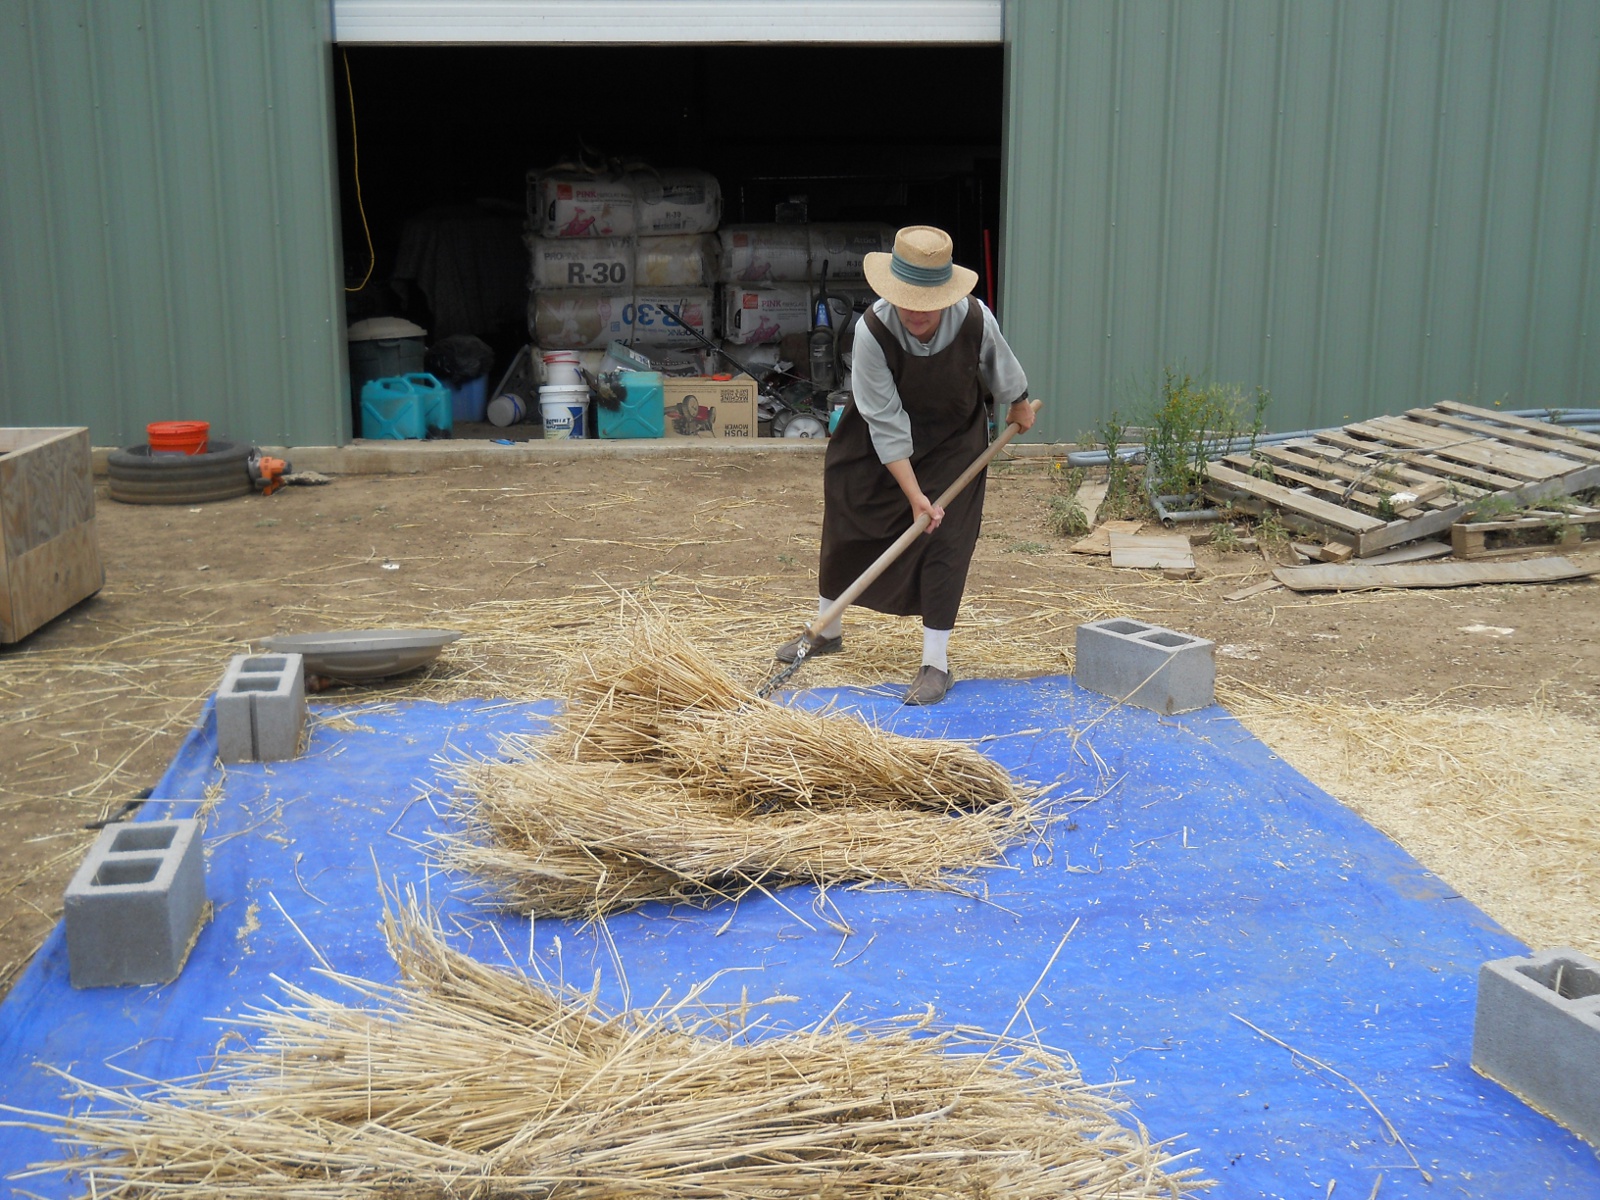
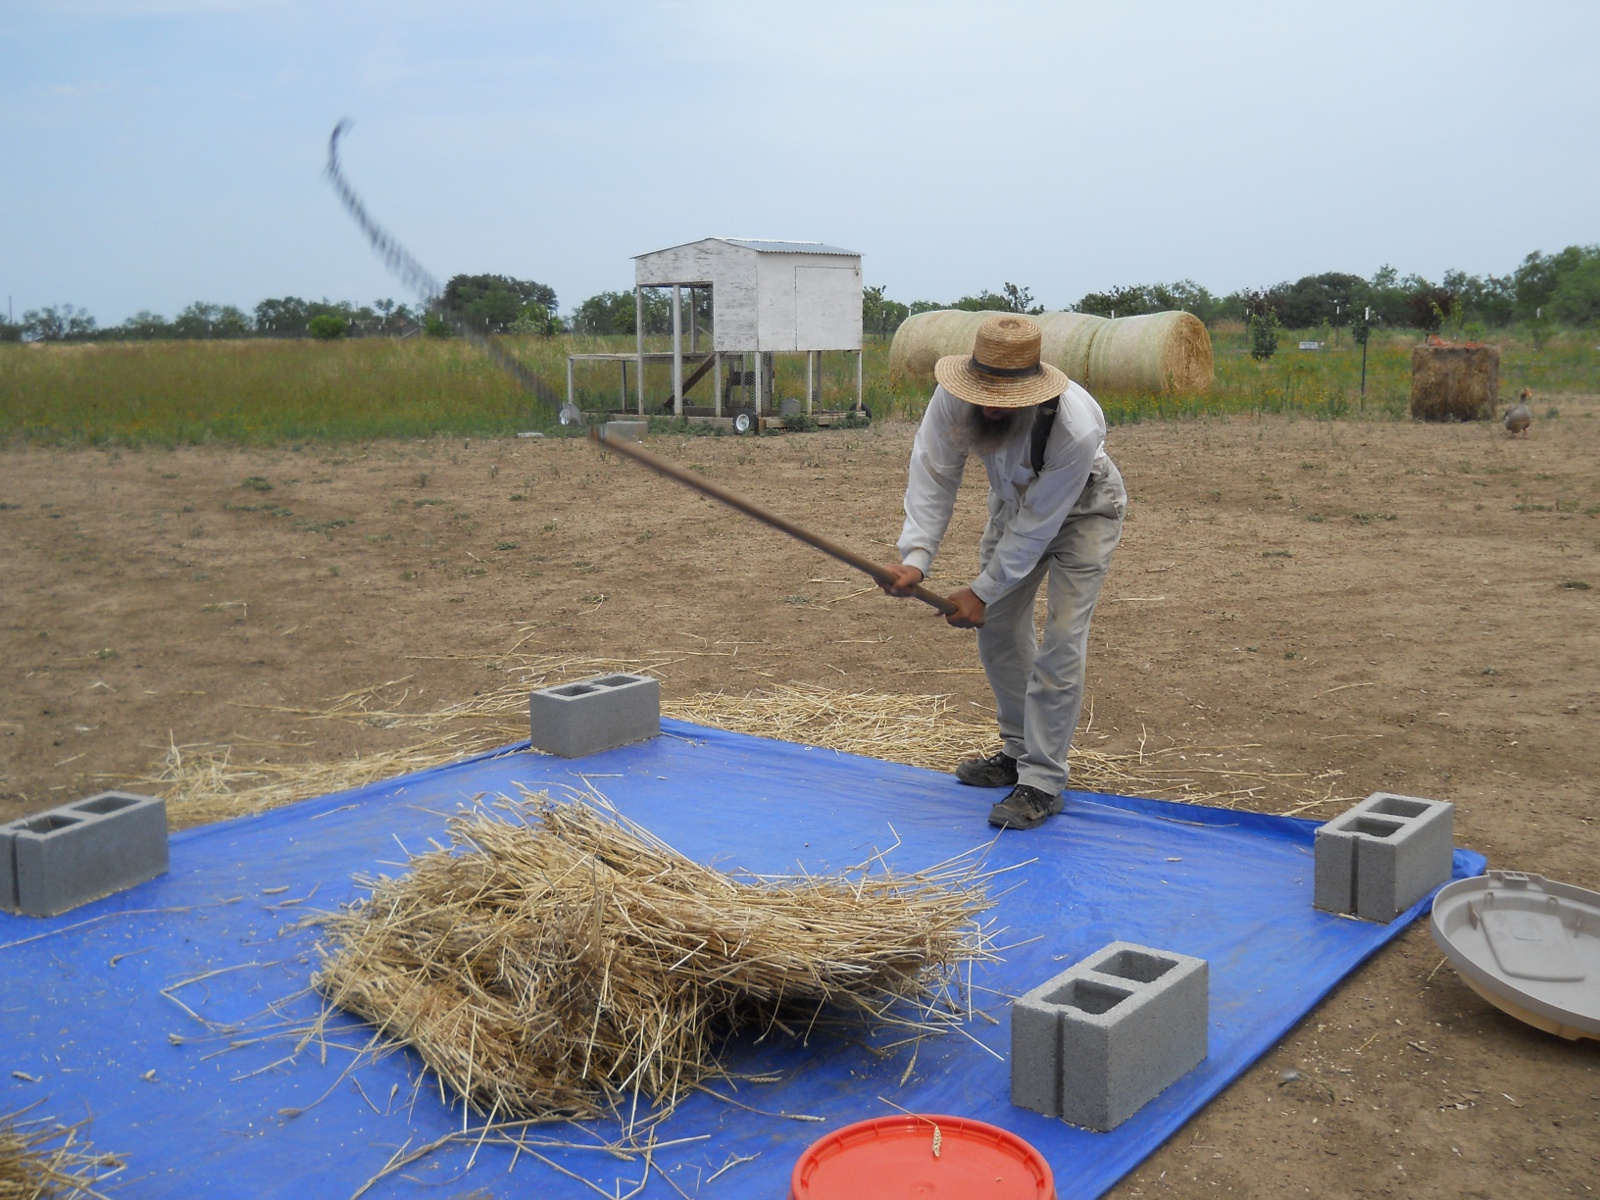
Once ready, it was time to begin the threshing process (God breaking down the carnal, selfish man of His chosen with trials and chastisements). We laid out a tarp, and borrowed some flails from one of the folks here. He attached some chains on the end of closet dowels — we thought the loose, heavier chains might do well with the flailing:

Preparing to Flail the 2012 Wheat Crop

And here is Sue and myself flailing away. It’s something of a violent process (sometimes God needs to be a little “violent” in the breaking down of our pride):

Flailing the 2012 Wheat Crop
More Flailing the 2012 Wheat Crop

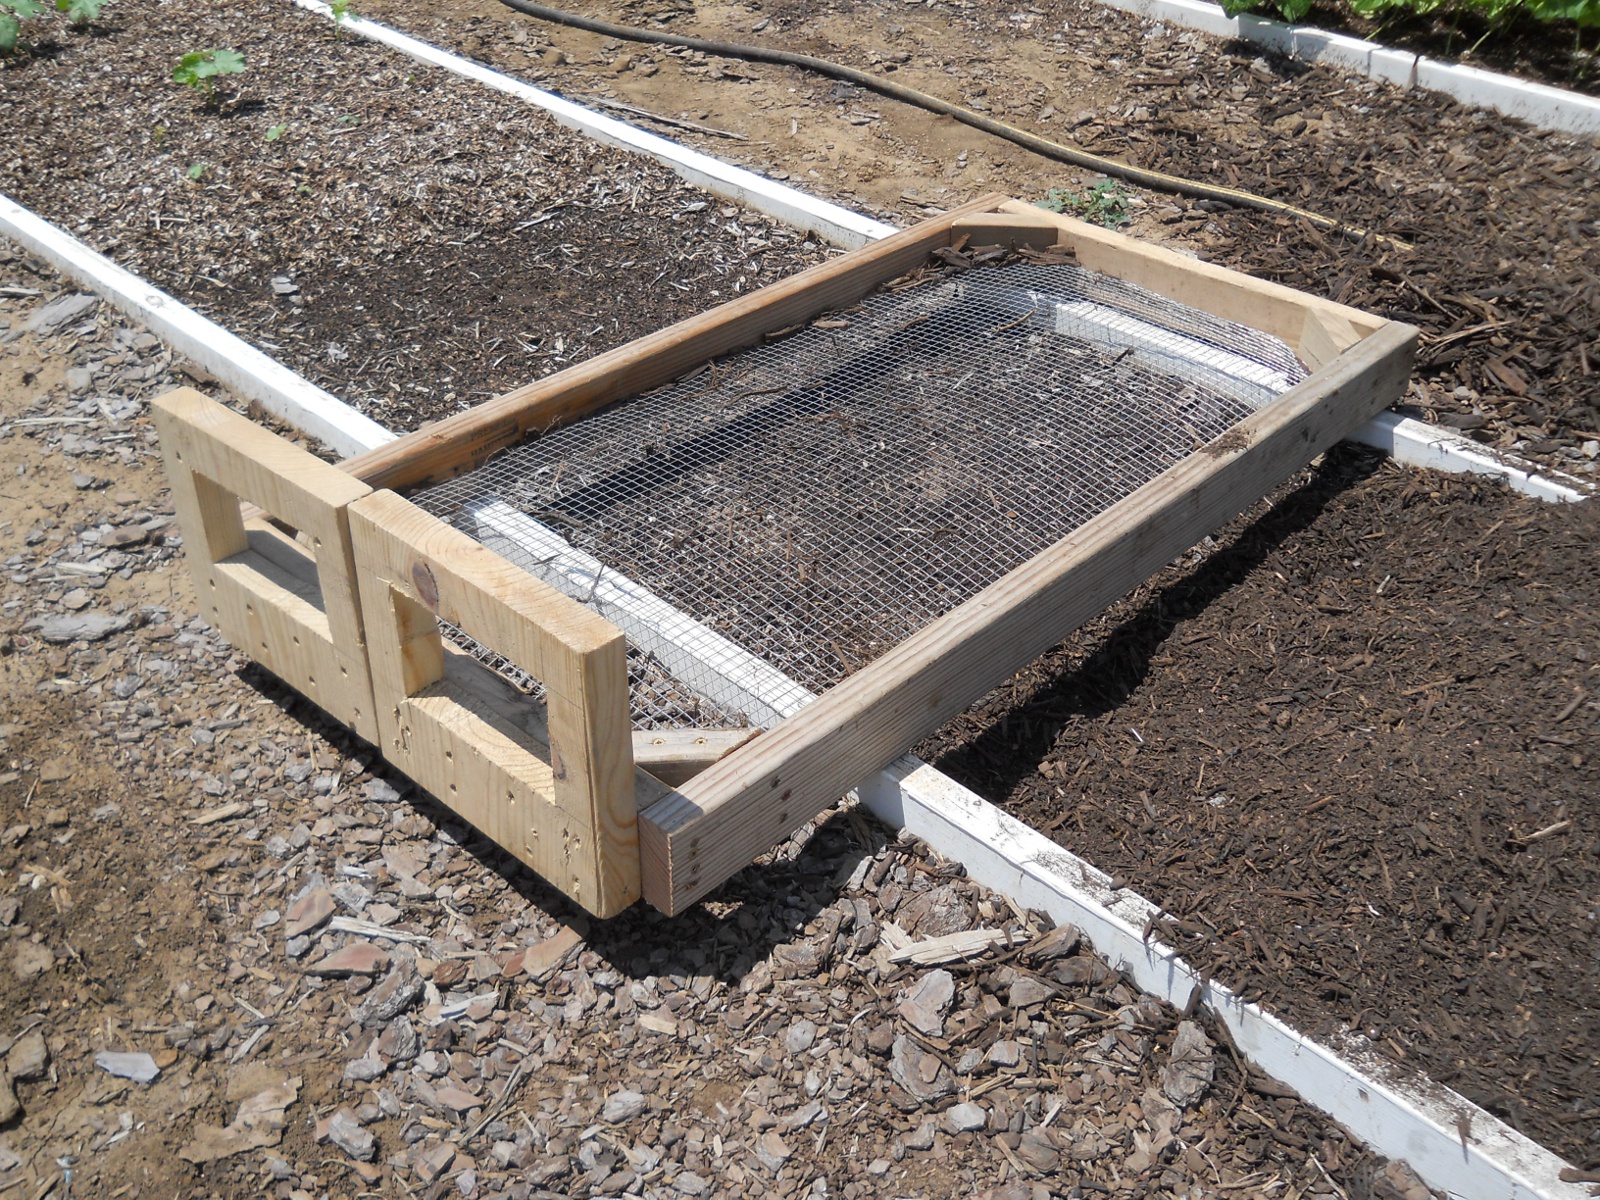
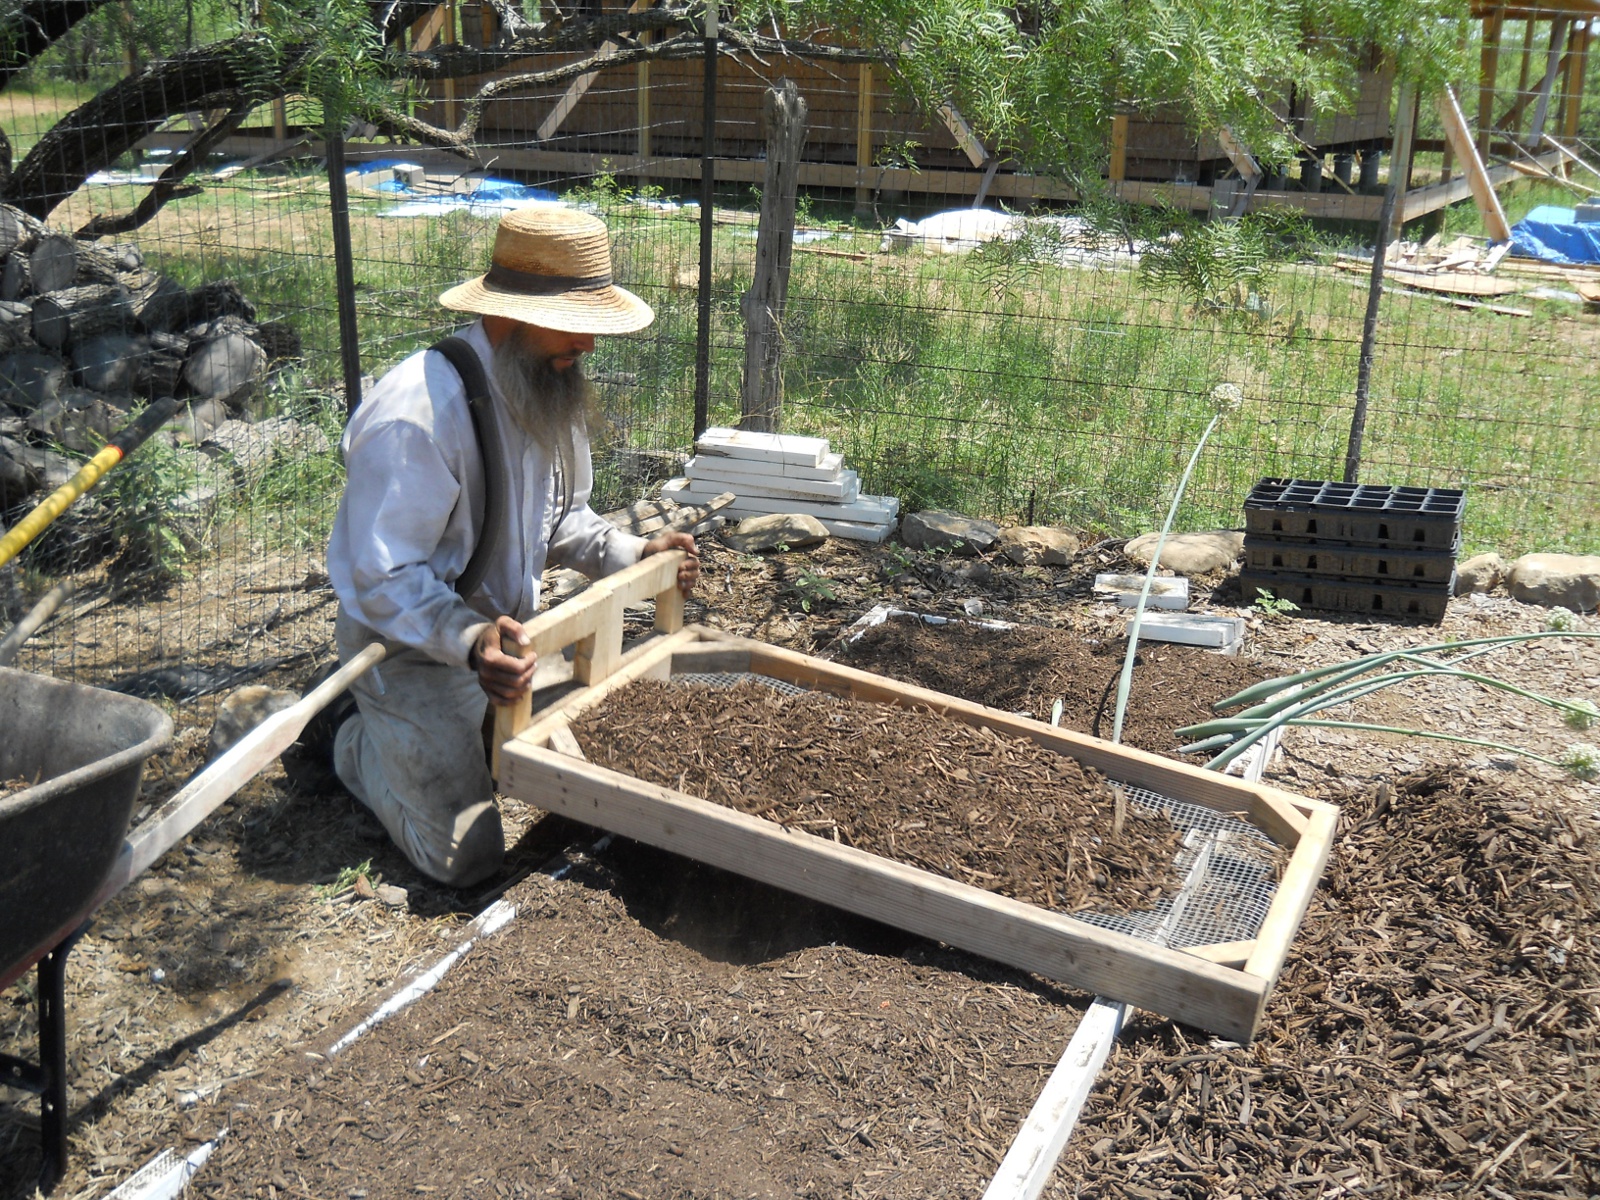
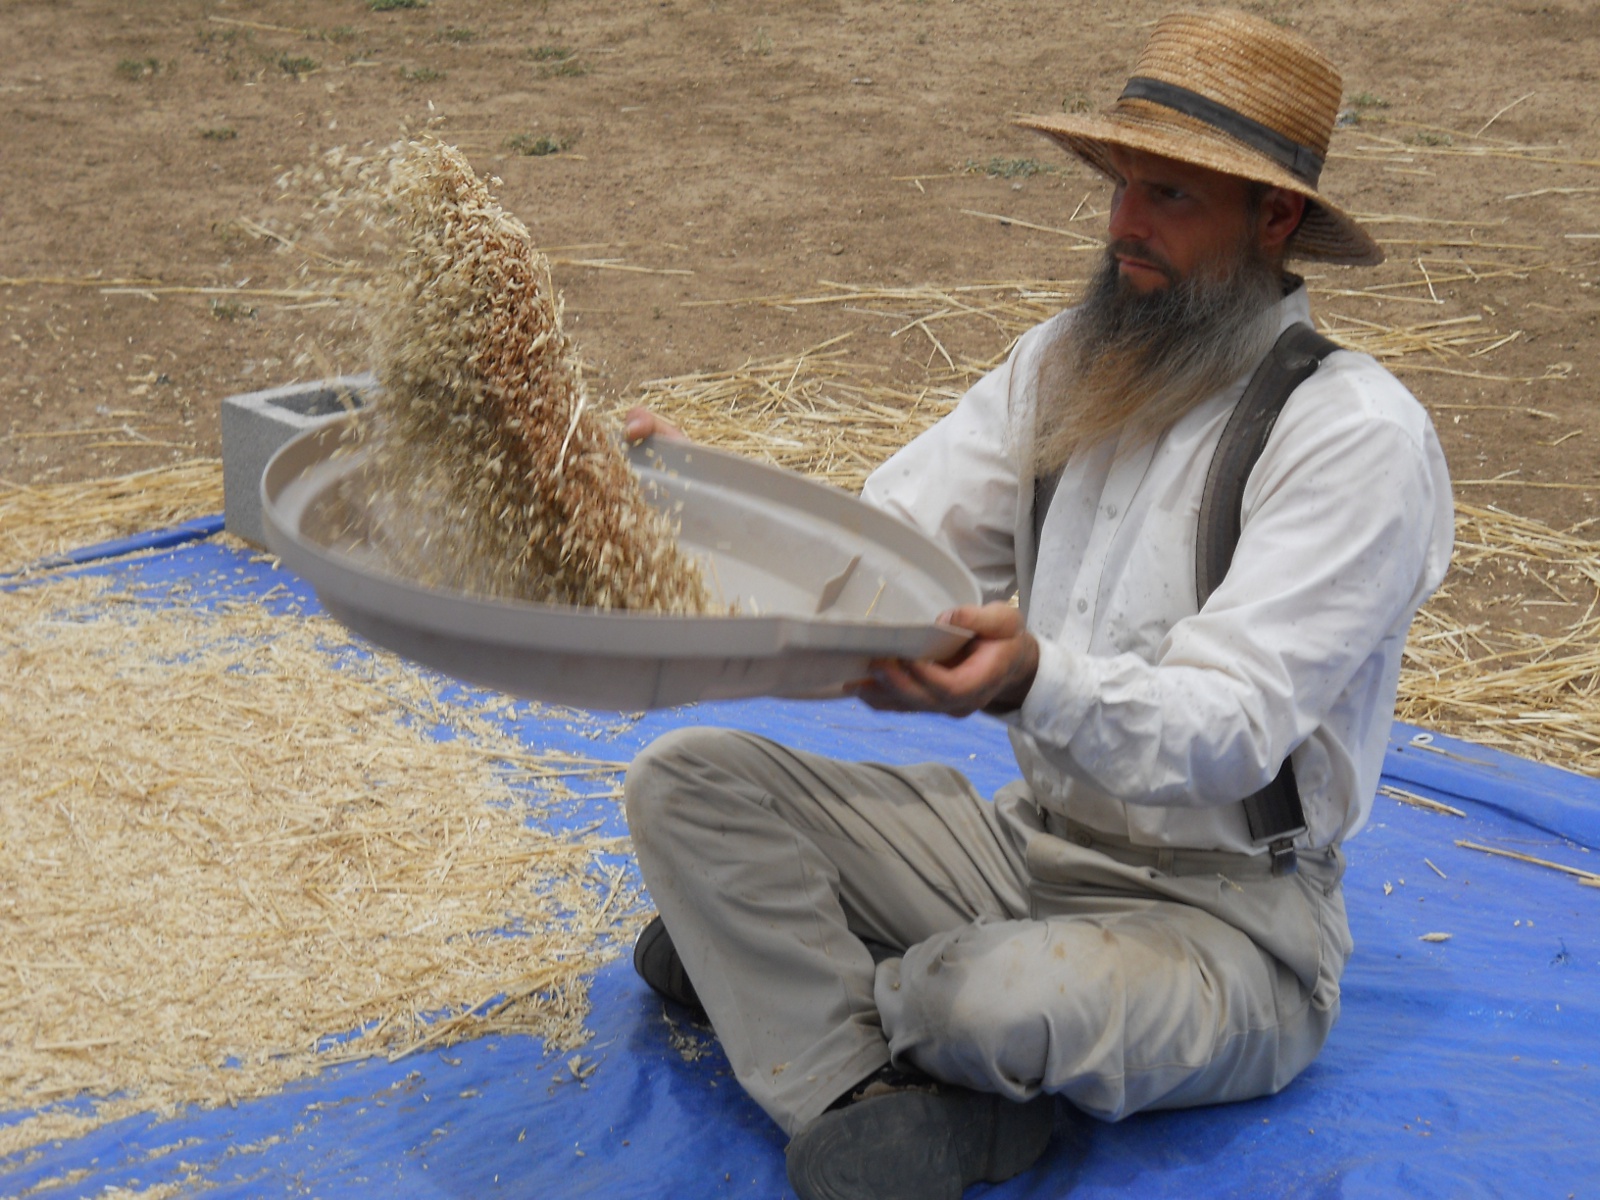
And then it was time to winnow the wheat, separating the chaff from the wheat berries (God further refining the souls of His children). We used a garbage can lid, which didn’t work too badly:

Winnowing the 2012 Wheat Crop

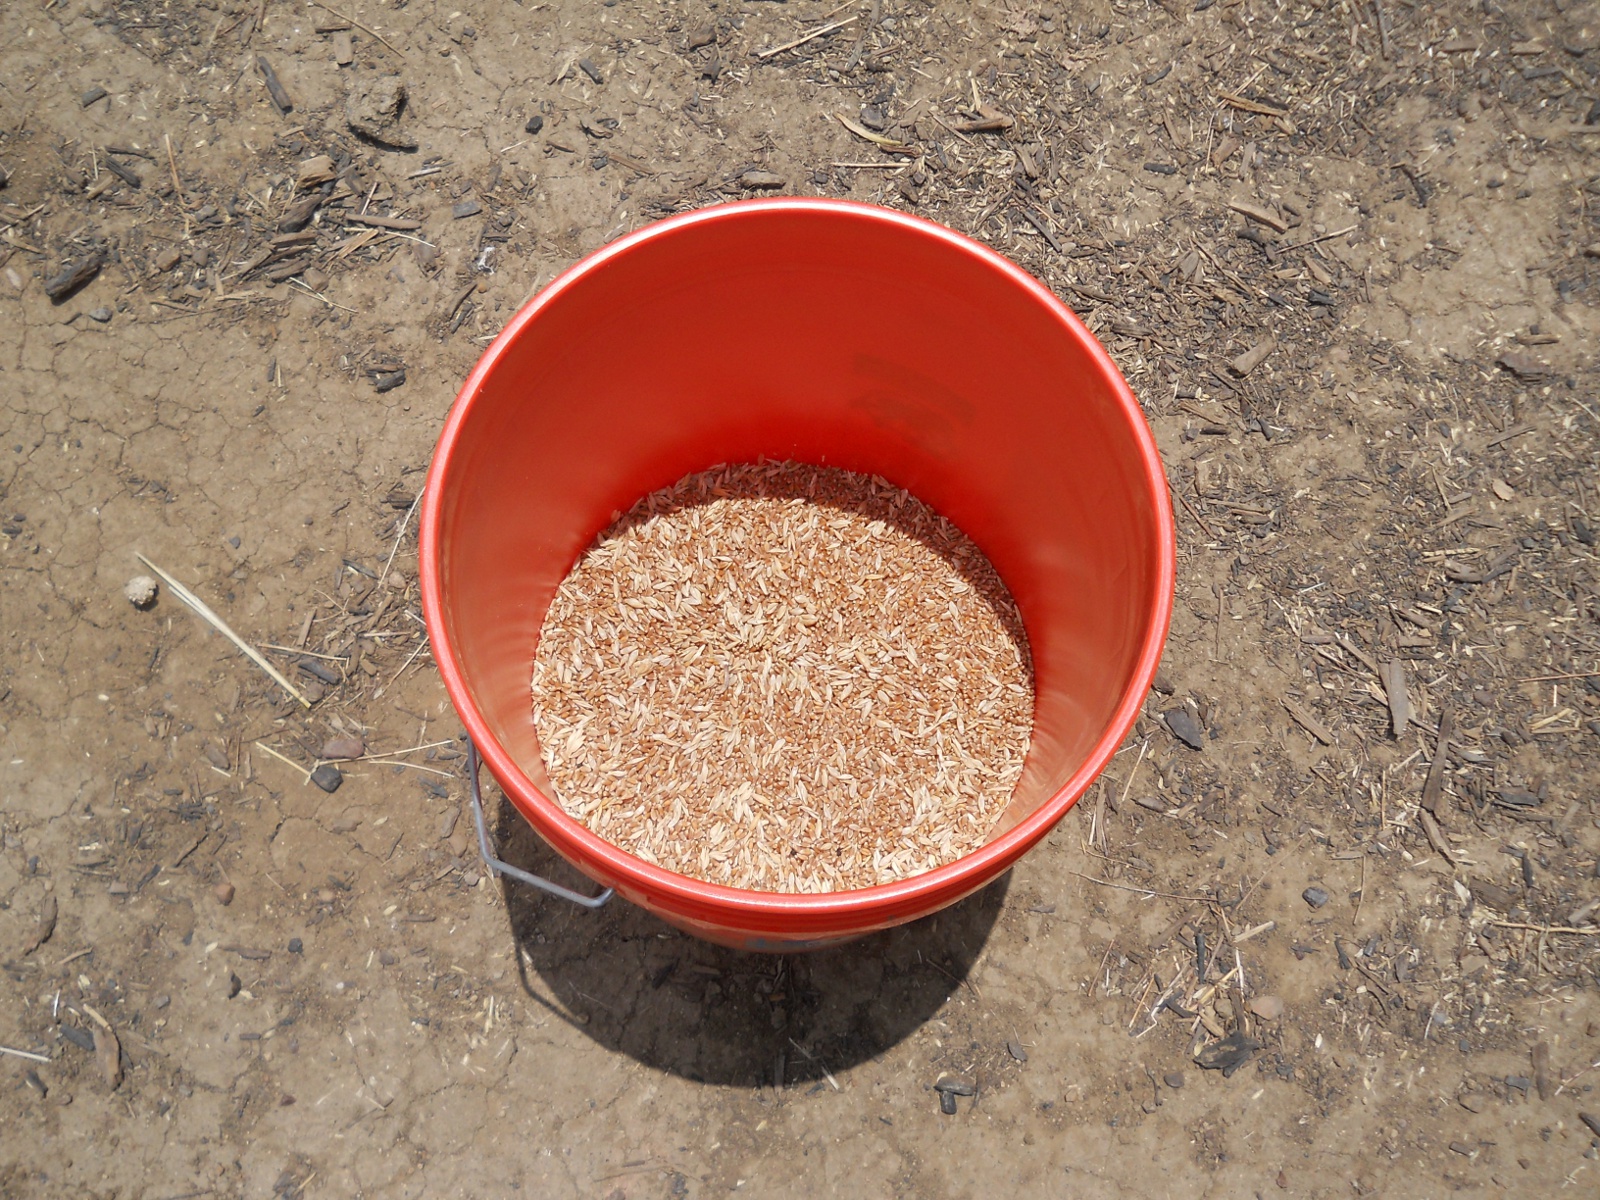
After several hours of work, here is the finished product — the mostly cleaned wheat berries (God’s gathered in, sanctified people):

Hand Harvested 2012 Wheat Berries

We were thankful to be able to go through the process of hand-harvesting and processing the wheat.

It happened though that a fellow from town we know had an old grain combine that he wanted us to have to use, if we wanted, and he had a backup one for spare parts. After the Bunkers got done using it, and graciously going through all of the headaches and replacing of parts needed to finish their fields, it was our turn to use.

The “combine” is a machine that does all of the processing we described above all at one time. Of course, it’s much faster, but you also have to maintain it (which causes dependence on the world), you don’t get the experience needed to learn how to harvest wheat by hand should the mechanized methods be no longer available one day, you don’t think about the spiritual aspects of the harvesting process because you’re not intimately involved, and you don’t get the benefits (spiritual and temporal) of performing work in God’s way, all of which are why we wanted to process at least some of the wheat by hand.

Still, I wanted to be able to make sure to get all of the wheat harvested and stored before we lost the crop from being in the field too long; and so I decided we would use the combine on the rest of the field. And here it is a-harvesting:

Harvesting the 2012 Wheat Crop with a Combine

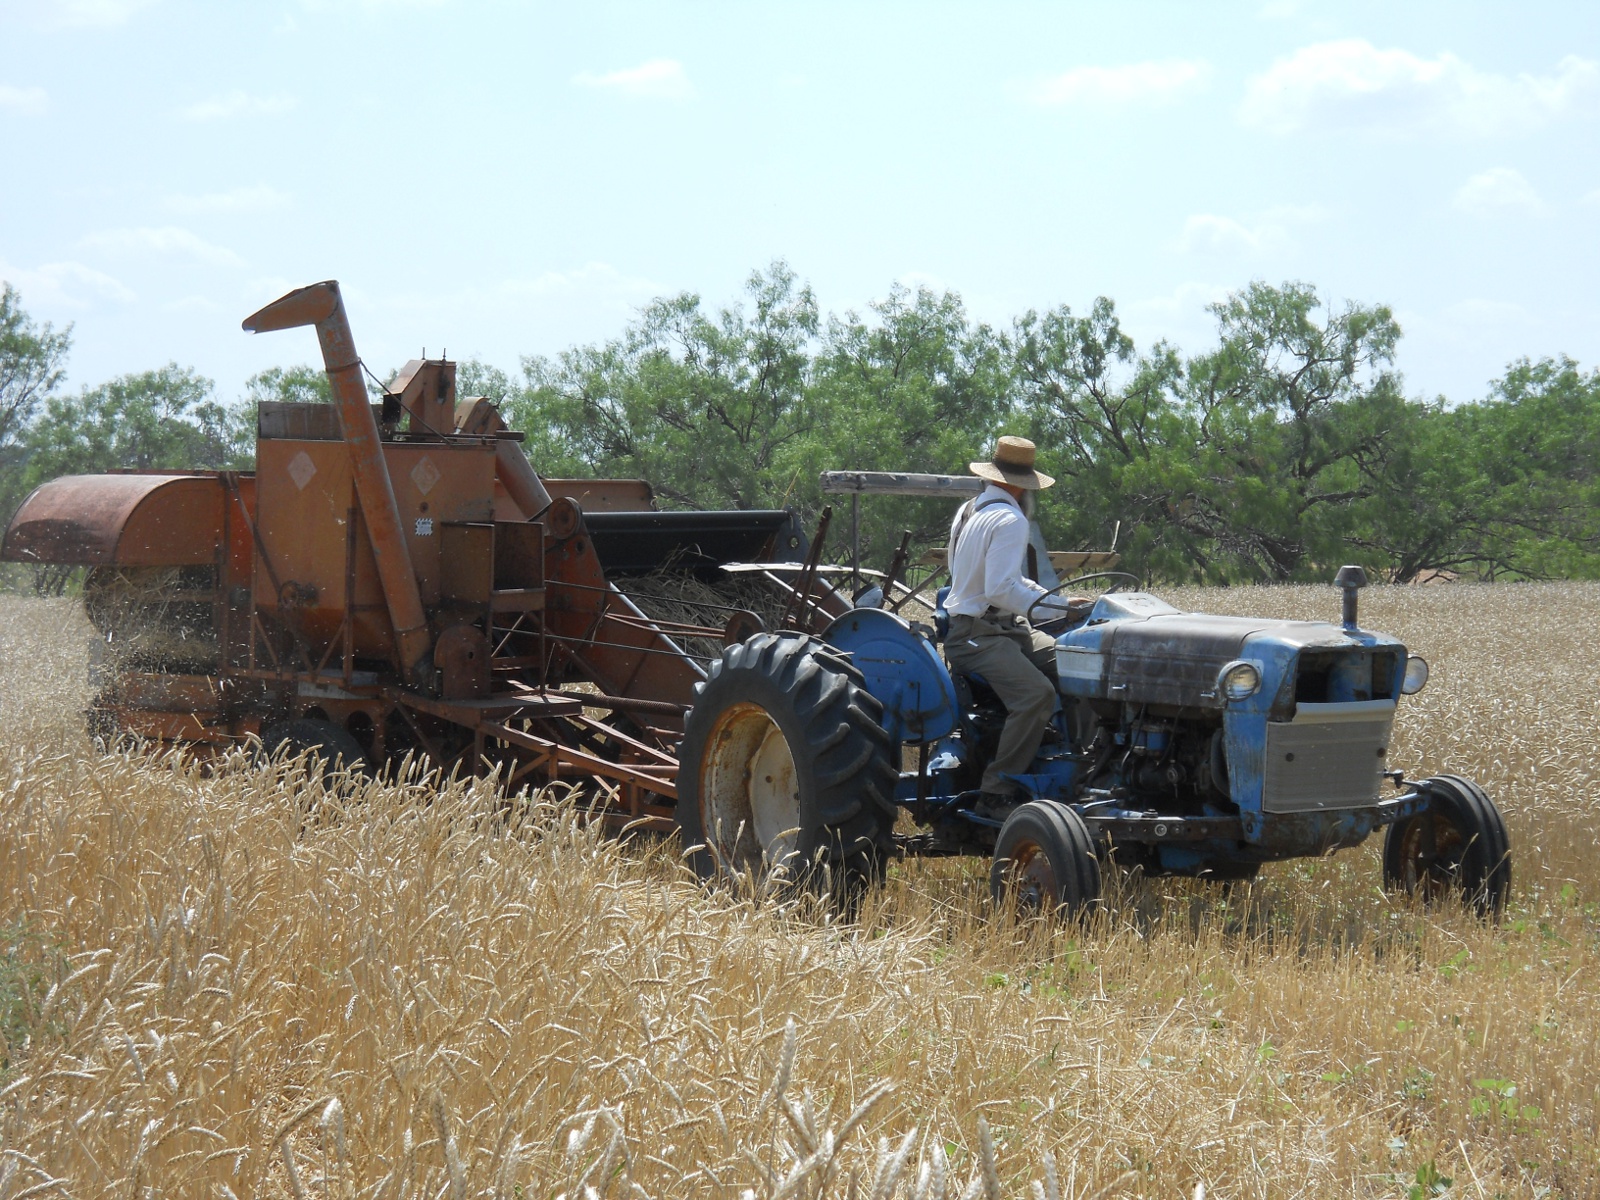
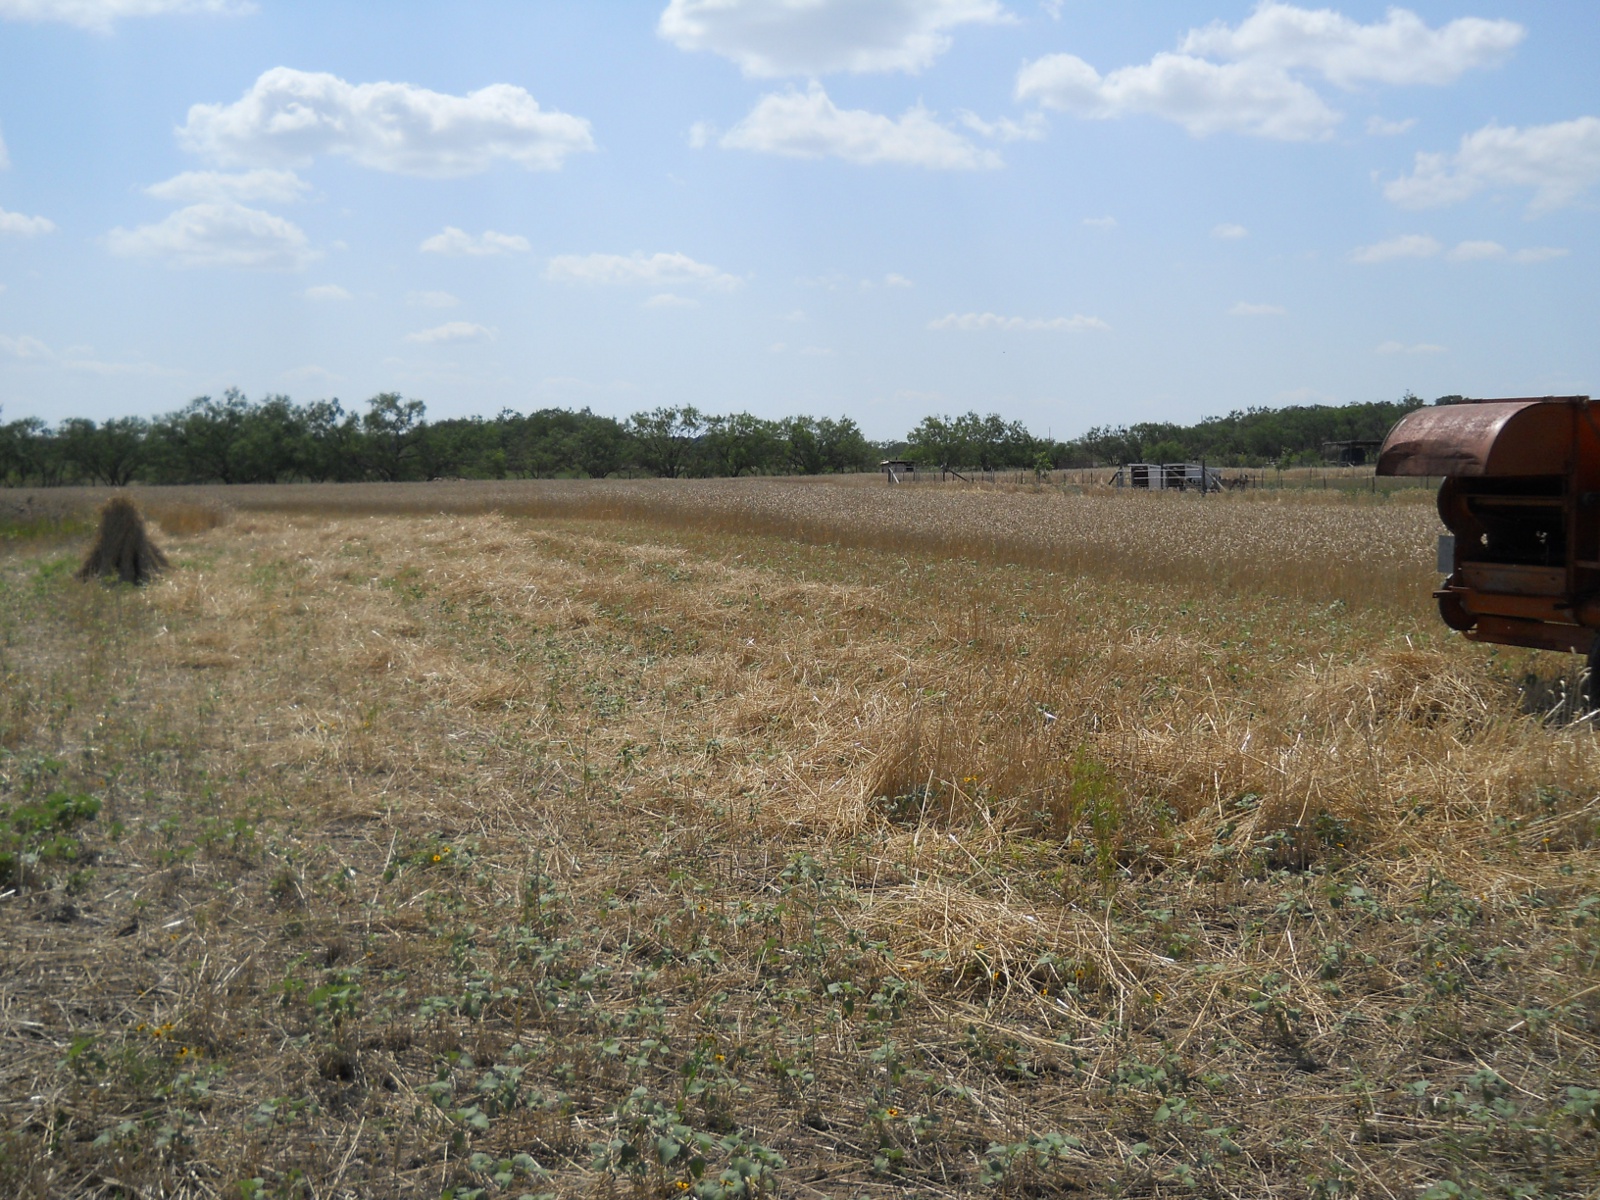
And a completed row:

Completed Row of Harvesting the 2012 Wheat Crop with a Combine

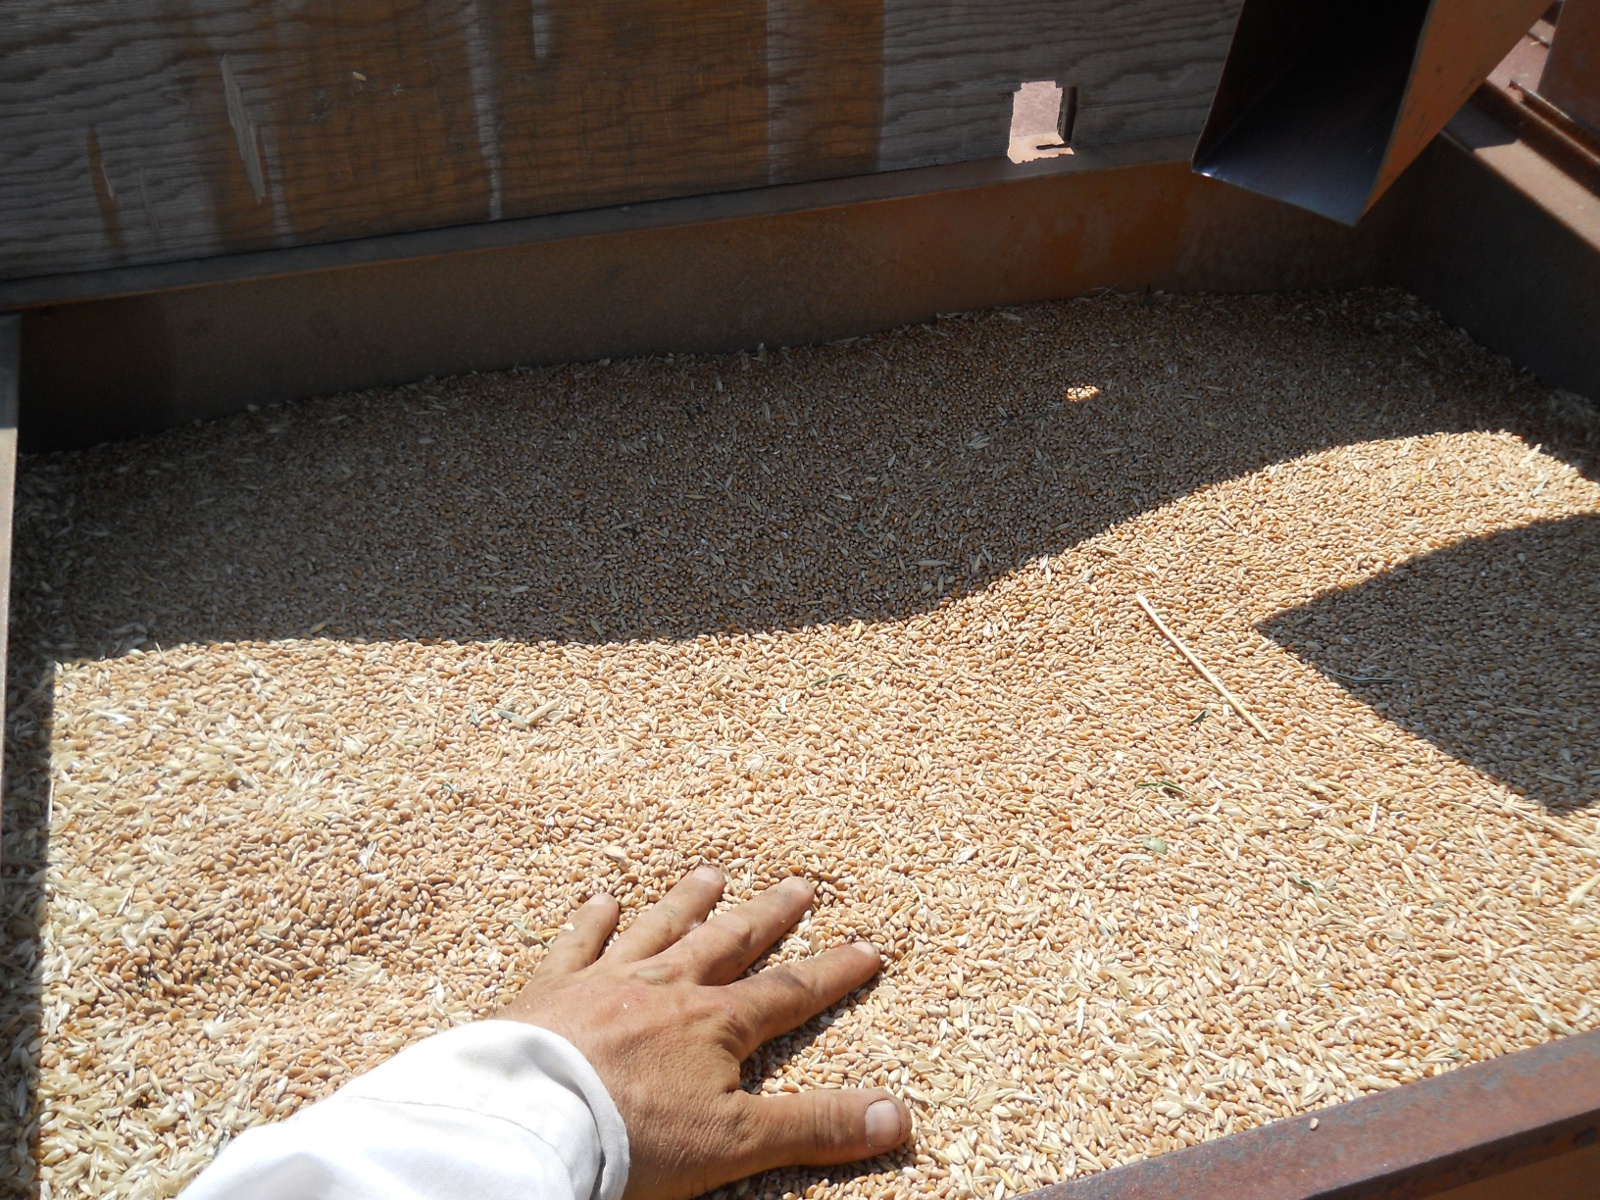
You can see the difference in amounts between the picture above of the hand-harvested in the bucket vs. what the combine collected after just a couple of hours. I can understand the temptation of the carnal man that caused him to desire and then over time find and eventually implement, through industrialism, what appeared to be easier ways to do things, and how easily it can be to get sucked into the industrial trap, which actually leads to slavery — you become dependent on the industrial machine (as a system), and then MUST do things the worldly way to survive). This is something we try to remember and keep in perspective, even if we use something like a combine for now:

Combine Bin Full of Harvested 2012 Wheat Crop

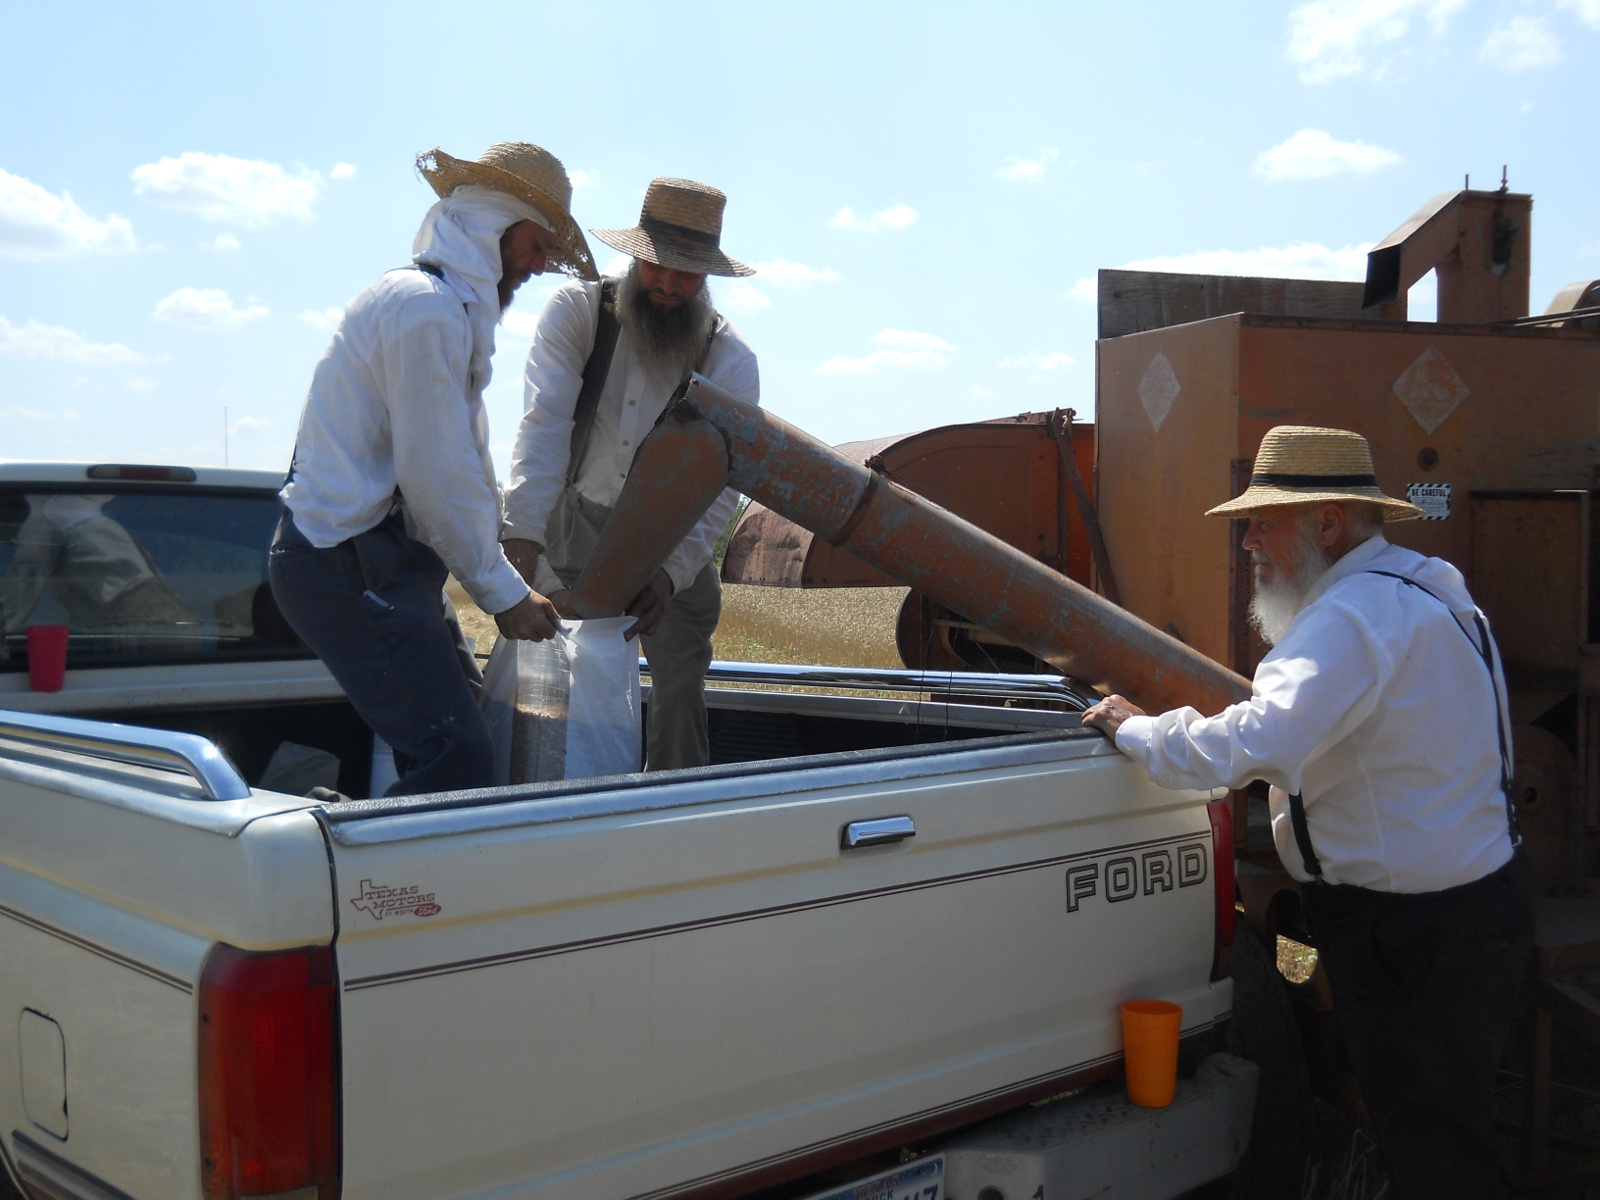
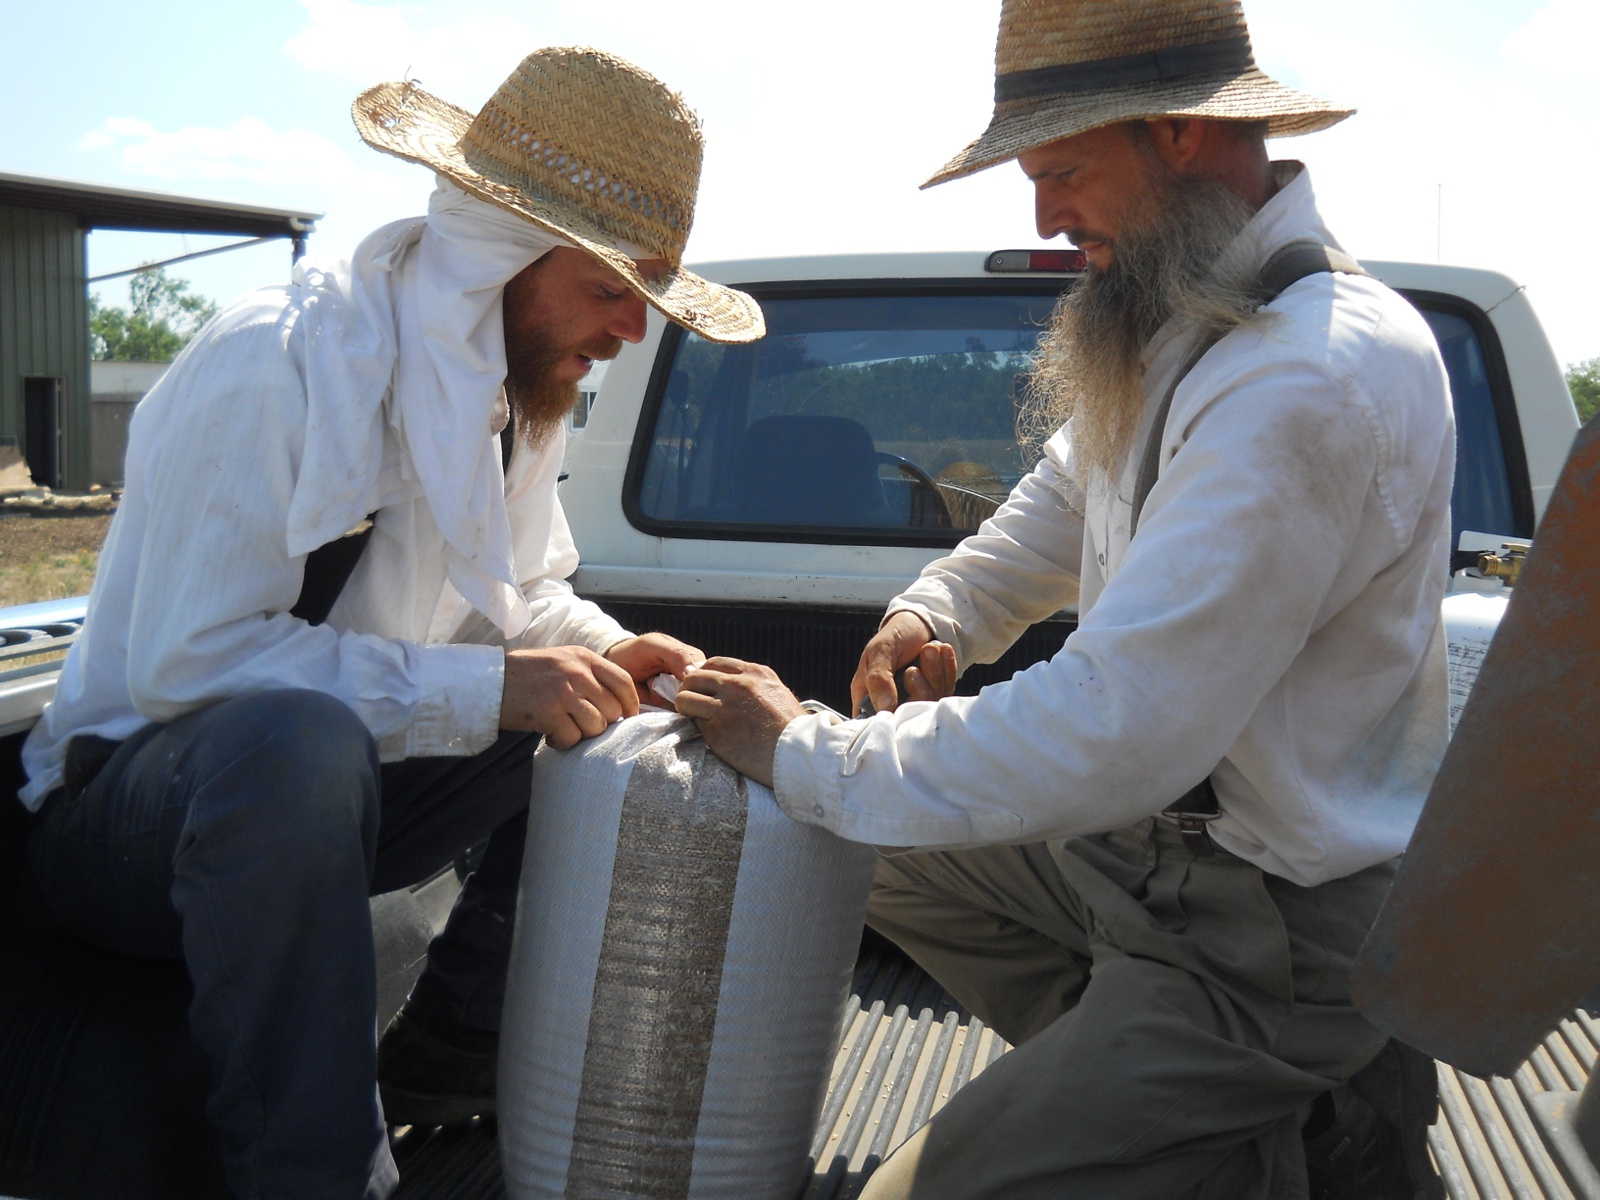
With the combine’s grain bin full, with the help of some of the men, we unloaded it into sacks for storage:

Unloading 2012 Wheat Crop into Sacks

And used rebar ties to tie them off:

Tying Off 2012 Wheat Crop Sacks

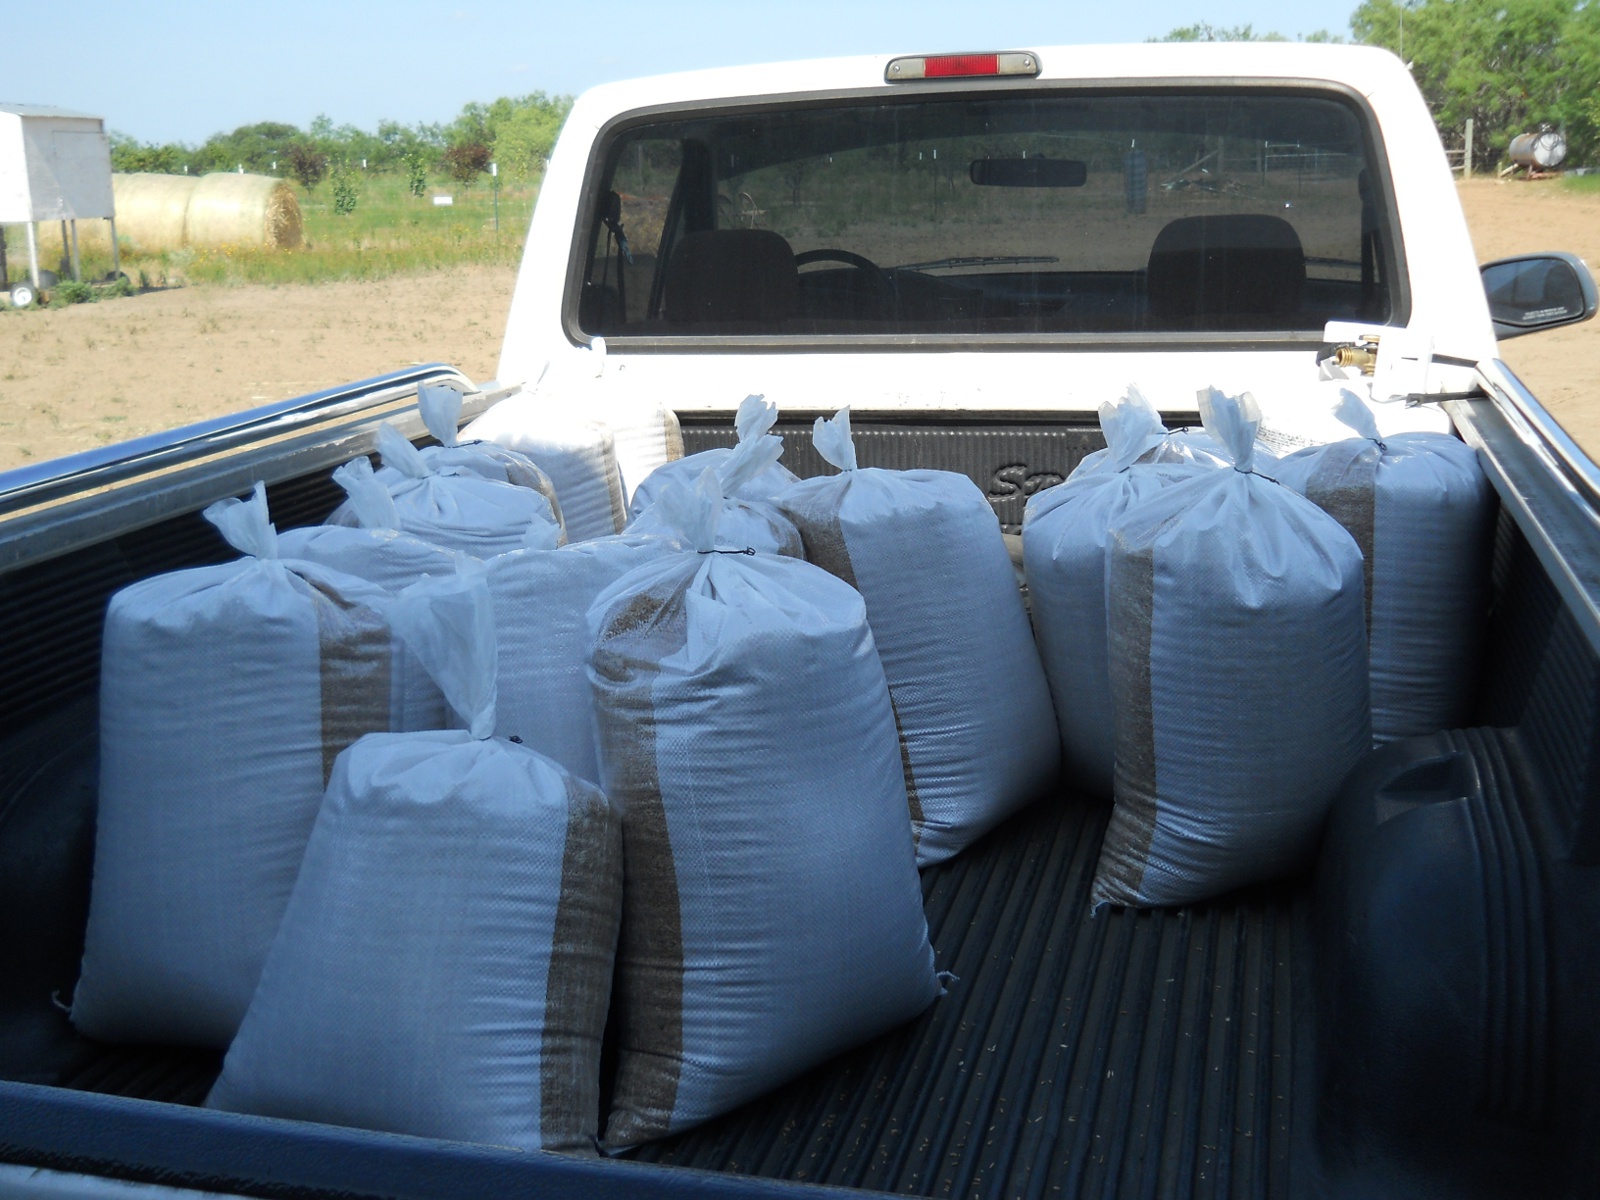
Here is the first haul from that first bin:

2012 Wheat Crop in Sacks

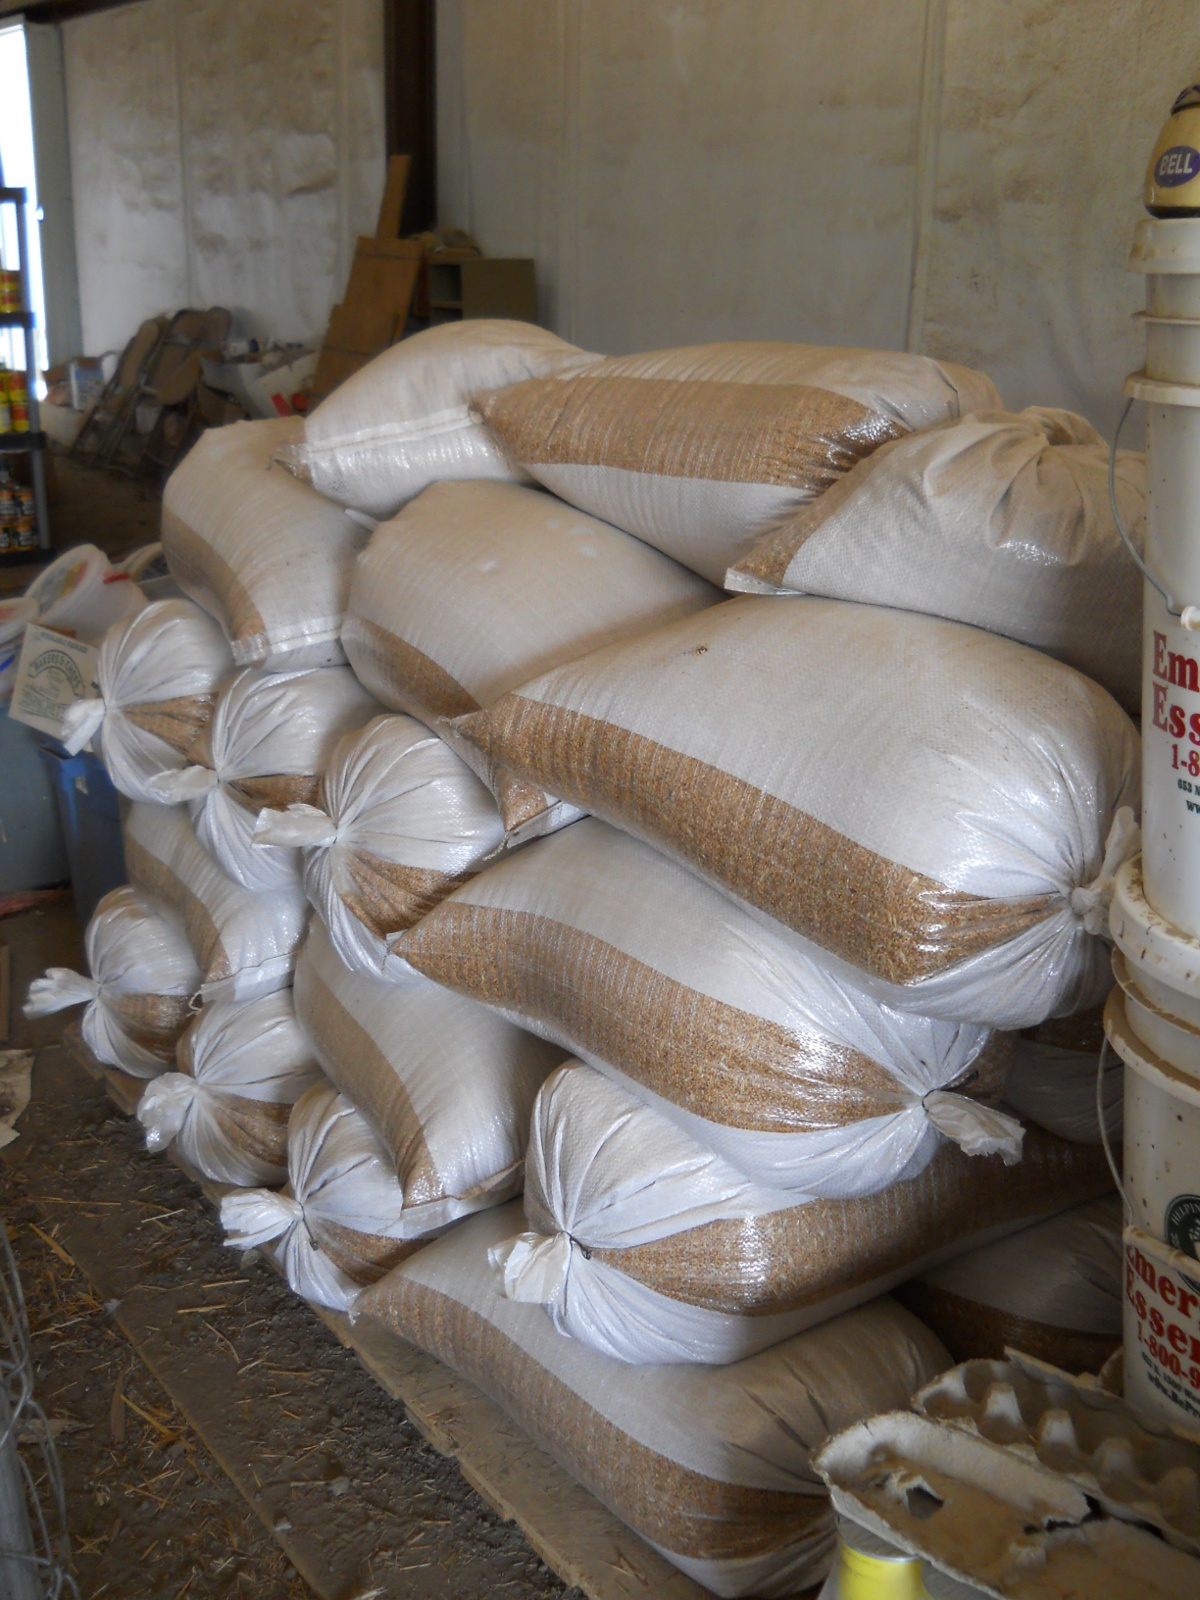
And here is the final stack of wheat sacks:

2012 Wheat Crop Stored in Sacks in the Barn

If you’ve never seen a combine in action, it is pretty amazing the amount of “work” it does, when it’s working and not broken down:

We are so very thankful to the Lord for His granting of a wheat harvest — our first real crop, besides the turnips this year as well. We thank Him for the lessons He teaches us in His word and through work, and we pray He leads us into work that is worship unto him. We pray He thresh and winnow us in purity, and that He help us through that when He does; and we pray we will be presented to His Son one day, a “cleaned” and holy bride.

— David

Garden – Spring 2012 – Update I

After our garlic was harvested this year, I had planned to replant those beds with black-eyed peas we had harvested from Mr. Bunker’s field a couple of years ago, because late spring is about the time to start planting them, and they work well in the heat.

But, the garden beds needed to be prepared with some new soil. We’ve recently started using mulch for actual garden beds, but, even though the mulch we get has composted dirt in it, it also has too many larger wood chips; and so, other folks around here have been sifting their mulch to remove those larger chips; and I decided to follow suit.

Here is the mulch sifter I put together with scrap stuff I had laying around:

Mulch Sifter

And here I am doing the sifting:

Sifting Mulch

Here, you can see the results in the raised bed; and the left-over wood chips can be used for walkway covering:

Mulch Bed and Walkway Mulch After Sifting

And here are the black-eyed peas growing after being planted!

Sifted Mulch Bed Black-Eyed Peas Growing

So, going around the horn, here is how the garden now looks….

This is the okra:

2012 Okra

And the green beans (in the front bed) and the squash and zucchini (in the bed in back):

2012 Green Beans, Squash and Zucchini

And the tomatoes (in the front bed) and the carrots (in the bed in back). Usually, our carrots do really well; but for some reason this year, not too many grew. I did try planting a little scarcely, because usually the carrots are very packed and smaller; and I ended up trying to replant a couple of times too; but it just wasn’t to be this year:

2012 Tomatoes and Carrots

Now, in that previous blog post above about the new mulch gardening, one of the folks here had already tried planting in their mulch-gardening area with some success; so I thought I’d give it a whirl too, to see if anything might grow. I planted some more of the black-eyed peas in half a row as a test case, and lo and behold they started growing!

Mulch Gardening/Eden Black-Eyed Peas Growing

With those results, I went ahead and planted the whole area:

Entire Mulch Gardening/Eden Bed Planted with Black-Eyed Peas

And here, if you look closely (you probably have to click the image), many of them have started to grow too:

Black-Eyed Peas Growing in Mulch Gardening/Eden Bed

Here is some of the produce the Lord has graciously granted:

Squash and Zucchini from the Garden

Instead of pressure canning it, we’ve wanted to try to use the more healthy preservation method of lacto-fermentation. Here is some squash and zucchini in a brine solution, with some mesquite tree leaves that are supposed to help keep the vegetables crunchier:

Lacto-Fermenting Squash and Zucchini

And here is our lacto-fermenting section in the camper. We initially put the jars down in the root cellar, but the lacto-fermenting process actually needs a warmer environment to process correctly. Also, the vegetables would float in the brine. And so, we figure with the combination of the cooler temperatures of the root cellar, and the floating vegetables, they started to mold on top. Well, we picked off the moldy pieces from off the top, brought them into our very warm camper, tried weighing the vegetables down but didn’t find a good way to do that, and instead began to turn the jars upside down and then back right side up every 12 hours, burping them at the same time (to release the gas build-up from the lacto-fermenting process):

Lacto-Fermenting Garden Produce

Once again, we are very thankful to God for the provisions from the garden He has granted, and for the processes He built into His creation to preserve the produce without man-made methods of preservation (like canning, which destroys nutrients, or freezing, which causes dependence on the world for electricity and freezers).

— David

Garlic 2012 – Update I

As the the garlic-growing season went on, it became apparent it was time to pull the garlic. Last year, I believe I waited a little too long, and some plants started to wither; and so, this year, we tried to get them a little earlier. But to me, with some of the leaves yellowing, and a couple of the plants starting to lay over, it was time to get harvesting.

Here is the garlic haul for this year:

Garlic 2012 Picked and in Baskets

And here are the plants drying. We let them dry for about a week, although we had to roll them all up and get them out of the rain a couple of times:

Garlic 2012 Drying

After the drying, it was time to tie them up and get them hanging for the curing process. I think we might have ended up with at least a little more than we used for planting. Some of last year’s garlic ended up being rotten and dried by this year; and so, I’m hoping pulling them a little earlier will help against that:

Garlic 2012 Tied, Hanging and Curing
Garlic 2012 Batch of Garlic Bulbs

We are grateful to the Lord for granting the garlic He did, and we pray for a granting of the health benefits from it that can come with garlic.

— David

Providence’s Perpetuation Provisions: New Kids of 2012

Back in November, it was breeding time for the goats! We had decided in the past to basically in-breed only every other generation, and so we have two pure Nubian billy goats we use for that.

And so, without further ado, allow me to introduce you around the herd!

Our billy Shatner…

2012 Mating Billy Goat Shatner

…was mated with the following does, producing the following offspring:

Winnie (center), and her new buck Obie (we call him Obie from O.B., standing for “over bite,” because he has pretty pronounced one):

New 2012 Goat Buck Obie

If you are interested, here is a video of Obie’s birth, which Sue was able to capture. It’s a little graphic, for obvious reasons; but if you’ve never seen something like this, it is quite fascinating:

Betsy, and her new bucks Bo and Luke (think early ’80s TV show featuring a car named the “General Lee”):

New 2012 Goat Bucks Bo and Luke

Hannah, and her new does Rigby and Pippi (because their ears look like pig tails):

New 2012 Goat Does Pippy and Rigby

Pammy, with her new does PJ (for Pammy Jr., as she looks like her mother; and Sandy, like a white, sandy beach):

New 2012 Goat Does PJ and Sandy

Lucy, with her new buck Lester (from William Shatner’s daughter Leslie, since he looks a lot like his sire Shatner):

New 2012 Goat Buck Lester

And then, our billy Rocky…

2012 Mating Billy Goat Rocky

…was mated with the following does, producing the following offspring:

Marie, with her new buck and doe RJ (front) and Raquel (RJ for Rocky Jr., since he looks like his sire; and Raquel, since she does as well):

New 2012 Goat Buck and Doe RJ and Raquel

Nellie, with her new buck Melvin (from his coat looking velvety smooth, and Mel Torme being called the “Velvet Fog”):

New 2012 Goat Buck Melvin

Gracie, with her new buck Albert (Princess Grace’s son is Prince Albert):

New 2012 Goat Buck Albert

*

Gracie had another kid, whom she sadly rejected. And so, we sort of “adopted” (and I mean that loosely, not like adopting a pet today), and named him Junior:

New 2012 Goat Buck Junior

And here Junior and Albert are together. They do often hang out, so my guess is that they have a sense for each other:

New 2012 Goat Bucks Junior and Albert

And finally, Tapioca, with her new doe and buck Annie and Spot (Tapi is the goat to the far right in the second scene of the birthing video above). Tapi had a very rough delivery — she was a little older and this was her first kidding, although we’re not sure if that played into it. Whatever the reason, she had one teat squirting blood and water, and that whole side of her udder was purple (looking extremely bruised), and she wouldn’t really get up much at all and walk around and eventually stopped drinking water. It was very hot outside, and she had flies eating the skin of her udder, ears, snout, arms, etc. — I tried spraying eucalyptus essential oils on her udder, as I read that might help keep them away, and because we had some; but it didn’t work. We had a dilemma with that too — being as hot as it was, we made some shade over her, but it was too hot for the flies as well; so, her being in the sun was better to keep the flies away but had her in direct sunlight, and putting her under the shade brought the flies back in. Sadly, in the end, we decided it was best to euthanize her; and so, we had two more orphans on our hands — the doe we decided to call Annie (for Little Orphan Annie) and the buck Spot (because he looks like a dalmatian):

New 2012 Goat Doe and Buck Annie and Spot

Here is a video tour of the new herd:

And here is feeding time with the orphans:

As I mention in the tour video, the Lord showed His graces with the orphans in allowing other kids to be born on the same day, so we could “steal” some colostrum from the other mothers to get some into the orphans, as the colostrum has things in it, which apparently are adapted to the local area, to help the immune systems of newborns. We have had to use some milk replacer to feed the orphans, but now that the kids are over a month old, we’re able to use mostly milk from the other mothers.

Both orphan experiences, for different reasons, were somewhat difficult; but we thank the Lord for His help through them, and for the health of the orphans and all of the new kids.

We are very grateful to God for the increase in the herd, for the colostrum He granted for the orphans, for the increase in healthy goat milk; and we pray for help in proper management and for provisions for the herd.

— David

A New Bee-ginning

After building a top bar bee hive a couple of years ago or so, with the drought last year, I figured then wasn’t the time to try to start a bee colony. But, after the winter rains we had, I became hopeful for this year; and so, I ordered a package of bees from R Weaver Apiary in Texas. I decided to purchase the standard Italian bees, and have the queen marked (so we could track her more easily) but with her wings not clipped, as I read that it’s possible the colony can interpret the clipped wings as damage to the queen, for which they will kill her and make a new one.

Beforehand, I had to decide on and prepare a location for them. I wanted somewhere in the wooded area farther from the open fields and the cold north winter winds, under oak trees for summer shade, with hopefully a view of the southern sky for possible winter sun; and then I wanted to fully enclose them in so as to further protect them from winter north winds and also various animals (like our cattle and also, hopefully, harmful critters).

And so, here is the location I ended up choosing, shown after clearing some of the underbrush:

Bees 2012 Bee Hive Fenced Area Location

And here it is with the post holes for the fence dug:

Bees 2012 Fenced Area Post Holes

I decided to use treated wood around, including the fence slats (which I chose for maximum wind protection); and here is the beginning of assembling the first wall. After measuring for and attaching the cross-piece 2x4s, I squared the “box” from corner to corner before adding the third cross piece in the center:

Bees 2012 Building First Wall of Fenced Area

And here it is complete:

Bees 2012 First Wall of Fenced Area Complete

And standing:

Bees 2012 First Wall of Fenced Area Raised

Here is the second wall:

Bees 2012 Second Wall of Fenced Area Raised

And the third wall:

Bees 2012 Third Wall of Fenced Area Raised

And the fourth, half wall. In order to line up the fence slats next to each other, it was necessary to use bar clamps to bend over one end after securing the other end; and here I’m using the clamp in the middle to bring the fence slats together before securing them to the cross piece. For the longer walls, I had to string several bar clamps together:

Bees 2012 Fourth Wall of Fenced Area with Clamp Over Fence Slats

And here is that fourth wall raised:

Bees 2012 Fourth Wall of Fenced Area Raised

In the original design for the top bar bee hive, if I interpreted correctly the instructions for the false back, which is used to keep the bees in a smaller area in the hive, particularly during the winter so they can stay warm more easily, I cut the bottom of the false back up 1/2″ from the bottom of the hive. After thinking about it, that didn’t quite make sense to me if using the false back in back of the hive, because the bees could get under it and go to the empty part of the hive that had no exit. And so, to create a true false back, I tacked on that extra 1/2″ piece. After considering it more though, I suppose I could move the bees to the back (which seems to be where they naturally want to go), and use the false back as a false front by removing the 1/2″ extension, which would allow them access to the empty front area, and thus the hive entrance. But for now, I’m not sure which way it will go; but the extension is removable if need be:

Bees 2012 Top Bar Bee Hive False Back Extension

One thing I didn’t consider with the false back was it fitting in the middle of the hive, given that I did not embed into the wood the plexiglass window I installed. And for that, I had to notch out the side of the false back:

Bees 2012 Top Bar Bee Hive False Back Notched to Fit Over Plexiglass Window

I decided to place the top bar bee hive on sawhorses, using them as a stand, to get them off the ground and keep the entrance “suspended” in mid air, thus hopefully making it harder for little critters to get to the entrance:

Bees 2012 Top Bar Bee Hive on Sawhorses

And I “tied” the bee hive legs to the sawhorses using plummer’s tape:

Bees 2012 Top Bar Bee Hive Plummer's Taped to Sawhorses

Here is the bee area fenced in with the door hung and closed:

Bees 2012 Fenced Area with Door Hung

And then with the door open:

Bees 2012 Fenced Area with Door Open

And here are the delivered bees!

Bees 2012 in Shipped Box

After donning the folding bee veil (something I read suggested a folding veil was easier to store away) I purchased from Weaver, which slides over a hat (I’m using a hard-hat helmet now, which works better and doesn’t deform my straw hat), putting on some gloves and taping the wrists closed, and spraying the bees in the package with sugar water (which I read distracts them and calms them very well), I took the bee package box, “clunked” it on the ground one time (I read doing it multiple times can disturb the bees more) to get them all to the bottom of the box, and went in and placed the bee package in the hive:

Bees 2012 Placing Box in Top Bar Bee Hive

After trying to figure out how it was all put together (I thought the top of the honey water can was just a lid), I removed the honey-water can using my knife to slide it up slightly but enough to grab it with my fingers:

Bees 2012 Removing Honey Water Can

And then removed the queen cage:

Bees 2012 Queen Cage

I had heard to hang the queen cage between two top bars, and so I taped the little cage “handle” to one of the top bars:

Bees 2012 Placing the Queen Cage
Bees 2012 Top Bar Bee Hive with Queen Cage Hung

And here are the bees in their package box in the hive, moving in to their new digs:

Bees 2012 Box Placed in Top Bar Bee Hive

And then I replaced the missing bars and carefully closed the hive by trying to sweep the bees out of the way with my hand.

The next day, I went back and opened the hive to see how the queen was progressing in being released from the cage. There is apparently a candy plug that the bees eat away eventually to release the queen, but in my ignorance, figured it would only take a day, having since learned it can apparently take longer. At any rate, I had read that some people poke holes through the candy plug to help along the process, and had decided to do that if the queen was still in her cage, which she was. I brought an awl with me, began trying to push it through, and it popped the whole candy plug into the cage, and here came queenie waltzing out onto the top of the top bars. Uh oh…panic! She flew into the air, but then I found her again on top of the top bars, with other bees surrounding her; and I quickly took the small sweeping brush I had brought, and tried to sweep her and cluster of “attendants” into the bee hive through the space of one of the top bars I had removed. At the time, I thought I had swept them in; and so, I closed everything up and hoped and prayed that I had and for the best of the situation.

After doing a little more study, that bees could just abscond (leave) the hive for whatever reason, even after several days; and after watching a video on tips for installing new bees, I dropped in a few drops of food-grade lemongrass essential oils into the hive, as apparently bees perceive the smell of lemon as home. I also took the remaining honey water and put it in a little bowl on the ground with lots of twigs in it, especially ones leaning against the brim going into the water, so the bees would have something to stand on, as they can drown in open water.

Well, over the next several days, it appeared I did get the queen in there, as there was a continuous large cluster of bees in the back of the hive; and, after about two weeks, here are the bees congregating in the front:

Bees 2012 Comb Being Built

And after a about three weeks, here is the progress!

Bees 2012 Comb Being Built

We are grateful to the Lord for the example of these busy workers, and we pray we manage well these little well-ordered creatures, so we have more pollinators around, and for honey eventually for food preservation (and a little sweetener!), for His glory and the benefit of His Church.

— David

David’s Digest: God OR Mammon

Webster’s 1828 dictionary defines the word “serve” as follows:

SERVE, v.t. serv. [L. servio. This verb is supposed to be from the noun servus, a servant or slave, and this from servo, to keep.]

1. To work for; to bestow the labor of body and mind in the employment of another.

Jacob loved Rachel and said, I will serve thee seven years for Rachel thy youngest daughter. Gen. 29.

No man can serve two masters. Matt. 6.

2. To act as the minister of; to perform official duties to; as, a minister serves his prince.

Had I served God as diligently as I have served the king, he would not have given me over in my gray hairs. Cardinal Woolsey.

3. To attend at command; to wait on.

A goddess among gods, ador’d and serv’d

By angels numberless, thy daily train. Milton.

4. To obey servilely or meanly. be not to wealth a servant.

5. To supply with food; as, to be served in plate.

6. To be subservient or subordinate to.

Bodies bright and greater should not serve

The less not bright. Milton.

7. To perform the duties required in; as, the curate served two churches.

8. To obey; to perform duties in the employment of; as, to serve the king or the country in the army or navy.

9. To be sufficient, or to promote; as, to serve one’s turn, end or purpose.

10. To help by good offices; as, to serve one’s country.

11. To comply with; to submit to.

They think herein we serve the time, because thereby we either hold or seek preferment. Hooker.

12. To be sufficient for; to satisfy; to content.

One half pint bottle serves them both to dine,

And is at once their vinegar and wine. Pope.

13. To be in the place of any thing to one. A sofa serves the Turks for a seat and a couch.

14. To treat; to requite; as, he served me ungratefully; he served me very ill; We say also, he served me a trick, that is he deceived me, or practiced an artifice on me.

15. In Scripture and theology, to obey and worship; to act in conformity to the law of a superior, and treat him with due reverence.

Fear the Lord and serve him in sincerity and truth. As for me and my house, we will serve the lord. Josh. 24.

16. In a bad sense, to obey; to yield compliance or act according to.

For the most part, each of the above definitions is related, in that 1) each involves how time is spent of the servant, regardless of what or who is being served, and 2) there is a commitment and submission of the servant to that which is being served.

Matt 6:24 says, “No man can serve two masters: for either he will hate the one, and love the other; or else he will hold to the one, and despise the other. Ye cannot serve God and mammon.

Webster’s 1828 dictionary defines mammon as the following:

MAM’MON, n. Riches; wealth; or the god or riches.

or a mammonist as:

MAM’MONIST, n. A person devoted to the acquisition of wealth; one whose affections are placed supremely on riches; a worldling.

As I stated, and as is demonstrated in the dictionary definitions above, servanthood by nature involves spending time doing the serving. I would say further that this implies the reverse to be true: what you spend your time doing, you serve.

Now, the context of the Bible verse above is the Lord Christ discussing the spiritual condition of one’s heart, as evidenced by where his “treasure” is, and that the treasures of the world should not be sought, because if the Lord is lord of your life, you should not be concerned about the temporal necessities of life:

Matt 6:19-34 – “19 Lay not up for yourselves treasures upon earth, where moth and rust doth corrupt, and where thieves break through and steal: 20 But lay up for yourselves treasures in heaven, where neither moth nor rust doth corrupt, and where thieves do not break through nor steal: 21 For where your treasure is, there will your heart be also. 22 The light of the body is the eye: if therefore thine eye be single, thy whole body shall be full of light. 23 But if thine eye be evil, thy whole body shall be full of darkness. If therefore the light that is in thee be darkness, how great is that darkness! 24 No man can serve two masters: for either he will hate the one, and love the other; or else he will hold to the one, and despise the other. Ye cannot serve God and mammon. 25 Therefore I say unto you, Take no thought for your life, what ye shall eat, or what ye shall drink; nor yet for your body, what ye shall put on. Is not the life more than meat, and the body than raiment? 26 Behold the fowls of the air: for they sow not, neither do they reap, nor gather into barns; yet your heavenly Father feedeth them. Are ye not much better than they? 27 Which of you by taking thought can add one cubit unto his stature? 28 And why take ye thought for raiment? Consider the lilies of the field, how they grow; they toil not, neither do they spin: 29 And yet I say unto you, That even Solomon in all his glory was not arrayed like one of these. 30 Wherefore, if God so clothe the grass of the field, which to day is, and to morrow is cast into the oven, shall he not much more clothe you, O ye of little faith? 31 Therefore take no thought, saying, What shall we eat? or, What shall we drink? or, Wherewithal shall we be clothed? 32 (For after all these things do the Gentiles seek:) for your heavenly Father knoweth that ye have need of all these things. 33 But seek ye first the kingdom of God, and his righteousness; and all these things shall be added unto you. 34 Take therefore no thought for the morrow: for the morrow shall take thought for the things of itself. Sufficient unto the day is the evil thereof.”

So, spending one’s time seeking riches, even under the guise of them being for the necessities of life, is, according to these verses, not godly living, because if you are spending your time doing that, you are thus serving those riches.

This is further evidenced by dependence. Why do people spend so much time in the service of obtaining money? It’s because they NEED the money to survive — they are dependent on it. Don’t believe me? What would happen to people’s ability to eat and drink if they lost their jobs and couldn’t find other ones, or if money became worthless? Unless they are growing their own food and have their own source of water, they would die. Dependency requires servitude.

Sound familiar? Does not a person spending all day at a corporate job, in a career, earning a paycheck so he can buy food and water, fit these descriptions?

Now, once again, verse 24 says one “cannot serve God and mammon,” which means the service of these are mutually exclusive: if you are serving one, you cannot be serving the other. So, if one’s time is spent in pursuit of money, that makes that person a servant of money; and if that person depends on that money for survival, that person is further a servant of money. And therefore, in that, that person cannot be serving God.

What is it you’re spending most of your day doing, and on what do you depend for your life necessities; and thus, what do you serve? And so then, Whom are you not serving?

— David

Providence’s Perpetuation Provisions: Chicks, Ahoy!

The Lord has shown extra graces this year in the amount of broody hens we’ve had. We almost can’t keep up, for which we’re very thankful!

And so, after the first round of chicks hatched for 2012, here is the next round from the hens that were in the “nurseries” mentioned in that previous blog post.

This was the next hen to hatch some out (this one wasn’t mentioned in that last blog post; these chicks are Group 2). We had her in our chicken pen area:

New Chicks 2012 Second Hatching

Going onto the “nursery,” this was the next hen to hatch her chicks (Group 3):

New Chicks 2012 Third Hatching

And then here’s the next one (Group 4). You can see the struggling one at the bottom — I didn’t think it was going to make it; and it looked like it had trouble walking; but by God’s graces it did, as you can see in the video below. I did add some “shackles” to its legs using duct tape, as it looked like it might have been spraddle-legged; I don’t know if it was for sure, but if it was, the shackles seemed to help (I got the shackles info from http://www.poultryhelp.com/spraddle.html, although our little chick didn’t look as bad as the example on that page). We have tried the shackles before on a very young rooster, and by God’s granting the shackles definitely helped:

New Chicks 2012 Fourth Hatching

And then here’s the hen and her chicks that are in the piano room (Group 5). This one also had a chick that really looked like it wasn’t going to make it — it had trouble standing, looked very sleepy, and couldn’t really get around very much. I actually put the spraddle-leg shackles on it too, but it was having so much trouble dealing with them (it was just falling over with its talons pointed backward) that I removed them. I thought for sure it wasn’t going to make it; but, again by God’s granting, it did, and it seems to be getting around pretty well now:

New Chicks 2012 Fifth Hatching

Finally, there were a couple of broody hens in our main chicken tractor that we just didn’t have a place for in any of our other buildings — they were both in the same nest; and so, we waited until they were supposed to hatch them, and they did hatch two before we could move them. Then, having removed the mother hen from Group 1 from the previous chick-hatching blog post, we also removed the mother hen from Group 2 that is in the chicken pen area, shuttled Group 1 to the chicken pen, and moved one of the mother hens (we just picked one), the chicks, and the rest of their eggs to the mini-tractor; and since, she has hatched out two more (Group 6):

New Chicks 2012 Sixth Hatching

And here’s a video about them all:

Whew! But, apparently we aren’t done yet, Lord willing — there are now even more broody hens; and so, we plan to keep the shuttling-to-the-chicken-pen area/opening-up-a-nursery-area process going.

This one is scheduled to hatch out next. She decided to get broody in an empty garbage can (which she leaves every once in a while to get food and water), where chickens sometimes lay eggs:

Game Hen Brooding in Garbage Can

And here are the nests in the main chicken tractor. The game hen in the upper right is scheduled next after the garbage can hen, and then we just added eggs under the three Australorp hens on the bottom nests (the other hens I think were just “playing” broody at the time of the picture). I believe the hen in the bottom right nest is one of the ones that helped hatch out Group 6:

More Broody Hens in the Chicken Tractor

And so, once again, we are very thankful to God for this “problem” of many broody hens; and we thank Him for these many safe hatchings.

— David

« Older posts Newer posts »