Our journal of what we pray is our sojourn of life along the narrow way, even the old paths, submitting to the Bible as a light unto both.

Category: food preserving (Page 5 of 5)

Garden 2009 – Spring – Update III – A Borsch is a Borsch, Of Course, Of Course

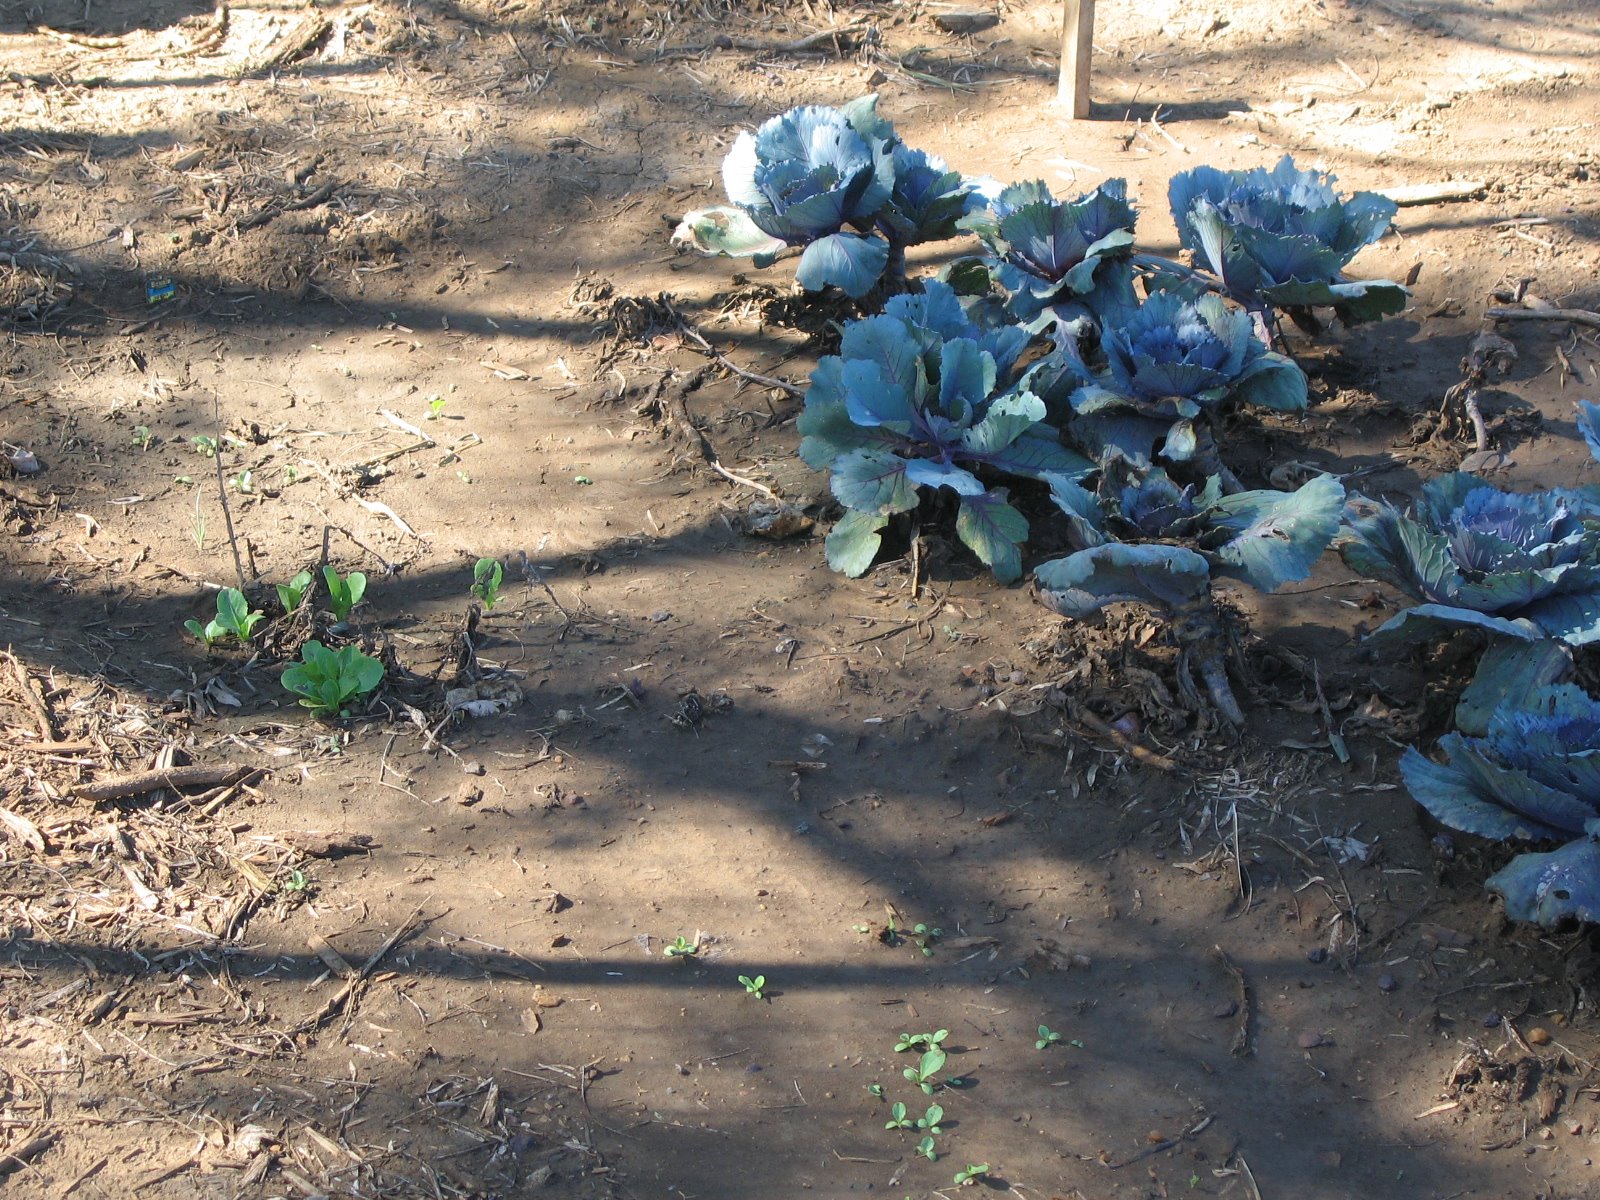
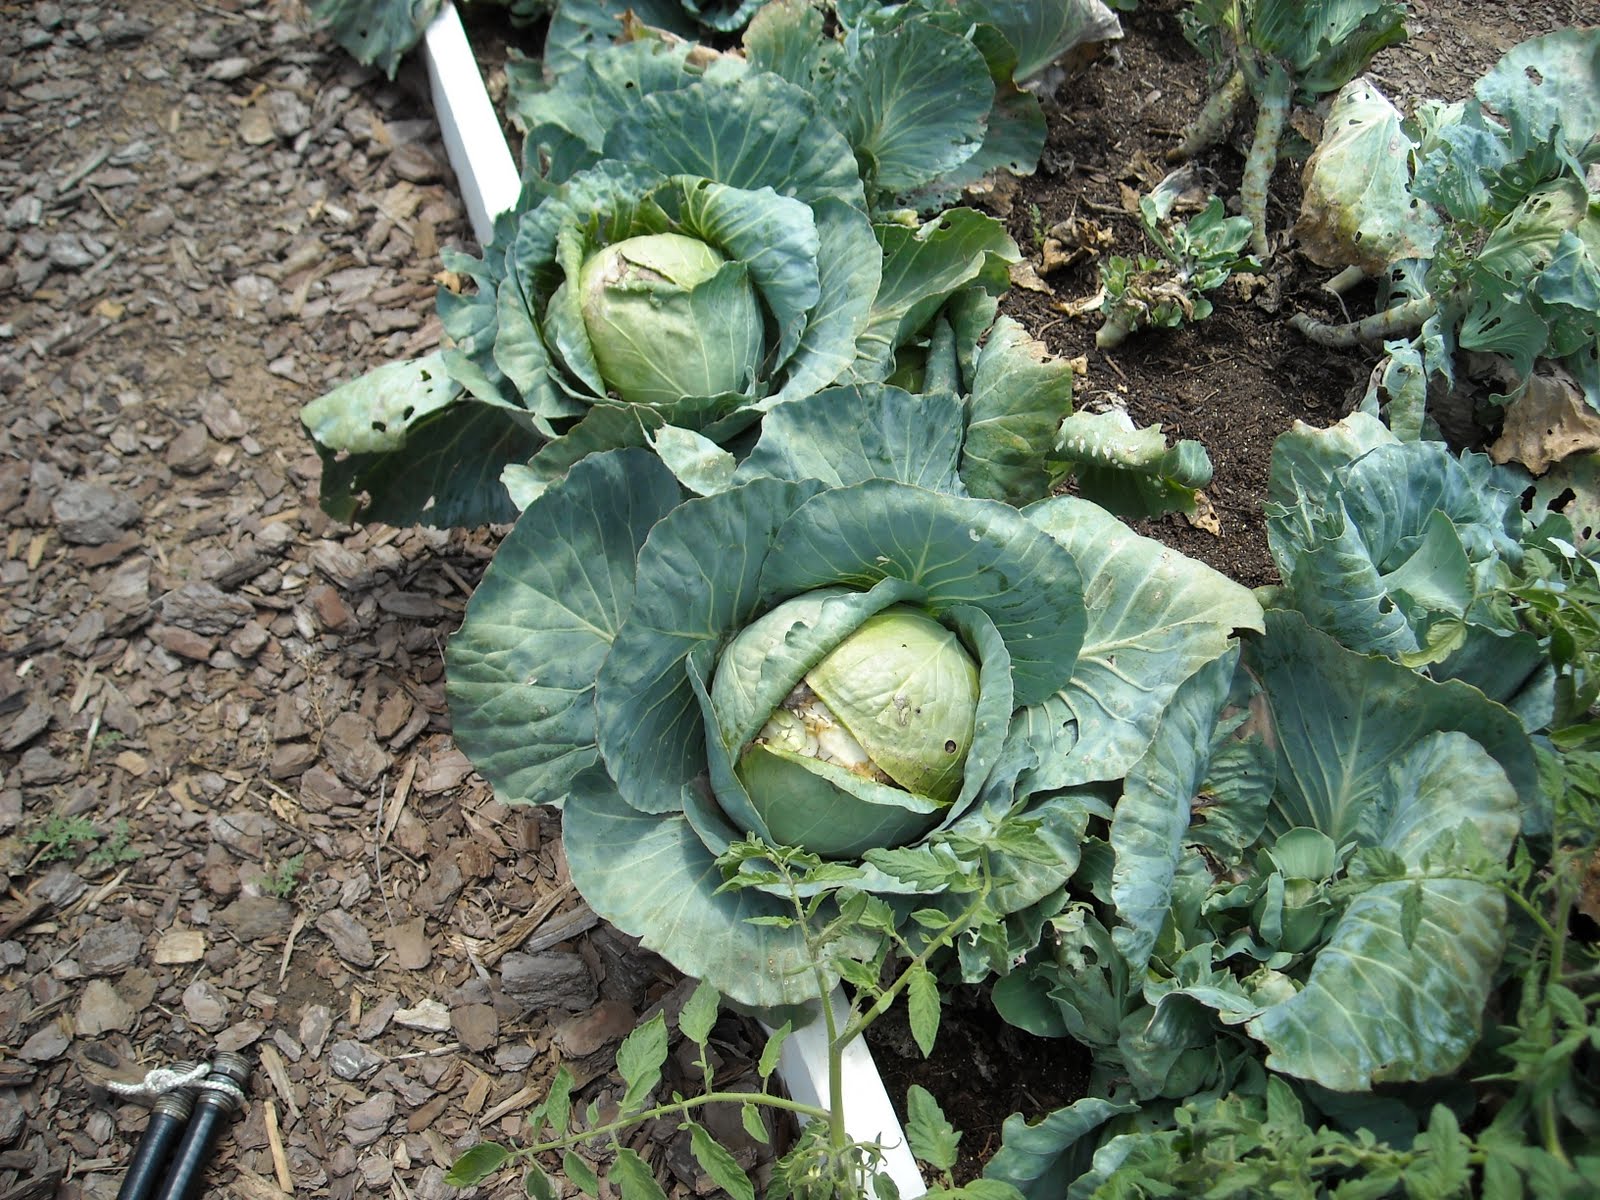
We planted cabbage in our summer garden again this year. If you’ll remember from our garden last year, we didn’t have any cabbage heads to speak of; but this year the Lord has graciously blessed us with large, beautiful cabbage heads to eat fresh and preserve.

I can probably count the number of ounces of cabbage I’ve eaten in my life in single digits. I have nothing against cabbage in the least but just didn’t grow up eating much of it. So I was stumped to find a good way to preserve all of this cabbage with which God had blessed us.

I surfed online a bit under canning cabbage and found a recipe that sounded pretty tasty to me. Fast forward several weeks, and I now have over 60 quarts of borsch in my root cellar! (NOTE: For you proper spellers, “borsch” is, indeed, an approved variant spelling of “borscht.”) I had heard of borsch but had never eaten it to my recollection. I’m not certain if this recipe is an “official” borsch; but, regardless, it’s tasty! Wow! All these years I’ve been missing out! This recipe calls for five pounds of tomatoes per batch, so we were very thankful when we discovered the local produce market was having a sale on tomatoes at about $.50 per pound.

I’ve listed the recipe below in case anybody is panicking like I was, wondering how to capture and preserve their garden cabbage crop. Or if you just have a “hankerin'” for borsch 😀

Here is the official link to the recipe, but I made a few changes so I thought I would post it here also with a few personal notes in italics:

Yield: Eight pints (or four quarts) although I was generous with the ingredients and consistently got five quarts each time.

  • 5 lbs. tomatoes (about 20 medium tomatoes)
  • 8 cups coarsely shredded cabbage (I tried using a grater but realized coarsely chopping the cabbage works just as well and is much faster)
  • 6 cups water
  • 2 cups chopped onions (approx. 2 medium onions)
  • 1 cup chopped apple (approx. 1 medium apple)
  • 2 tablespoons instant beef bouillon (store-bought bouillon contains MSG, so on some of the batches I used pork stock from previous canning sessions of our pigs in place of the six cups of water, and added a little garlic and onion powder seasoning in place of the bouillon; and it worked fine)
  • 2 tablespoons sugar
  • 2 tablespoons lemon juice
  • 1 teaspoon salt
  • 1/8 teaspoon pepper
  1. Wash, peel, remove stem ends and cores, and quarter tomatoes. Use a small spoon to scrape out the excess seeds, if desired. (I didn’t take the time to peel the tomatoes or scrape out any seeds, and it was fine)
  2. In a four to six quart kettle or dutch oven combine all ingredients. Bring to a boil; boil uncovered five minutes.
  3. Ladle hot soup into hot jars, leaving 1/2 inch head space.
  4. Adjust the lids.
  5. Process in canner at 10 pounds, 45 minutes for pints or 55 minutes for quarts. (Please look online for altitude instructions if you live 1,000 feet or more above sea level)6. Makes eight pints (or four quarts) (As I stated before, I was generous with the ingredients and consistently got five quarts)

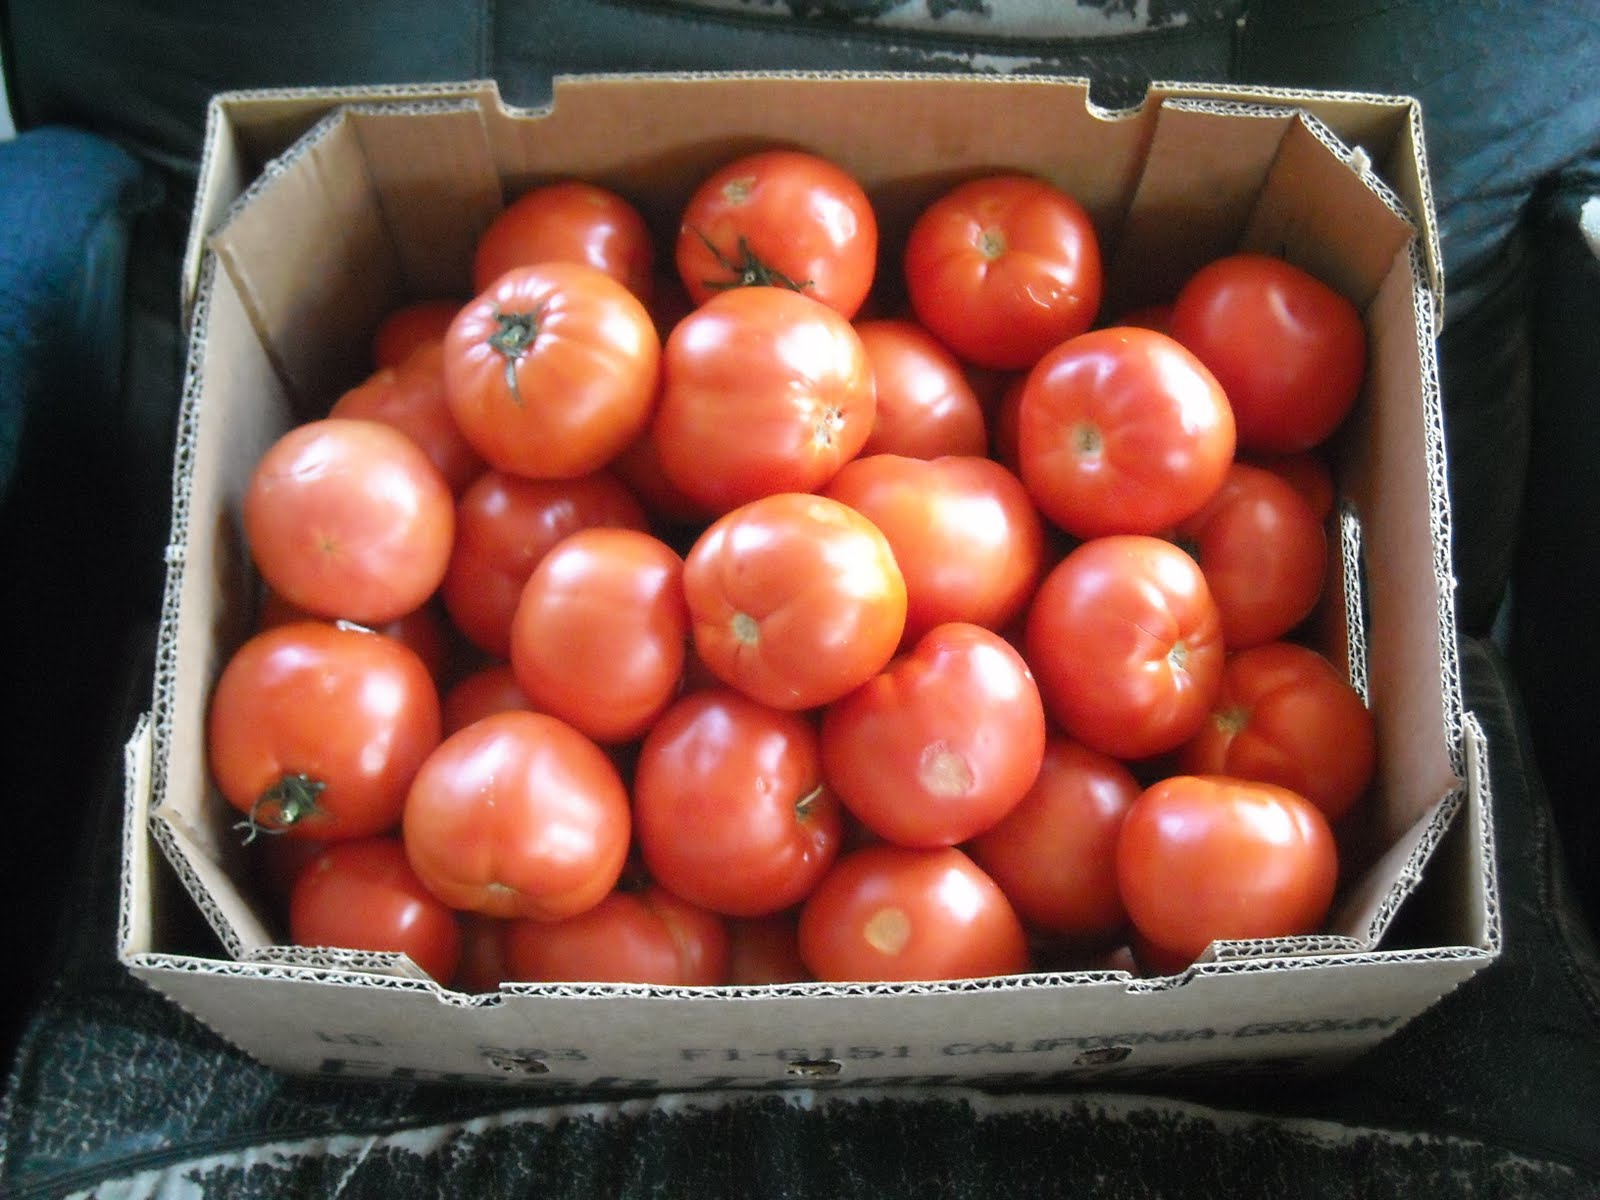
Here are the tomatoes we were blessed to be able to buy very inexpensively. A 20 lb. box yielded three to three and a half batches:

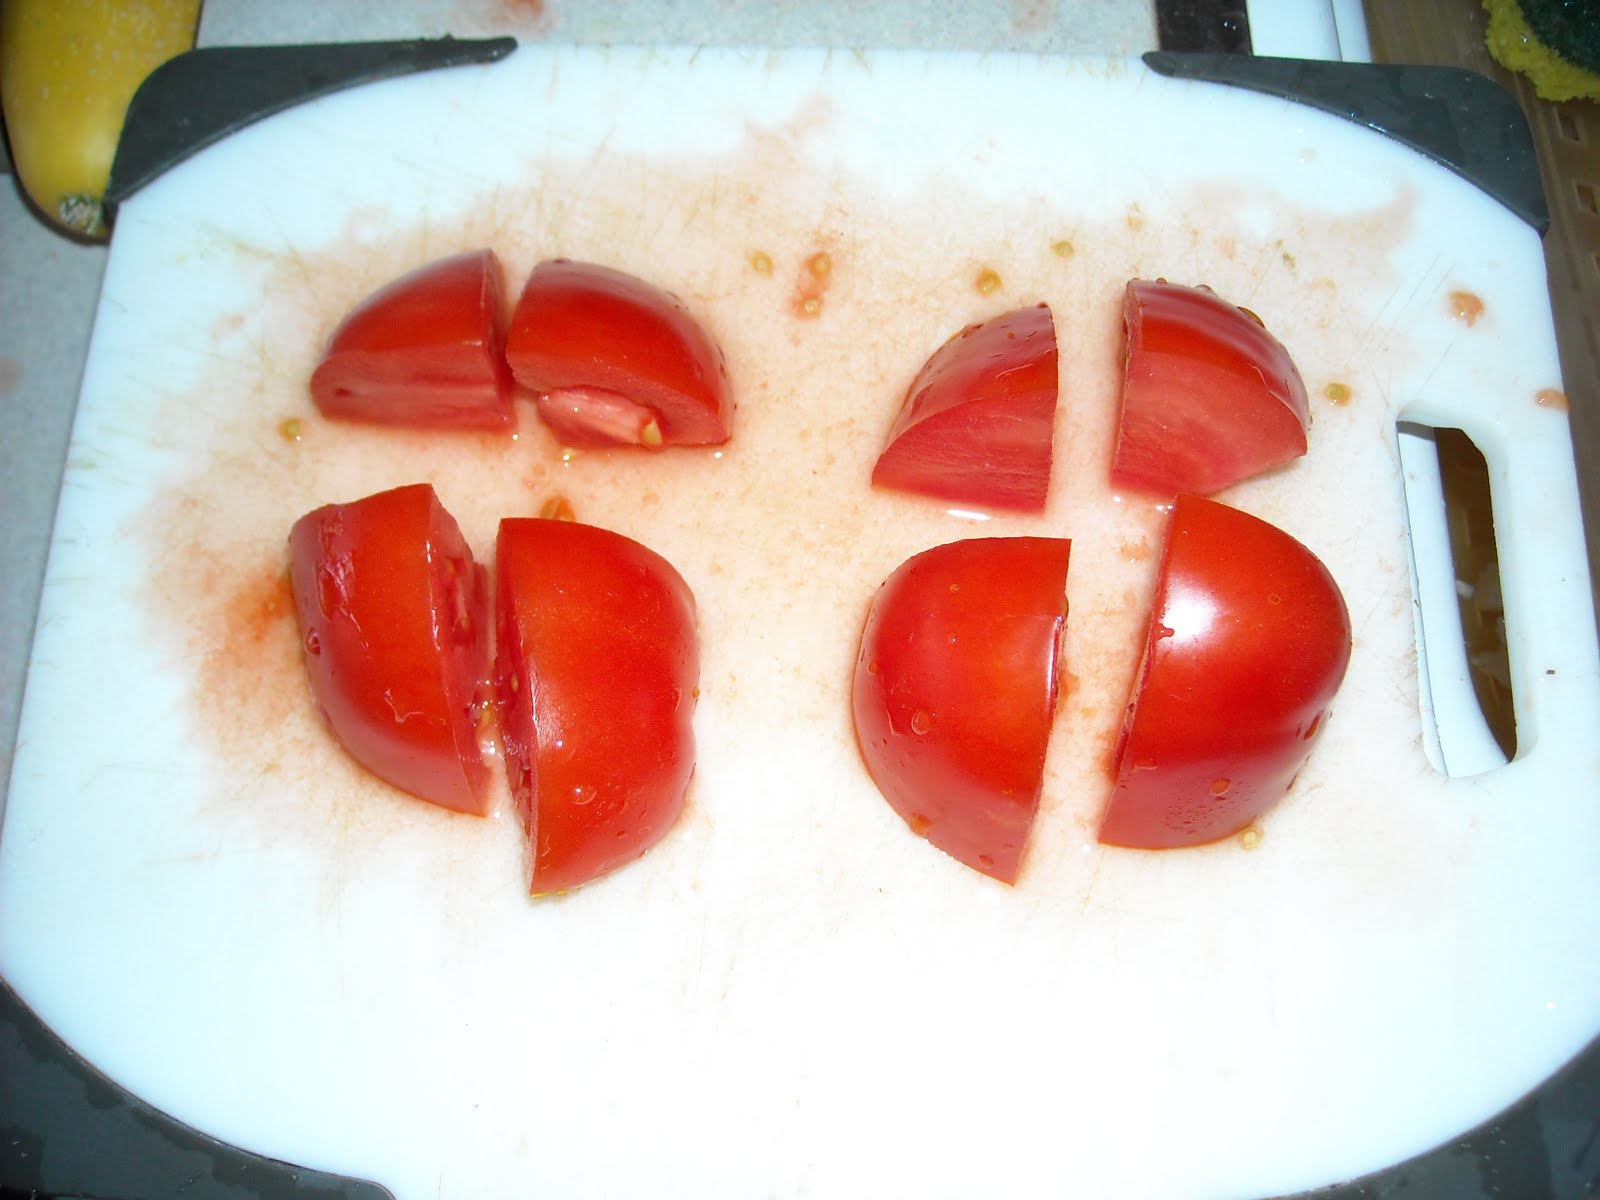
I cut up each tomato in half and then into quarters and placed them in the soup pot:

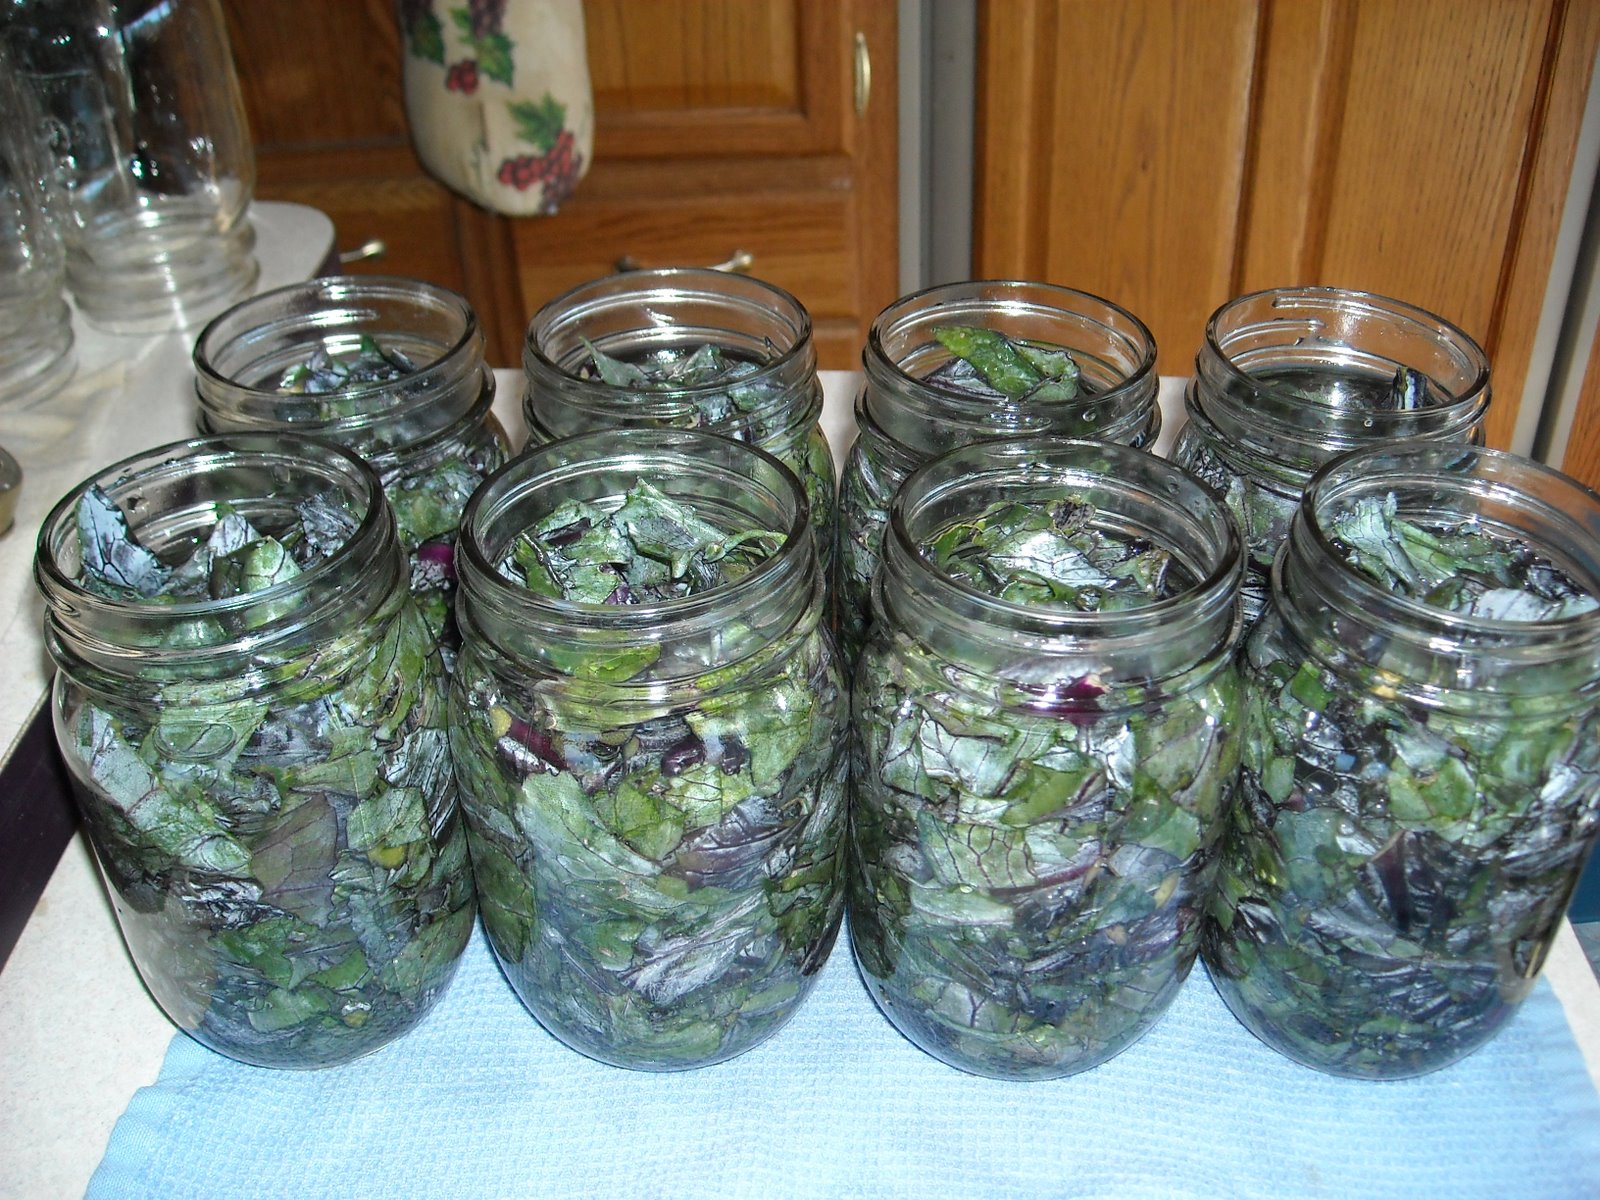
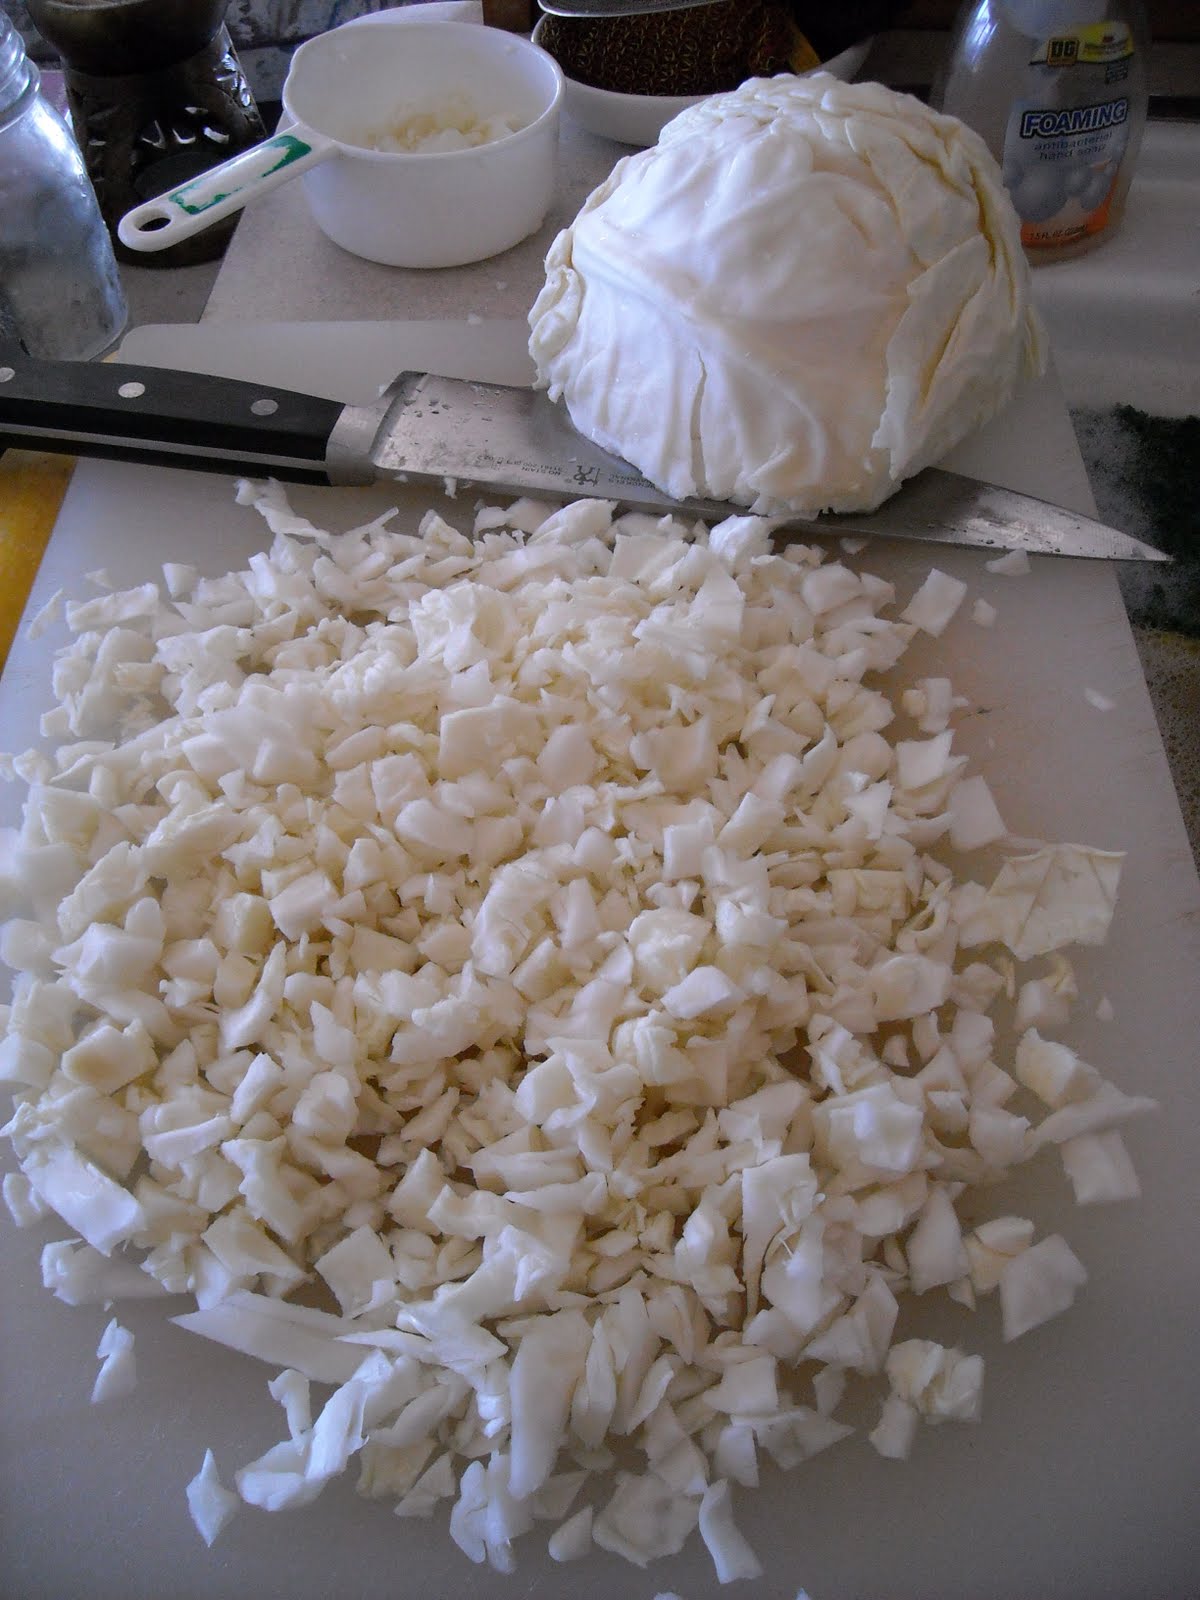
I coarsely chopped up the cabbage and placed it in with the tomatoes:

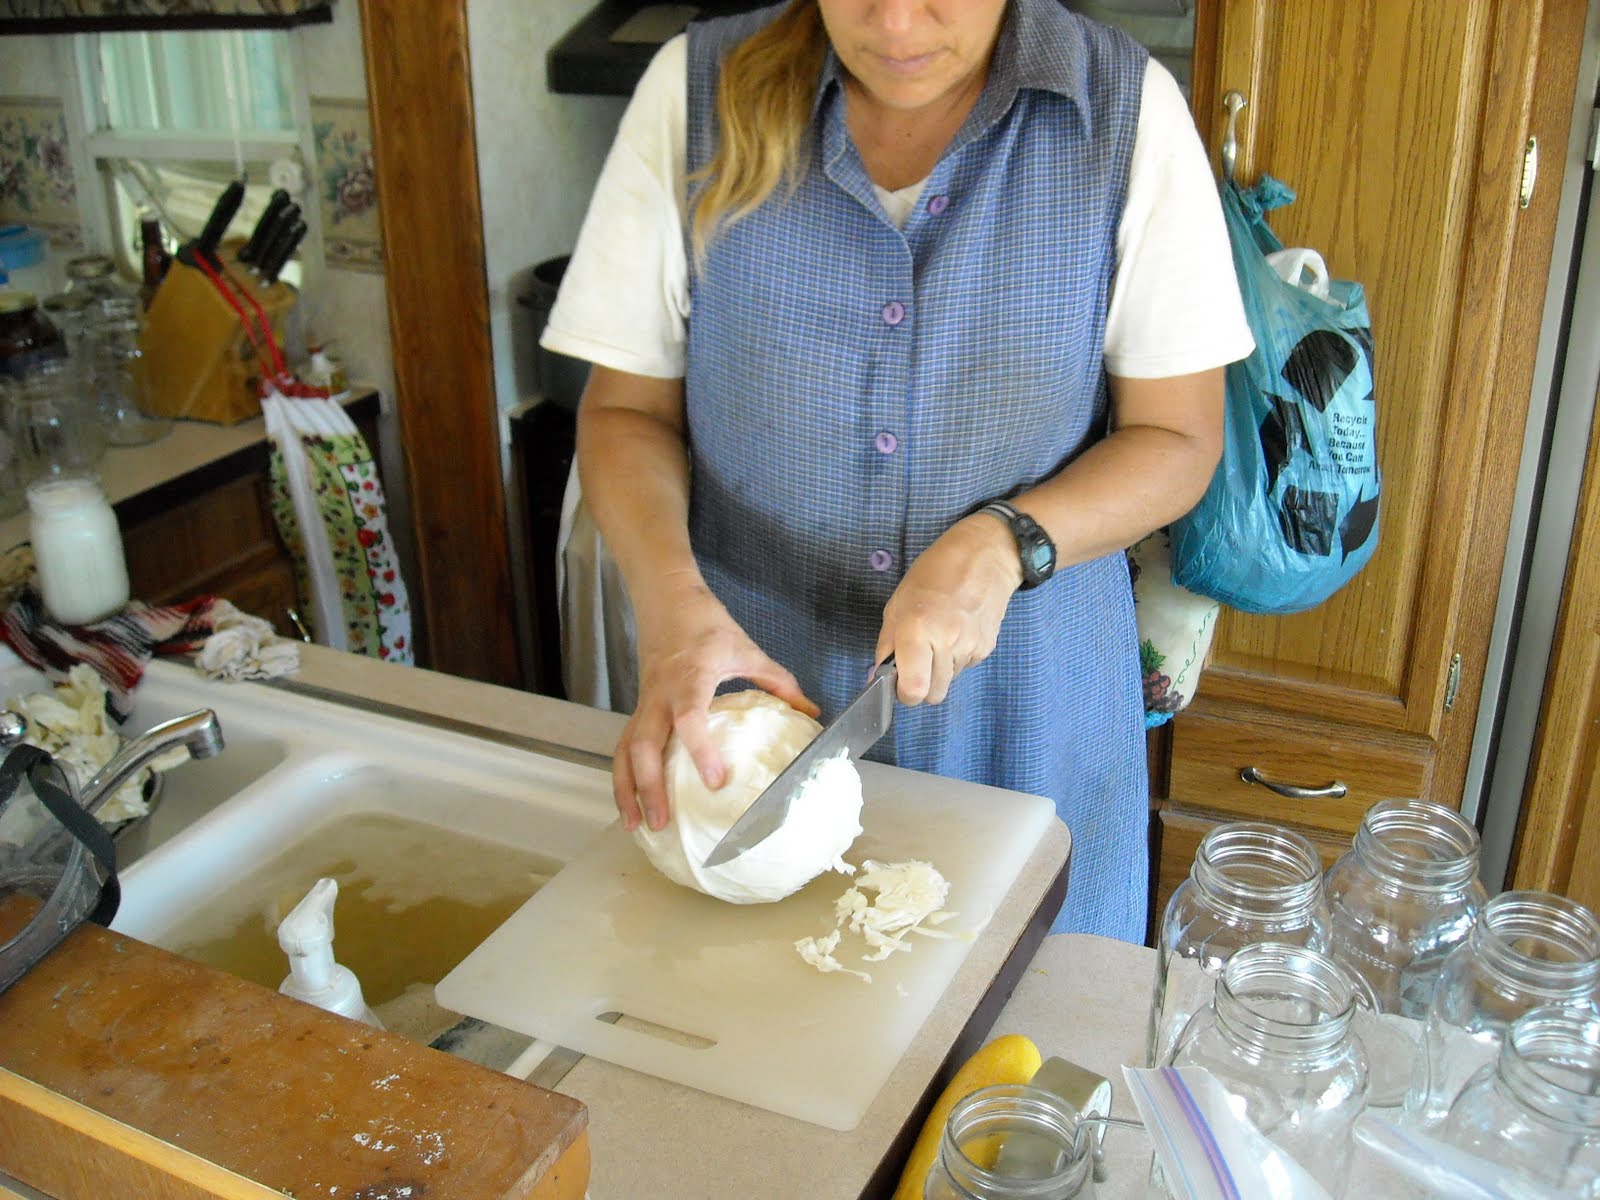
I was amazed at how many cups each head of cabbage yielded:

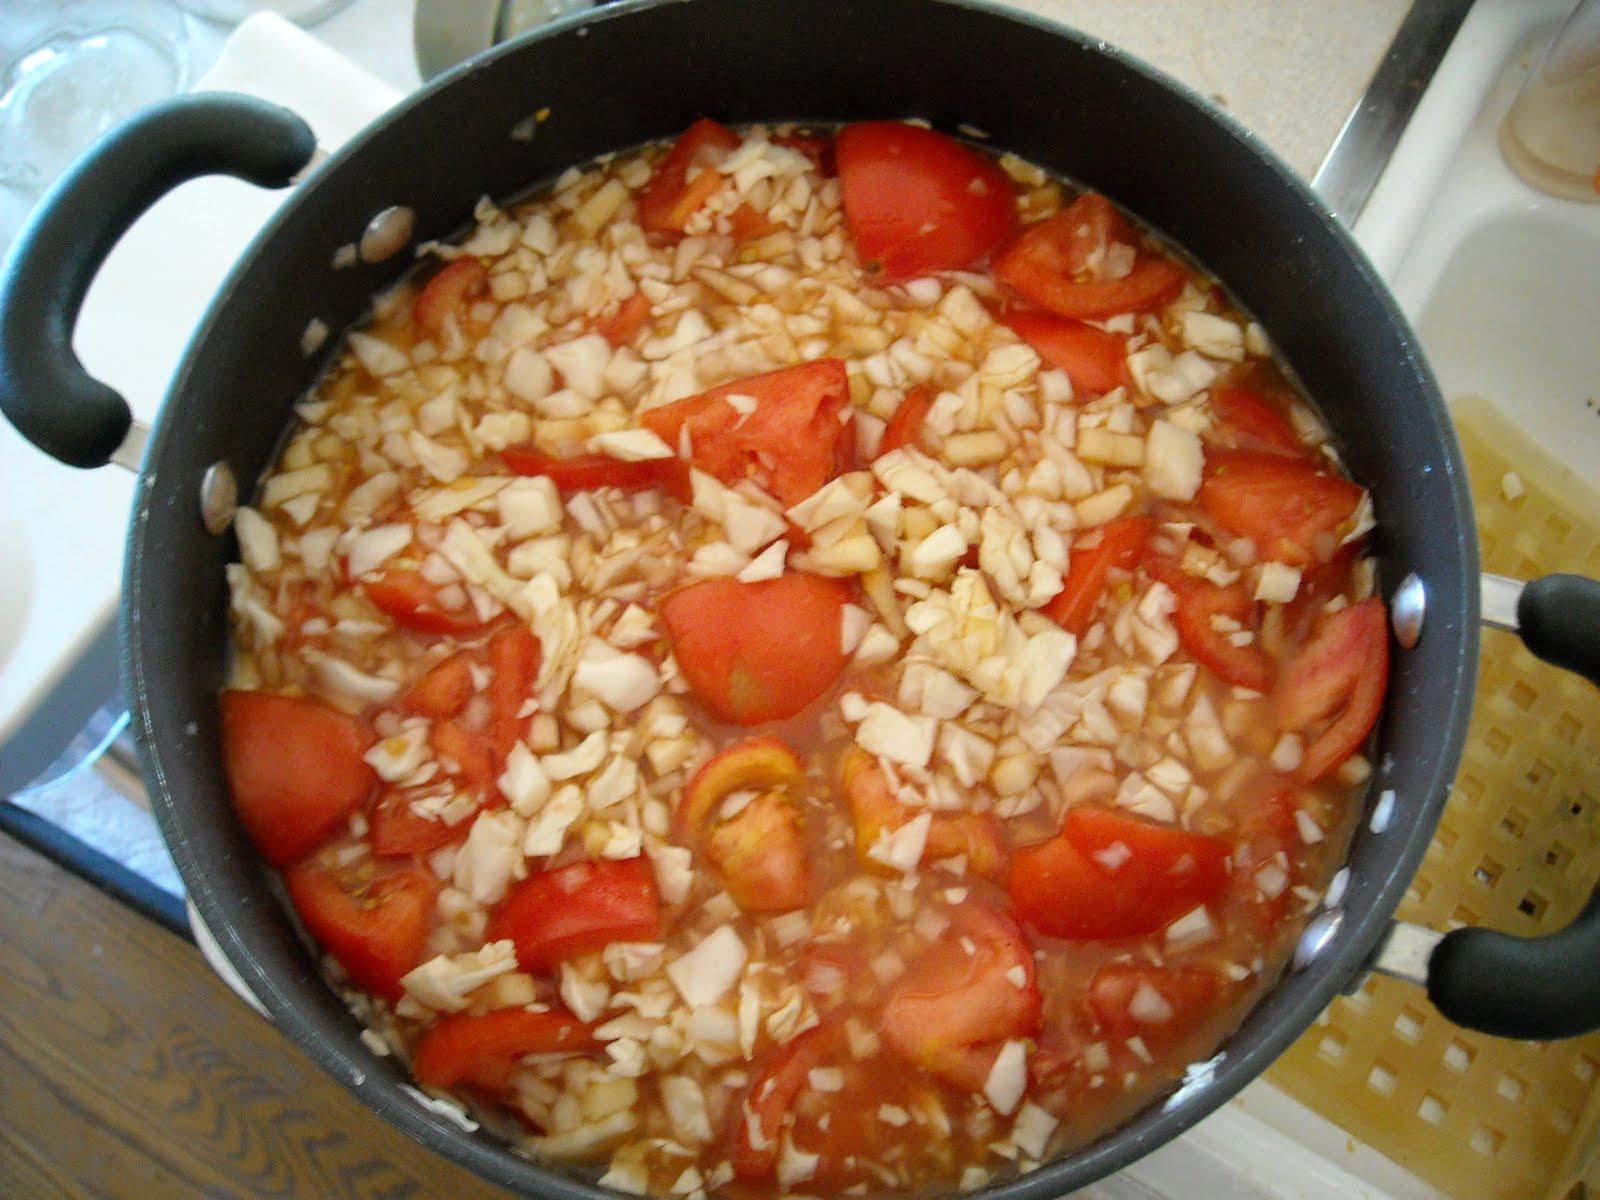
Here are all of the ingredients introducing themselves to each other and ready to be boiled:

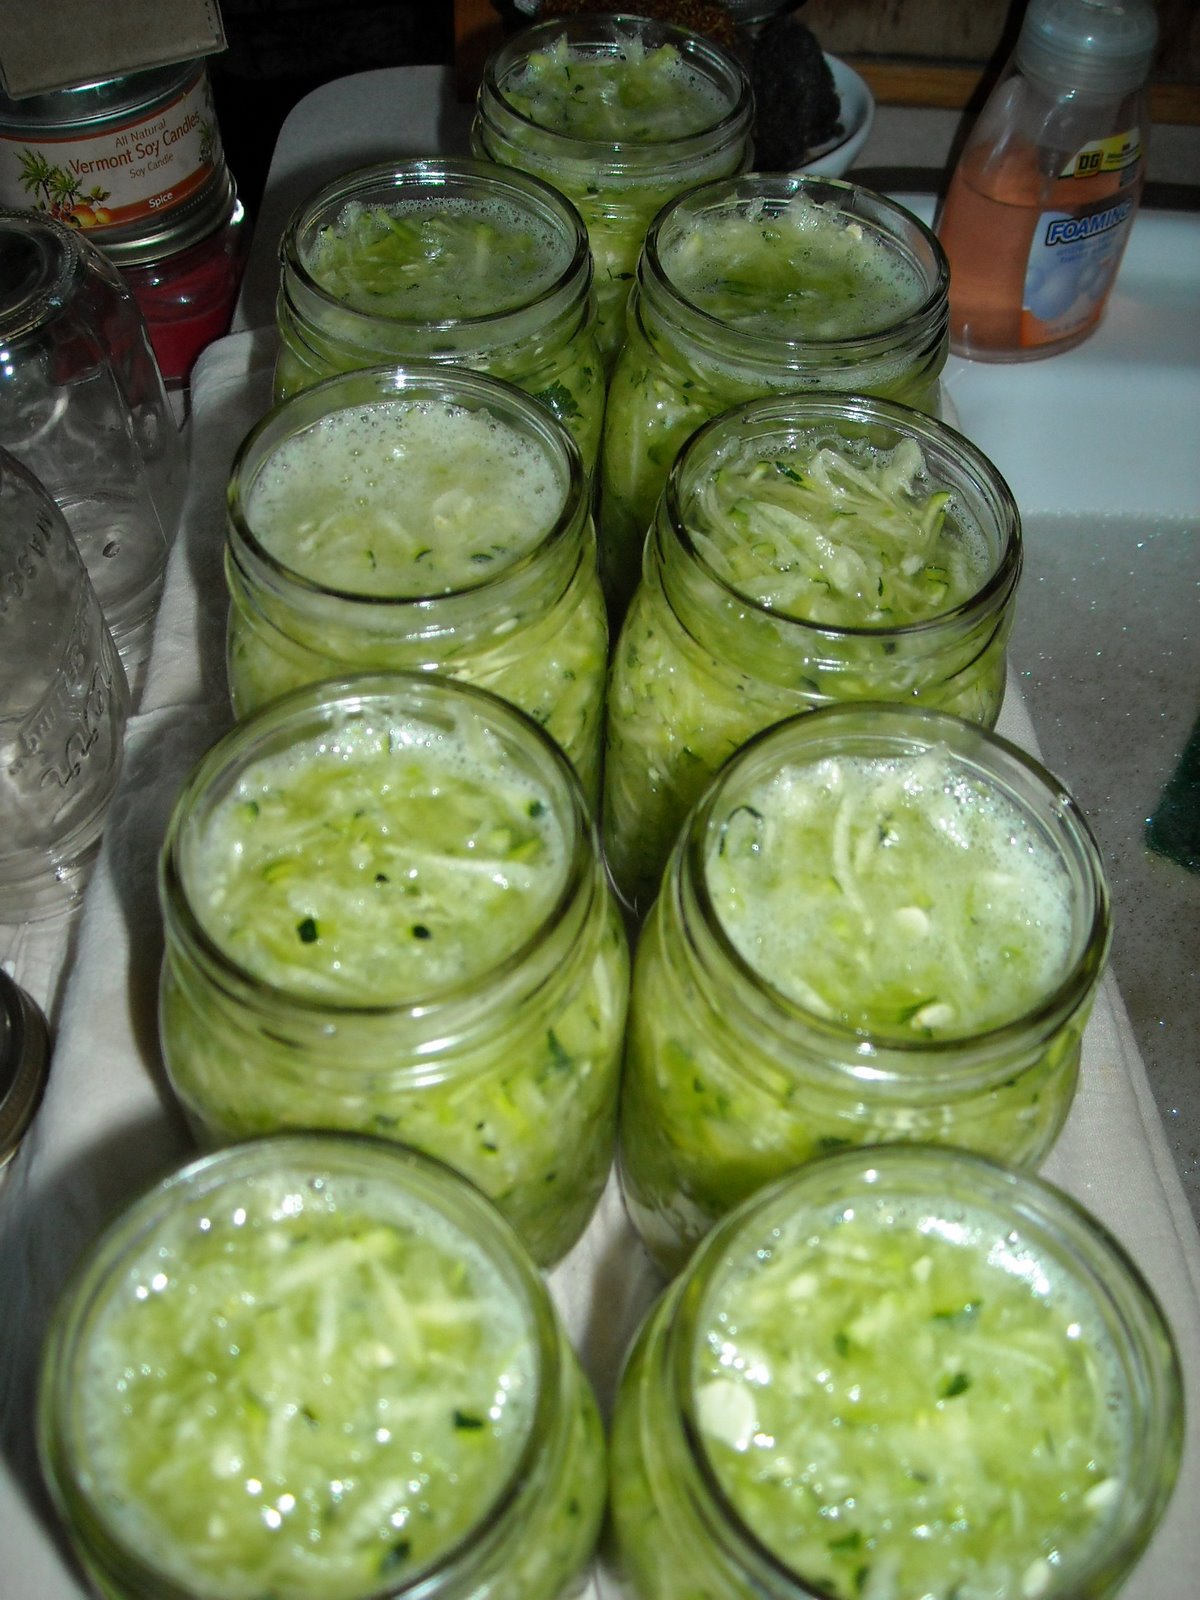
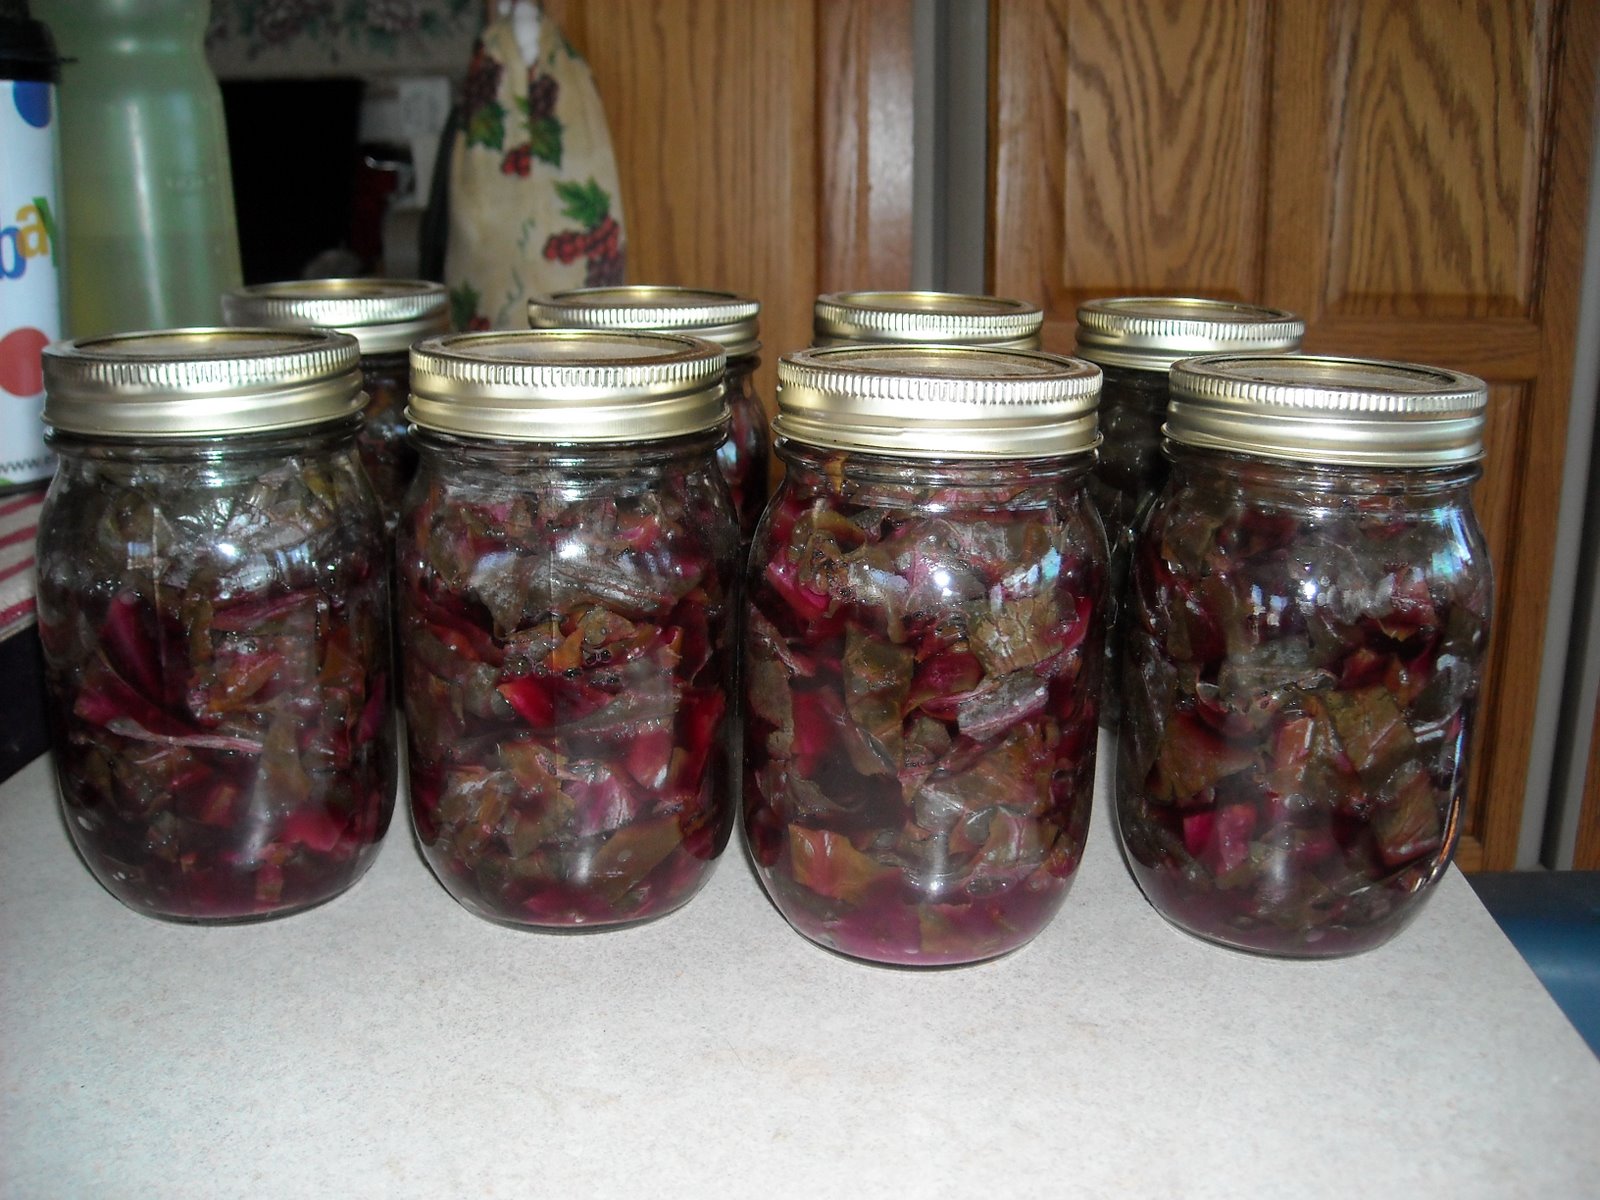
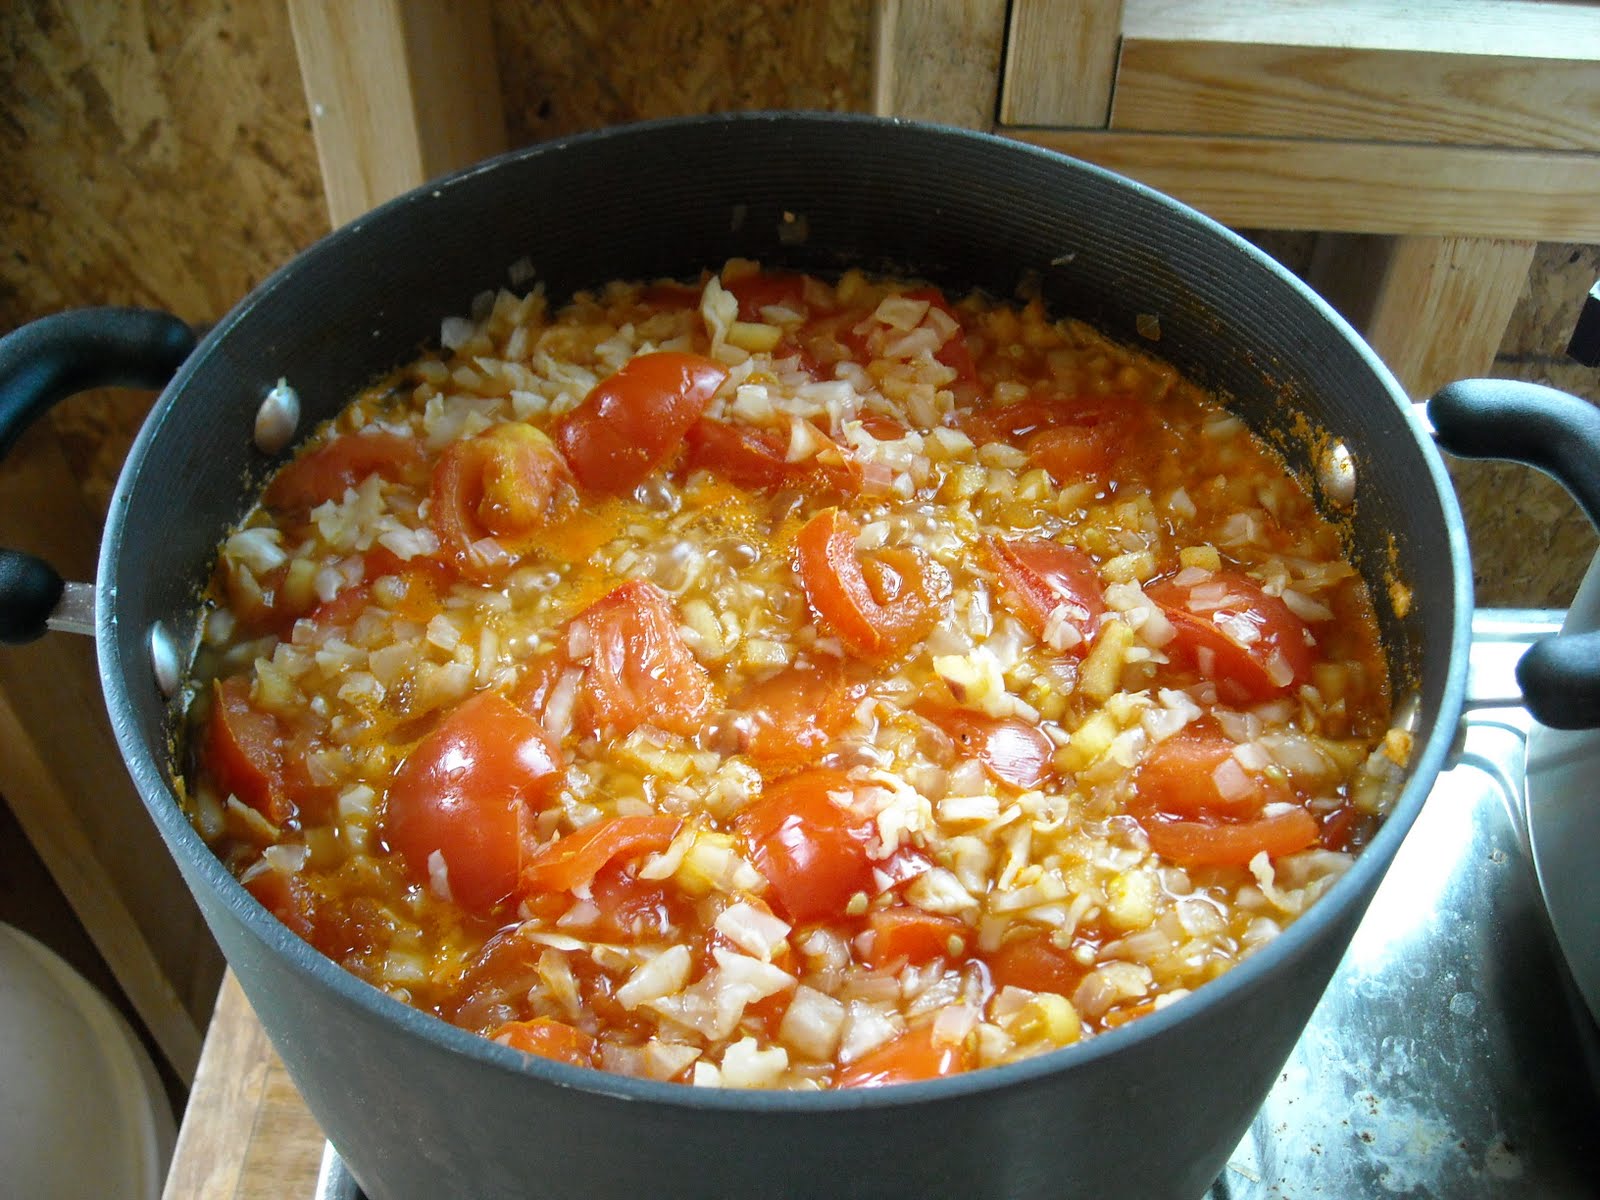
The ingredients have now been boiled for five minutes and are ready to be ladled into the canning jars for processing:

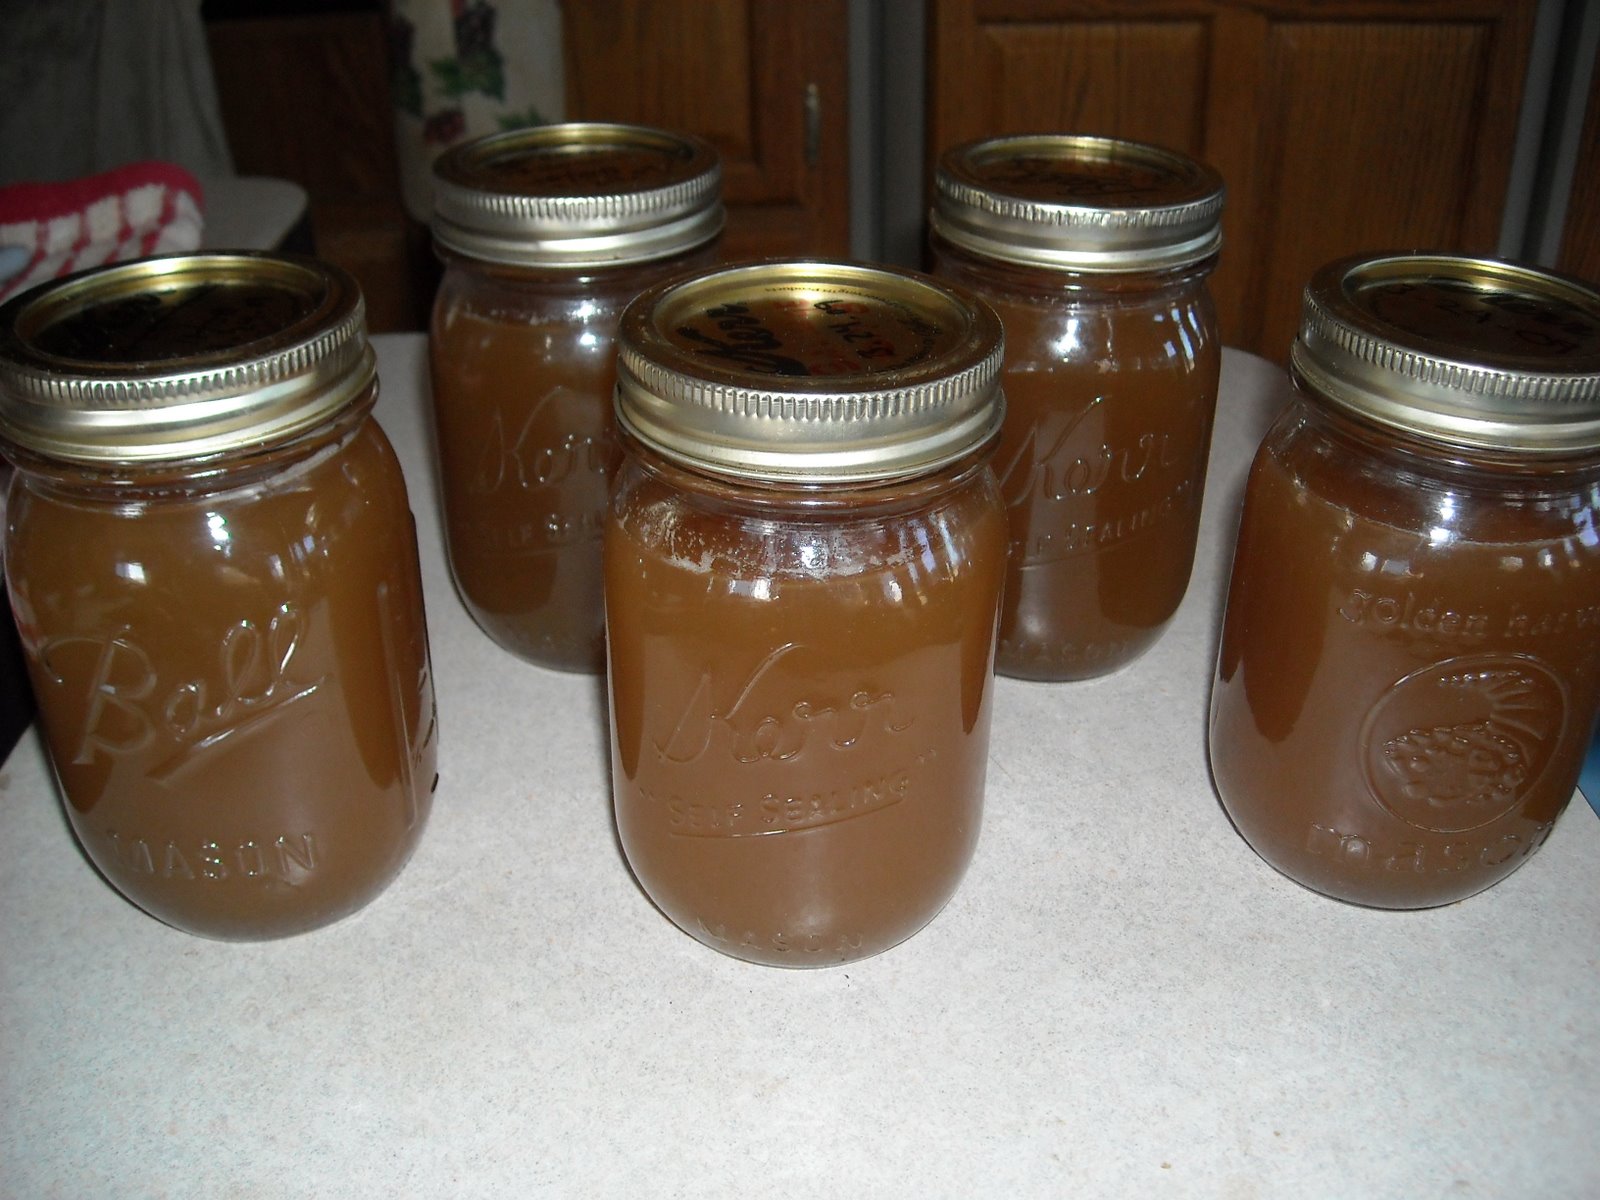
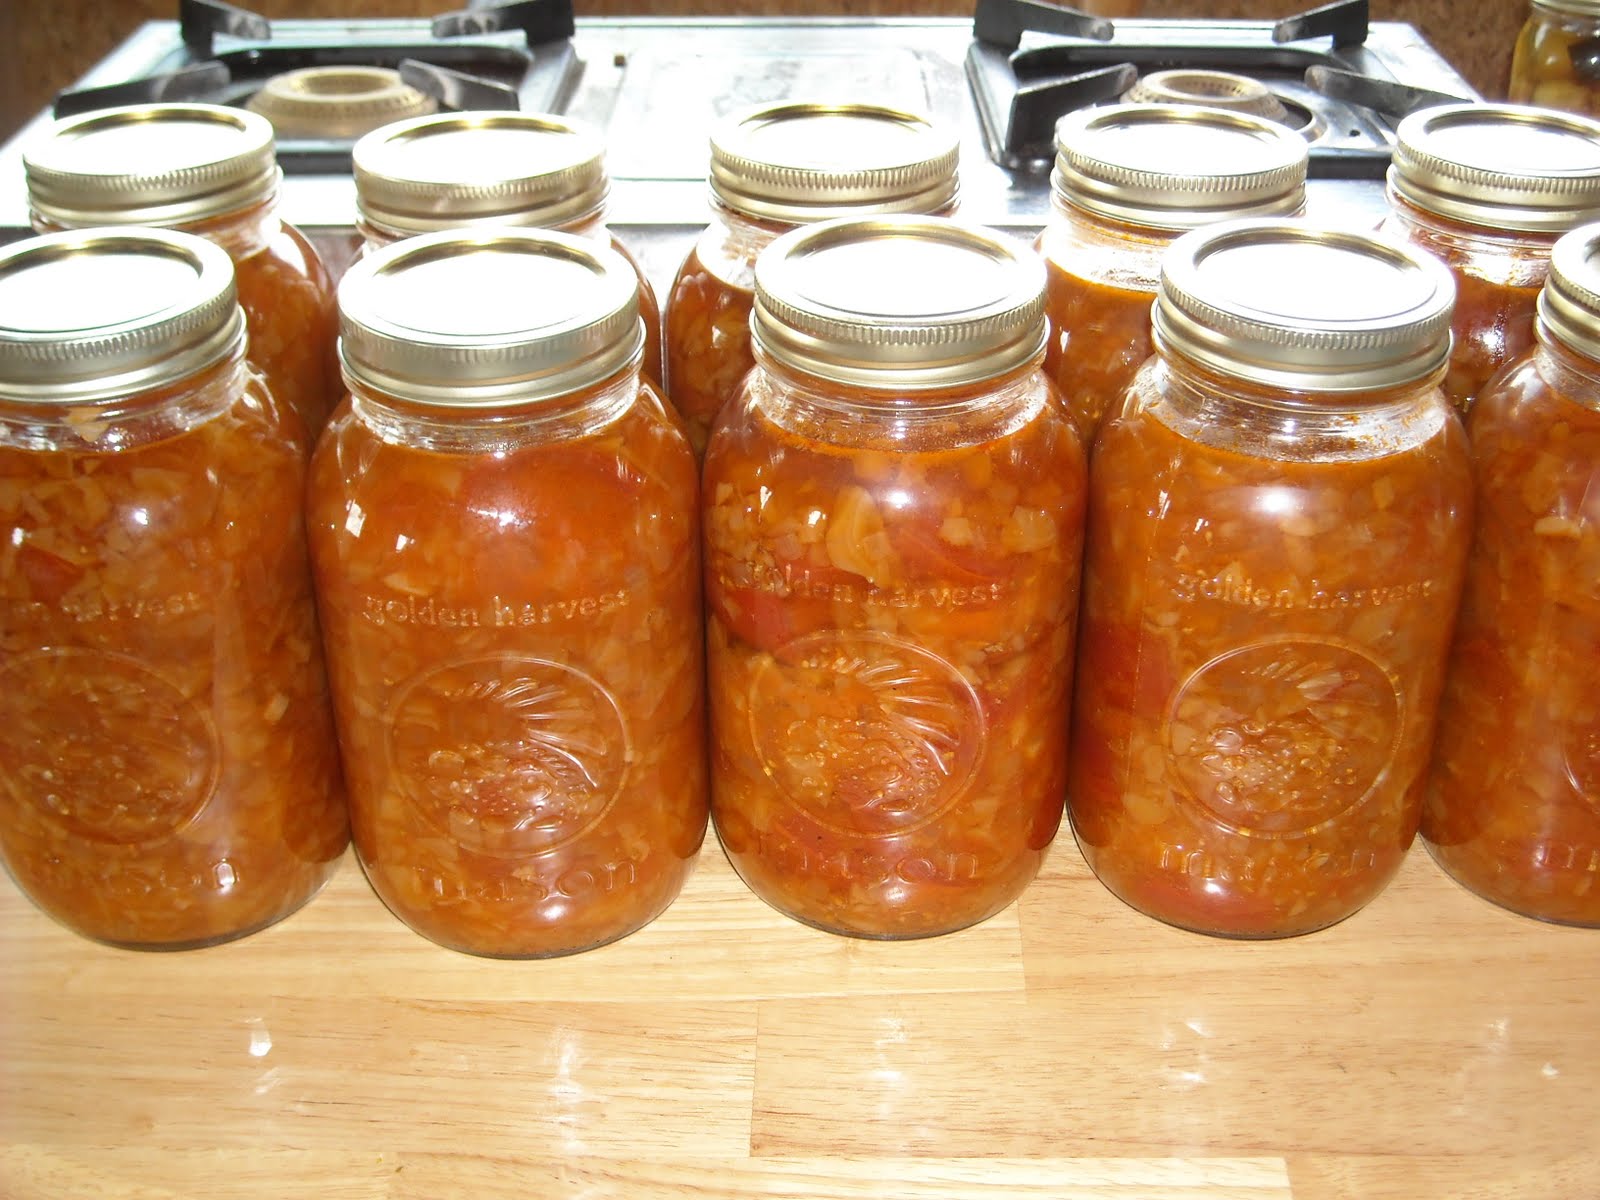
MMMmmmmm, delicious Borsch all cooked, processed and ready to eat!

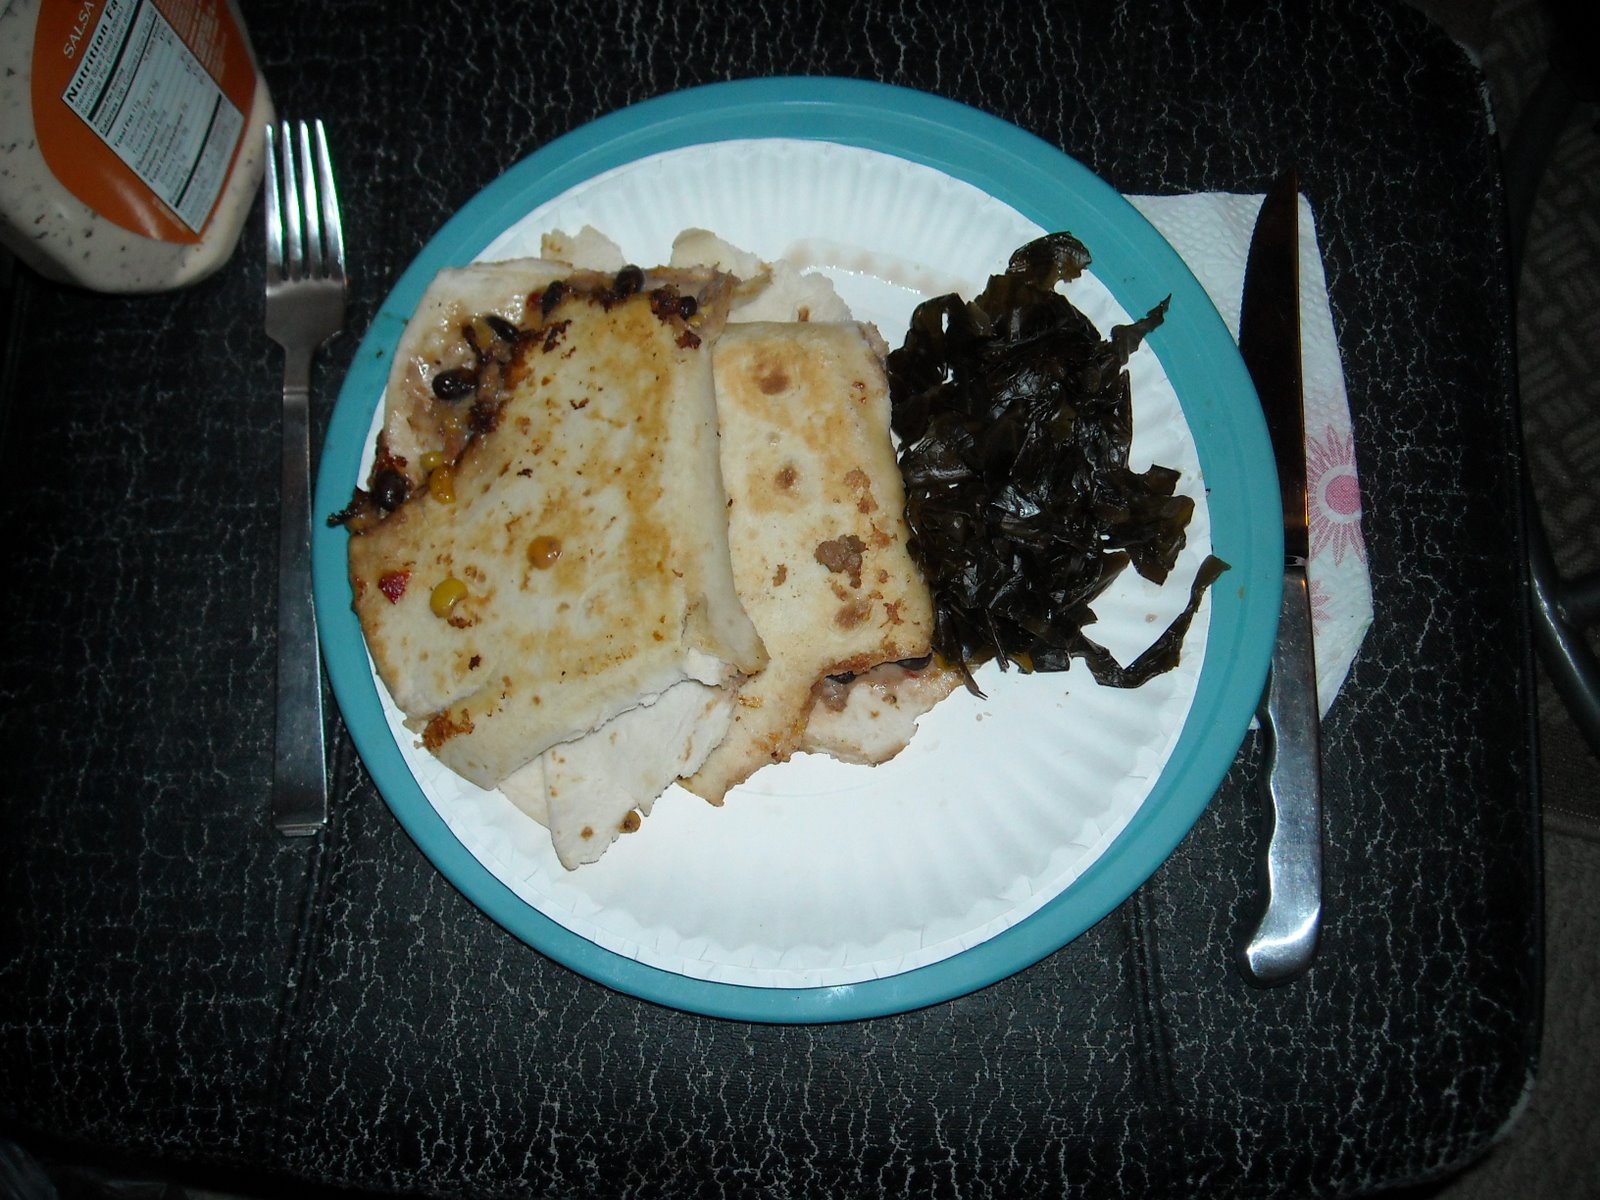
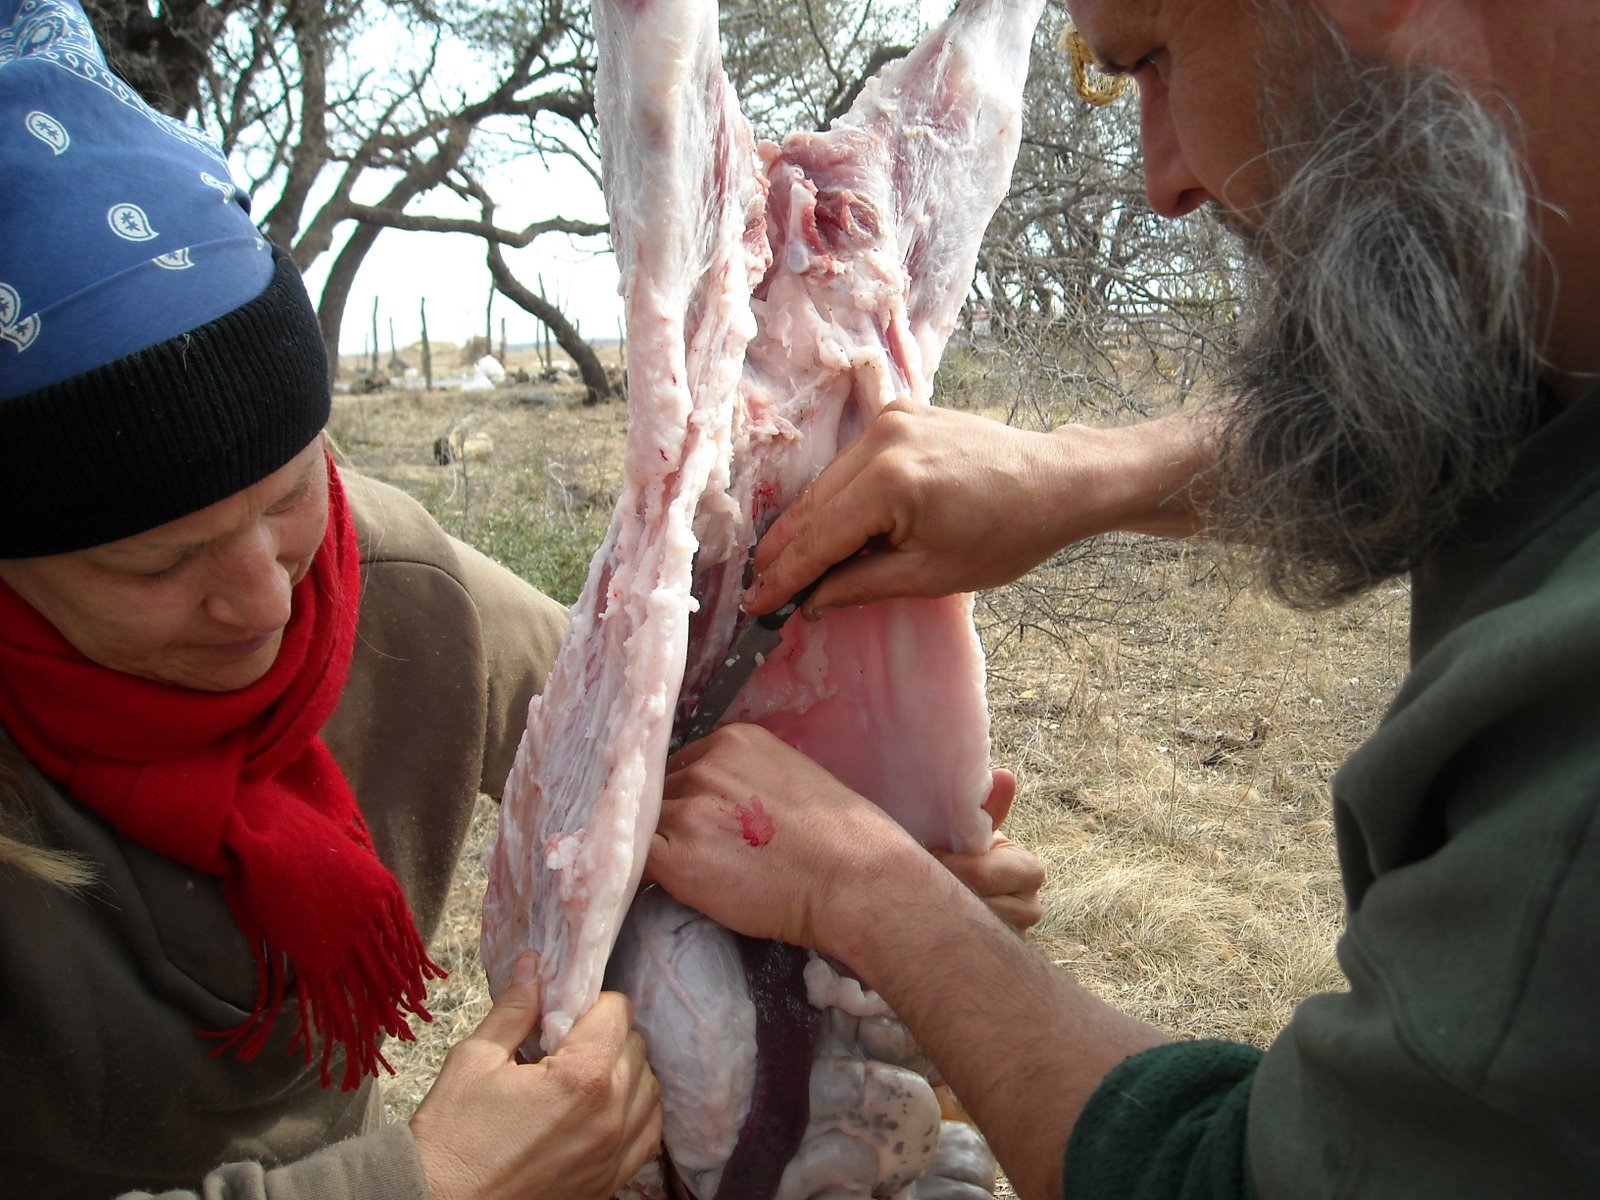
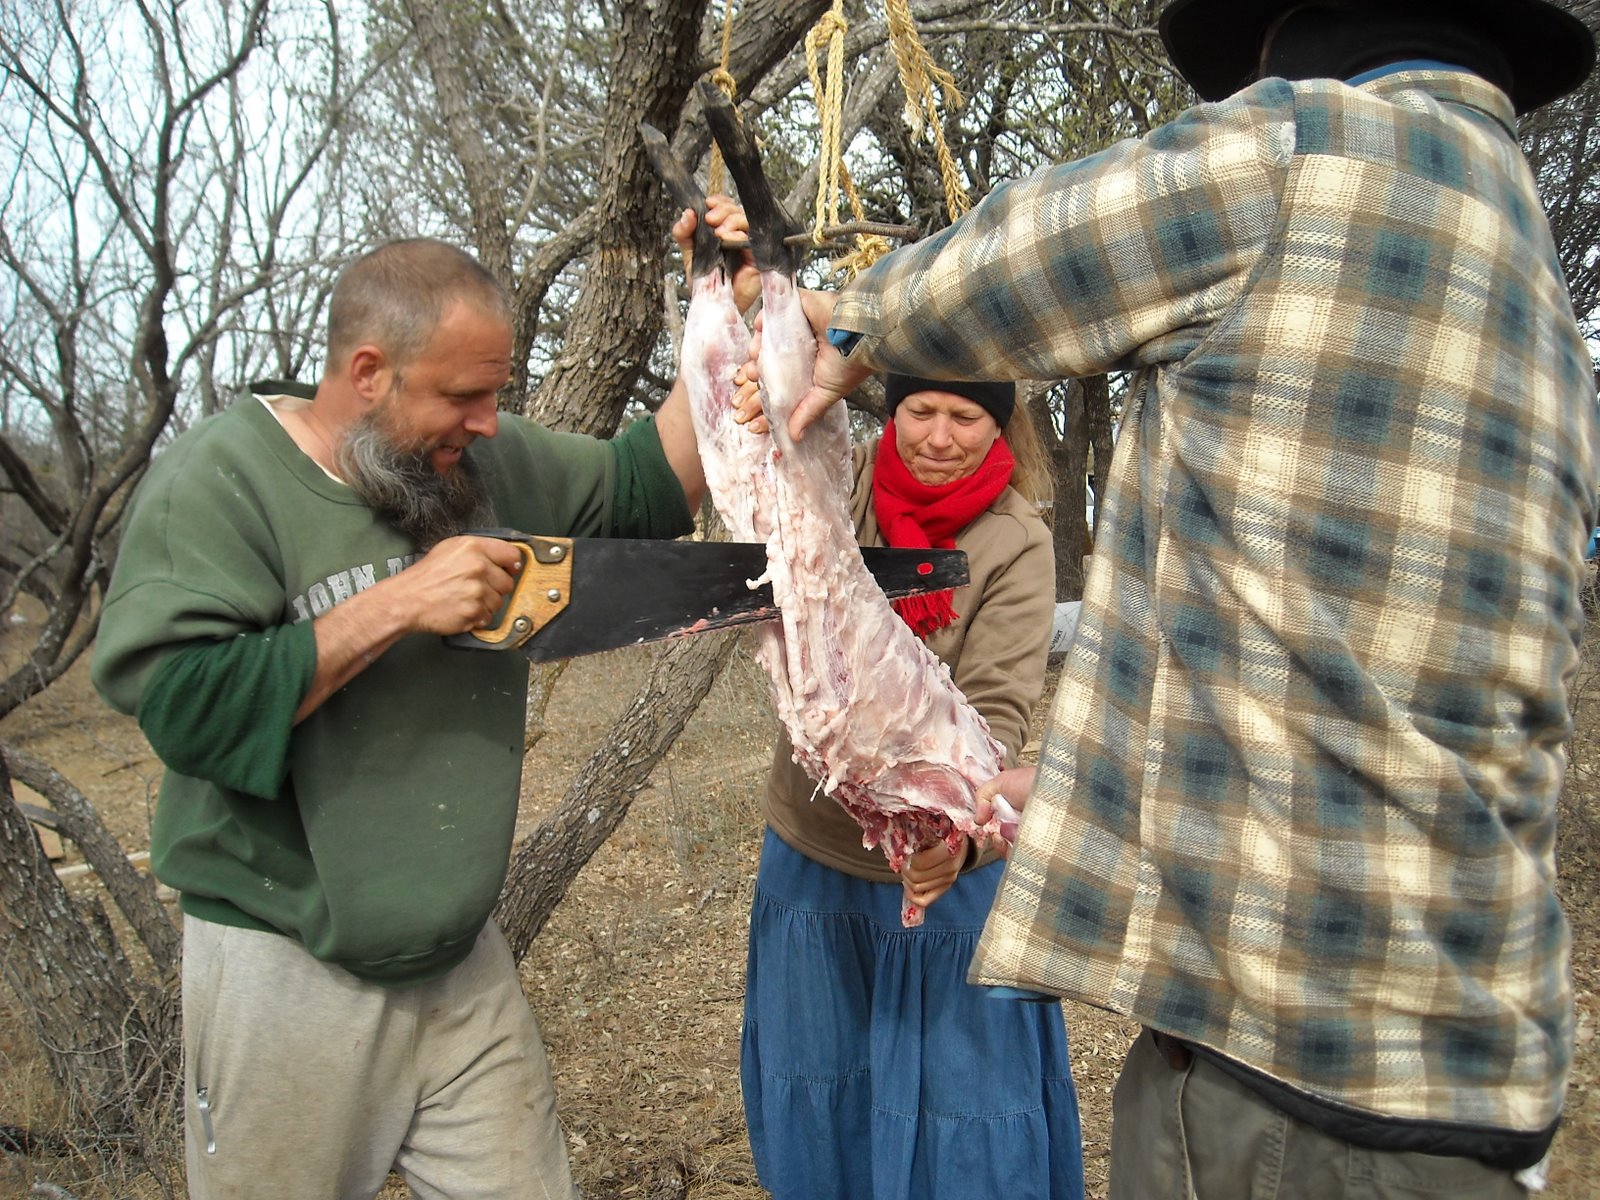
What a blessing to have been able to capture and preserve these abundant, direct provisions from God. Dave and I have had some borsch for supper a couple of times now. Dave said it doesn’t smell that great but tastes delicious! It can stand on its own as a very tasty and nutritious soup, or meat may be added to make a wonderful stew. I added in some canned brisket meat recently along with some homemade bread, and it made a well-rounded supper for us. All thanks to God for granting us this food from our garden as a type of the spiritual food He gives us from His Word.

Susan


Garden 2009 – Spring – Update II – Sue-cchini


We didn’t know what to expect with our 2009 Spring garden, but the Lord has seen fit to provide us with plenty of water in our cistern with which to water the garden; and He has brought the increase, and what an increase! As me and my buddies Rogers and Hammerstein always say, “Zucchini is busting out all over!”

I went out to see what was available to harvest; and, boy, there was an abundance of zucchini ready to be picked:


I looked through our book, “Preserving Food Without Freezing or Canning” by The Gardeners & Farmers of Terre Vivante, to see if there were ways other than canning to preserve the zucchini. The book described a very easy, lactic fermentation method. I simply washed and grated the zucchini, skin and all, and put it into canning jars with a teaspoon of salt per pint alternating layers of zucchini and salt. Then I added water to each jar leaving 1″ head space, put on the lids and caps and……that’s it! I put the jars down in the root cellar and within days we had a very delicious and fresh tasting zucchini kraut:


I also read that drying zucchini is a very good way to preserve it. I was excited to be able to utilize the wonderful solar food dryer that Dave had made. So I cut up the zucchini into slices, and within a couple of days they were shriveled and crispy! They say you can eat them like potato chips with dip or use them in soups and casseroles.

Here they are put out to dry on trays in our solar food dehydrator:

Here are the dried chips after 1-2 days in the dehydrator (the orange looking pieces are apricots which turned out delicious as well!):

I preserved the dried zucchini chips in glass jars. And I didn’t have to use the pressure canner or a drop of propane!

I also harvested a bunch of yellow summer squash I was hoping to preserve. I read online that one woman didn’t like the “mushiness” of hot packed canned squash, so she and her family started raw packing it with no water. This way it could be dipped in egg and crumbs to fry it or be used in soups and casseroles. Well, I went ahead and tried it that way, and it worked great! I’m very excited to have found this method, which opens up a wider variety of ways to use squash in meals.

In addition to canning, I also processed some of the yellow summer squash with the lactic fermentation method, as I had done with the zucchini; and it turned out fresh and tasty as well, without any freezing or canning used.

What a huge blessing to be able to capture and preserve the freshness of these garden vegetables without canning or freezing. We are careful to thank God for the bounty of this harvest as well as His many spiritual provisions.

1 Cor. 3:6 – “I have planted, Apollos watered; but God gave the increase.”

Susan


Cheese Waxing

Our neighbor mentioned one day that the local market was having a great sale on cheddar cheese. Dave suggested we buy several pounds to take advantage of the price. I include cheese in many of our meals but not enough to consume that much before it would start to go bad. Then during one of our church get-togethers, another neighbor mentioned that you can preserve cheese in wax. I had seen wax-covered cheese in the deli’s and grocery stores all my life but had never thought much about it. I thought it was a marketing gimmick or something.

We decided to buy a five pound block of red cheese wax from New England Cheesemaking Supply Company, and it arrived in just a few days:

The instructions called for a double-boiler in order to not burn the wax, so I dutifully went out and bought one. That was my first mistake. They said you should have dedicated utensils and containers because working with wax pretty much ruins them for other uses. I then asked myself, “What was I thinking. Why would I want to ruin a brand new double boiler for this use??!” I decided to keep the double boiler because I didn’t have one and it is an integral component of good kitchen utensils. So I ended up putting water in the bottom of the double boiler and setting in it an old stainless steel bowl which ended up working just as well. I hope to find a used large saucepan at a thrift store in which to put the steel bowl for a makeshift double boiler in any future cheese waxing:

I cut a small block of wax off of the large block and placed it in the bowl to start melting:

It really didn’t take long for the wax to melt at a low heat:

At first I tried using tongs to hold the cheese as I dipped it, but that seemed to be a bit slippery, and the cheese ended up being dropped. Also, we had purchased a cheese wax brush to dip and brush the wax onto the cheese. That was my second mistake. The brush proved to be pretty useless because it didn’t provide for a thorough coating, and the process was very time consuming. Dave suggested perhaps cutting the cheese (alright, enough snickering) into smaller sizes and dipping them in half at a time with clean hands, letting that dry, and then dipping the remaining half. That seemed to work really well:


The instructions called for two to three coats of wax, but since this was my first time, I wanted to coat them really well; so I ended up dipping them about four times. It took only seconds between each dipping for the coating to dry:


Here is the final product ready to be stored for several months!

We figured in storing the cheese it would be best to keep it as far away as possible from any potential mice, so we purchased a few inexpensive hanging baskets and hung them containing the cheese in our root cellar:

I have used a few blocks of the cheese so far, and the wax has proven to work beautifully. It comes off very easily and can be washed, melted and re-used. I highly recommend this method of cheese preservation and thank God for His continued provisions.

Susan

Apple Cider Vinegar

Once again in an attempt to learn how to store food without canning or freezing so as to further separate from our dependence on the world, I thought it would be interesting to try to make apple cider vinegar, for the preserving method, for the health benefits, and since we have several apple trees in our orchard.

The recipes on the Internet basically said squeeze the apples for the juice, add a little already-made apple cider vinegar that has “the mother” in it, and let it sit for 3 to 4 weeks. Some said to add yeast, but I was trying to use as few outside ingredients letting creation and the yeast that is naturally in the air handle it. It apparently ferments and then turns to vinegar.

And so we purchased some apples and used our lard press on them. One apple cut in half with the halves face down seemed to press the best:

Here I am pressing:

And here are the results:

This is what was left after pressing:


(On a side note, sadly, the cast iron plate of the lard press cracked in half, I guess from tightening too hard; so, using it wasn’t a great idea. I suppose we might have to try a cider press for future attempts.)

After we were done pressing, Sue poured the juice through a piece of paper towel (as a filter) into the non-metallic containers (because of the acid produced) where they would ferment, and so we used canning jars. The first time, it took about 6 pounds of apples to make two 2/3 pint jars full; the second time we got 5 pints from 9 pounds:


Sue then added a couple of table spoons of already-made apple cider vinegar to act as a “starter”. From there they sat for several weeks. Each day I would tighten the caps, shake the jars and loosen the caps again to allow for any pressure out and some more air (with yeast hopefully) in.

After 6 weeks, the alcohol didn’t seem to be dissipating very quickly, and Sue did a little more research, and she discovered we probably should have just covered the jars with cheese cloth or a towel. I had figured it didn’t really matter much as long as some air was getting in there, but apparently it needs constant air availability.

And indeed it did what it was supposed to do: the apple juice is now vinegar!

We marvel at the Lord’s workings in His creation and how He has included these things to help us in the temporal matters of sustenance, and we thank Him for these provisions.

— David

Garden 2008 II Update II – Sauerkraut

We had a drought last Summer and Fall which really affected the quantity and size of many of our garden vegetables. The time came to harvest our red cabbage from our 2008 Fall garden, and the heads were small and did not really look like cabbage heads but more like a bunch of leaves loosely wrapped around or falling away from each other. Dave said we had to at least try to do something with them. Our neighbor, Michael, mentioned you could make sauerkraut with cabbage, so we thought that might be the best way to go.

I looked up the simplest recipe I could find and hoped for the best.

Here is the cabbage in our garden waiting patiently to be harvested by its novice owner (pick me, pick me!!)

I washed all the cabbage leaves and cut them up with a knife because they were too loose to shred with a shredder or grater. I put the leaves in two 9×13″ pans, added the proportionate amount of pickling salt, and mixed well with my hands. There wasn’t much moisture to be drawn out of the leaves, so I had to add a lot more water when putting them into canning jars. After about 24 hours +/-, I prepared pint canning jars and filled them up with the cut-up cabbage leaves adding water, leaving 1″ head space, and screwed on the lids. I followed the instructions to put the jars into a pan (or lined box in my case) because as they started to ferment, there was some (not much) overflow leakage.

Then I stored the jars at room temperature for six weeks and turned them upside down several times over the course of those weeks to distribute the brine and keep everything moist.

At the end of the six weeks, I opened up all of the jars and emptied them into a large sauce pan, simmering them for about five minutes. Yep, it smelled and tasted like sauerkraut, although it was very dark green and more coarse than the kind you buy at the store. Although turning the cabbage into sauerkraut is a preservation method in itself, I proceeded to can the pints of sauerkraut and put them down in our root cellar in order to preserve them for as long as possible. Since we are not generally sauerkraut eating folks, I needed all the time I could get to figure out more ways to fix it!

Wow! I couldn’t believe that we were able to make sauerkraut and preserve it from what appeared to be pretty lifeless leaves. What a wonderful blessing! I’m very thankful to be learning these valuable lessons in food preservation and to be able to witness God’s direct provision from planting to our table.

Susan

Providence’s Providential Provisions: Wild Hogs

Again, one of the reasons we moved out here was to try to remove ourselves from dependency upon the world and its systems and place ourselves directly under God’s providence. Well, as I mentioned with water, the Lord’s faithfulness continues to be shown.

An acquaintance of one of the men on the land here informed us that he had been catching wild hogs, and quite a few of them. This being brought to Michael’s attention, he thought it would be of great benefit to the community to take advantage of this gift of meat from God. And so, he put together a plan, which involved building a pen to hold them. We built the pen, bought the wild hogs for a very nominal fee, and began to raise them. The whole community has been involved and has benefited from this provision from the Lord. We have since been able to gather several more pigs the gentleman has captured.

However, with this has brought the processing of the pigs from the very beginning to end, which for Sue and I has involved a new venture for us in the realm of farming: slaughtering and butchering. For me personally, this has been interesting, given what I said in a previous David’s Digest; however, as we continue to progress into more proper, biblical perspectives, the Lord has shown us that He has granted us dominion over these animals and has provided them as food.

And so, it had come time to do what needed to be done. Here are some pictures (for those that aren’t used to seeing this process, it may be a little discomforting).

Here are several after being shot in the head with a .22 caliber rifle (meaning they were basically instantly dead) and their throats being cut to bleed them out:

And then the butchering began:


In reality, it wasn’t too bad. And for me, once you get the skin off, it really just starts to look like meat from the store. Also, now after participating in this process several times, it is not as shocking as it was at first.

Preserving

Typically with our pigs in the past, we would simply can the meat in all of its various forms (bacon, sausage, chops, etc.) after getting it back from the meat processing place. This time though, in hoping to continue our education in the old paths, which includes reducing our dependency on the world for its canning supplies, I wanted to take one section of the meat obtained from one of the pigs, and dry cure it by hand. And so, Michael gave us a recipe, which started by rubbing the meat all over with a mixture of salt, sugar and salt petre, followed by covering it with a cloth and storing it in the root cellar for a week, after which time the container is cleaned and the rub-down step is repeated. This sits in the root cellar for 1 week per inch of meat thickness. After that, it is washed and soaked for an hour in cold water, is drip dried, and then it sits in the container for 2 weeks to “equalize” the meat, which helps permeate the curing mixture throughout it. And then technically that’s it; it’s ready to be cooked to eat, and should stay preserved in the root cellar for some time. Here is a picture of the ham with the dry cure mixture on it:

Before final storage, Sue “painted” on a flavoring mixture of brown sugar, honey, pepper and salt petre, and we hung it in the root cellar for future use:


We pray the Lord continue to teach us His ways and grant us His continued provisions, in accordance with His will. And we are most grateful to Him for both.

— David

Air It Out

In trying to continue to get away from dependency on the world, we have looked into preserving food without canning or freezing. One of the methods for doing this with fruits and vegetables is drying. There are food dehydrators available for purchase, some electric, some solar; but it seemed to me this would probably be pretty easy to construct. And so I searched for plans on the Internet and settled on these solar food dehydrator plans (originally available from North Dakota State University), partially because the design was very specifically laid out (which I need), and also because it appeared to be the most compact for the process behind the drying and still large enough to be able to dry quite a bit of food.

Here are some pictures of ours as I built it:


I decided to use 1″ wood screws and 2″ coarse drywall screws for most of it, and 1 5/8″ deck screws for the legs. I found that a 1/8″ pilot hole worked best with the 1x2s.

On the top I didn’t use a miter joint on the ends; I simply used butted joints and alternated them for the vertical vs. the horizontal frames. Also, for strength and longevity, I decided to use .93 plexiglas instead of 4-6 mil clear plastic sheeting. I tried to find a 48″ x 48″ piece but couldn’t; and so I thought I would use two 24″ x 48″ pieces with a support in the middle, but the store I was at was out of them. I went to another store, and they didn’t have 24″ x 48″ pieces; and so, I had to buy 30″ x 60″ pieces and a scoring tool. However, that was good because the distance from edge to edge of the top was for me 49 7/8″ (which means the other sizes would have been too small); and so, I was able to cut each piece to fit very nicely. Before I did that though and because of the extra plexiglas I had, I was able to practice scoring and drilling the plexiglas so as to not crack it when setting the real pieces in place. This was good because my first attempts did not work well. After practice though, I was able to get the hang of scoring and drilling, which worked pretty well on the final product:

I learned a few things with plexiglas: the scoring tool would cut into my 4′ level when using it to guide my scoring, and so I switched to a straight piece of wood; I would score only a few times with the wood guide in place and then would do it free hand as I was able to apply much more pressure causing the scoring process to be finished quicker; and I found that quick speed and light pressure was the best way to drill a hole. Also, the drilled hole should be at least the full diameter of the screw so the screw doesn’t put pressure on the hole, which I believe can cause the plexiglas to crack.

After the dryer was completed, I let it sit in the sun with the top off for a couple of days before putting food on the trays to allow the paint to bake in so the fumes would be hopefully removed.

Here is some food drying in it:

I added casters (swivel wheels) on the bottom of the legs to make it easier to move, and also added some handles which I attached to the sides where the inside food frame supports where located so that the handles would be more firmly secured and the handles’ screws wouldn’t be poking through the plywood siding:

And here are the banana and apple results. Quite tasty!

At this point they can be bagged and stored in the root cellar, and should last for some time.

We thank the Lord for His provisions in being able to make this food dryer, and for His provisions in creation to allow us to preserve in this way the food He grants us.

— David

Newer posts »