Our journal of what we pray is our sojourn of life along the narrow way, even the old paths, submitting to the Bible as a light unto both.

Category: DIY (Page 2 of 3)

Goat Milking Stand – Update I

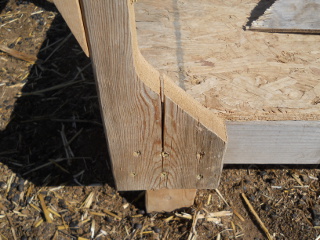
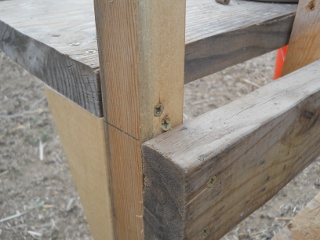
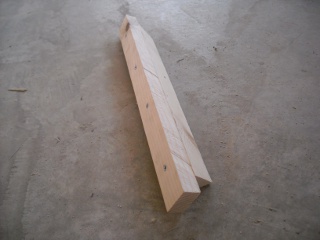
Last year I built us another goat milking stand, and with it tried to add some extra bracing to the uprights, as we’ve had trouble with them getting loose with all of the goat activity while on the stand. Well, even with the extra materials and screws, the wood started to split and still come loose and get wobbly. Here is the split one:

Goat Milking Stand Loose Upright

Hmm….bummer.

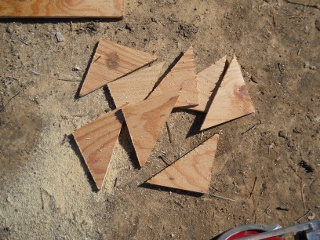
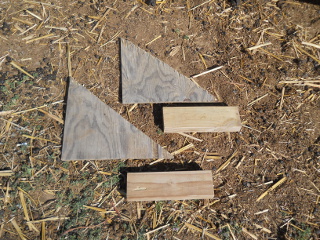
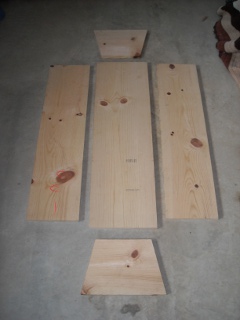
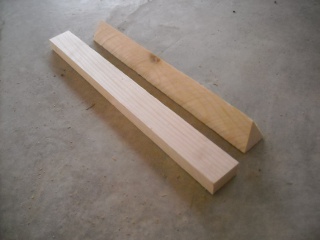
And so, here’s what I decided to do to try to help. I thought I’d add 2x4s along the sides of the base and then use plywood corners attached to those 2x4s and the uprights. Here are the cut-out parts:

Goat Milking Stand Upright Bracing Parts

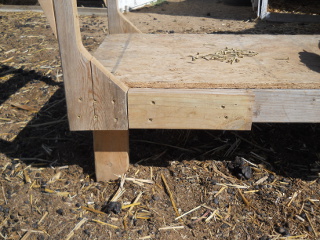
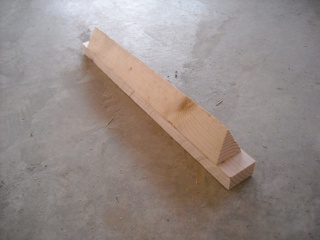
And the 2×4 blocks in place:

Goat Milking Stand Bracing Block

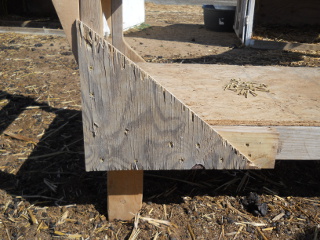
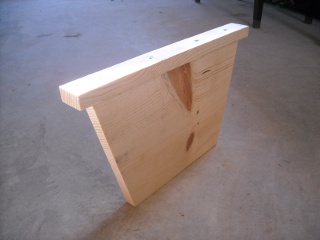
And then the plywood corners attached:

Goat Milking Stand Plywood Corner Brace

Hopefully now this will hold better. Lord willing in several weeks we’ll get to find out, as the results of breeding time are almost here!

— David

Goat Milking Stand

When we first started milking our goats, some folks from town graciously gave us a milking stand, and it has served us very well. It has started to really show the effects of time and wear and many repairs, and because when we breed our goats during the winter, we split them into two generations, and so Sue didn’t have to walk goats from one pen to another just for milking, I thought I’d put together another one for her, using the original as a spec.

Thankfully, I was able to scrounge up all of the wood necessary for it, which was nice.

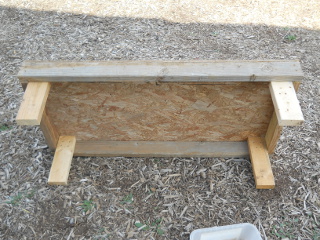
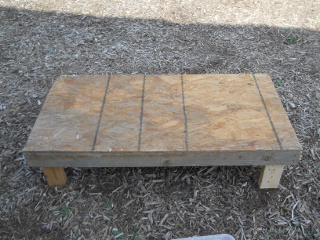
I started with the base, which is basically 2 feet by 4 feet. It might be interesting to make it 3 inches less wide so the cross pieces would be 2 feet instead of 27 inches, but we have quite a few leftover pieces of OSB that were cut out from the 2 foot by 4 foot pony wall windows of the house, so one of those is what I used. The 11 inch legs on the original were something of a weak point, so I tried to bolster them by using 2×4 instead of 2×2, and used screws on both sides (which, to allow for easier replacement, on the long side I did from the inside so the eventually uprights wouldn’t be attached over/covering the leg screws) and the top:

Goat Milking Stand Under Side of Base
Goat Milking Stand Top Side of Base

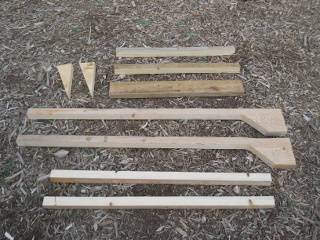
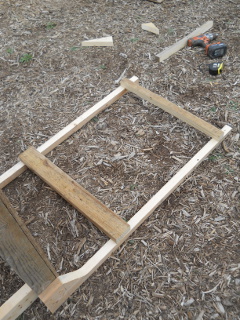
I then cut out basically all of the parts I would need:

Goat Milking Stand Parts List

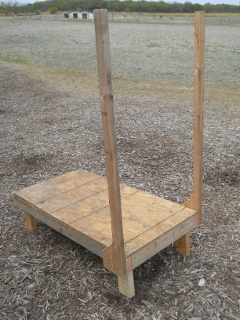
The uprights I used an 8 foot 2×6 cut in half to 4 feet, and then ripped at about 1 1/2 inches. Another weak point in the original design was where these uprights attach to the base, so I thought I would shape them at the bottom to hopefully be more sturdy and have more material to which to attach to the base. (UPDATE: please see our goat milking stand update blog post for a continuing problem with this and an enhancement I added.) Note that for many of the screws I drilled pilot holes, especially when dealing with the thinner pieces or older wood:

Goat Milking Stand Uprights

And then I added some cross braces, a 2×4 placed 10 inches from the platform and a ripped in half 2×4 around 3 inches from the top (although I measured from the 2×4 cross brace because the uprights weren’t exactly the same length):

Goat Milking Stand First Cross Braces

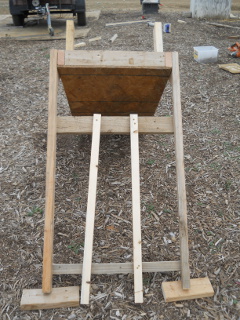
And the neck holders, one obviously being only attached at the bottom cross piece (which is the top cross piece because the stand is upside down). These were 3 feet long, ripped from a piece of one of the pieces cut out of the 2×6, a little less than 1 1/2 inches wide so that the moving one would slide nicely between two cross pieces without binding or being too loose. Their outer edges are 9 inches from the outside edge of the cross piece:

Goat Milking Stand Neck Holders

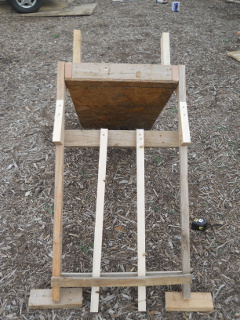
And then the last top cross piece and the shelf holders, which were from a 10 inch 2×4 cut diagonally. Those I put the top level with the top of the bottom 2×4 cross piece:

Goat Milking Stand Back Cross Piece and Feeder Shelf Braces

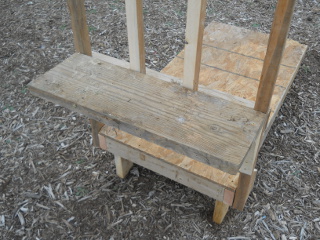
Here is the shelf. I used a 2×10 for this:

Goat Milking Stand Feeder Shelf

And here are some extra screws I put in to hopefully more securely attach the shelf:

Goat Milking Stand Feeder Shelf Extra Screws

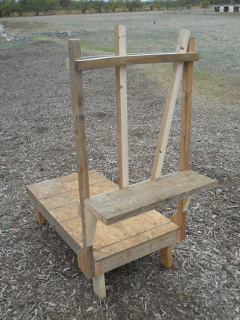
And here it is!

Goat Milking Stand Complete

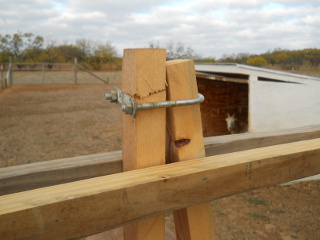
We had some u-shaped brackets laying around, which just happened to fit perfectly over the two neck holder pieces, and so we’re using that to hold the neck pieces closed when the goat’s neck is in it:

Goat Milking Stand Neck Holders Latch

And here the milking stand is in action! We hope to find and start using something more sturdy for the feed holder instead of plastic buckets, like an aluminum pot or the like from a thrift store — something to withstand the weather and the goats a little better 🙂 :

Goat Milking Stand in Actions

We’re grateful to the Lord for the original stand from those generous town folks, for the left-over wood to be able to use for this, and for the opportunity to have it completed. We are continually thankful for God’s provisions generally and for the healthy goat milk.

— David

Poor-Man’s Net-Wire Fencing

Our main working area is about 6 acres or so, where our barn, the pig pen, the chicken tractor and pen, the orchard, the goat pens, and a field area for crops are. To the south and west are barbed-wire fences.

One of the things we have hoped to be able to do is allow the cows and goats to roam in our main working area, eating either weeds or the left-overs from the crops. This saves costs and allows them to forage more, which is more natural to them. However, you find out really fast that 1) they prefer fruit and nut trees and hay bales first, and 2) what’s available on the inside of a fence is apparently not as enticing as what’s on the other side (regardless of what that is).

In the past, hoping this would be good enough, I had hand pulled net-wire fencing across t-posts around the orchard and pecan trees. Well, that alone proved to be a little less than successful as the goats would just go right through the barbed-wire fence to the south, and the cows decided to hop the orchard fencing to get to hay bales we had been storing in that area.

Arg.

And so, in order to allow our animals to be able to graze/browse this area, we needed to first stop the goats from getting through that south fence. This usually means putting up some form of net-wire fencing, which, besides the cost of the fencing, would mean I would have to basically re-do the whole south fence, which would mean the fence would be down for some time as I fixed or put in new posts and pulled the fencing, which would defeat the purpose of having an enclosed (ie. protected from the cows) area.

When we fix barbed-wire fences around here, often we add wire stays in certain places on dilapidated areas to keep the cows from going between barbed-wire strands. And then it struck me that I might be able to actually just do that for a whole fence line, mimicking a net wire fence. It would be kind of a tedious, time-consuming process; but to me, it was better than re-doing the whole fence.

And so I began. For the stays themselves, I have found that galvanized electric fence wire is relatively inexpensive and pliable yet sturdy, and so I chose to use that. When placing the stays, I decided to put them about 10 inches apart — hopefully far apart enough to save on wire usage, but close enough to keep the goats from trying to get through it. At first, I started just trying to do a few stays each day. But that was going a little slowly, so on some days when I had time, I would do several sections (a section being between two wood posts), but generally got into the groove of doing a section a day.

And here are the results!

Barbed-Wire Fence Turned into a New-Wire Fence Small Section
Barbed-Wire Fence Turned into a New-Wire Fence Larger Section

Here are some pictures as to how I wrapped the wire — starting at the top, two loops around each barbed-wire strand, alternating starting from the front or back of the wire as I went down each strand. Once wrapped, I would take my wire pliers and “crush” each set of loops down onto the barbed wire to keep them from sliding:

Barbed Wire Wire Stay Close Up
Full Barbed Wire Wire Stay from the Top
Full Barbed Wire Wire Stay from the Side

Besides turning the south fence’s barbed wire into net wire, I needed to do something about keeping the cows from jumping the orchard fence. What we normally do for a fence is add a strand of barbed wire above the fencing, but I certainly couldn’t stretch barbed wire on a hand-pull, t-post-only fence. But, I thought I might be able to use wire stays here as well to elevate the barbed wire, thus at least causing a visually higher fence for the cows, which hopefully they would not attempt to jump.

And here is how I wrapped the stays to do that:

Wire Stays to Elevate Barbed-Wire Strand Above Hand Pulled Fence
Wire Stay to Elevate Barbed-Wire Strand Above Hand Pulled Fence Close Up

And here is a close up. I did some extra wrapping of the wire down the net-wire fencing to hopefully make it a little more sturdy:

And lo and behold, it actually worked! Thanks to the Lord! The cows stopped jumping the fence; and when we started letting the goats out into the field after the cows had finished with what they were going to do with it, the goats couldn’t get through the south fence!

I was worried though they would try to do that on the west fence, but thankfully they never did, although I did add a barbed-wire strand along the bottom of that fence line because in some places the soil had eroded, and it seemed at least some of them could have fairly easily gone under it.

Our littlest doe from this year would sometimes go under the new “net-wire” fence to the south, and we’d have to shoo her back in, but being separated from the herd, she wanted back in (and would audibly let us know that!), and then eventually figured out how to get back herself. (We had one other doe figure out some way to the other side too, but it was only a few times, and she would want back in as well).

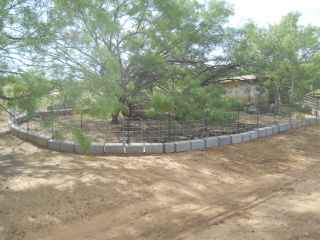
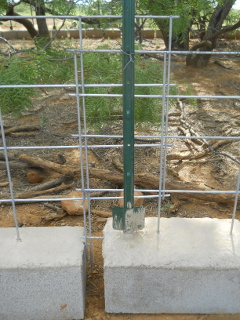
Here are goats, kept in by the “new” fencing:

I had to shore up the orchard and nut-tree fencing, adding a few t-posts, as the goats and cows would push on the fencing or lean over it to try to get to the trees (I didn’t add a barbed wire strand to the nut tree fencing); but all in all, this has worked well enough to be able to allow the animals access to some more, previously unavailable, grazing land.

We are thankful to the Lord for this idea and for allowing it to work, for the land He’s granted us all out here, and for the opportunity to further separate from dependence on the world to more dependence on Him and His direct provisions.

— David

A New Bee-ginning

After building a top bar bee hive a couple of years ago or so, with the drought last year, I figured then wasn’t the time to try to start a bee colony. But, after the winter rains we had, I became hopeful for this year; and so, I ordered a package of bees from R Weaver Apiary in Texas. I decided to purchase the standard Italian bees, and have the queen marked (so we could track her more easily) but with her wings not clipped, as I read that it’s possible the colony can interpret the clipped wings as damage to the queen, for which they will kill her and make a new one.

Beforehand, I had to decide on and prepare a location for them. I wanted somewhere in the wooded area farther from the open fields and the cold north winter winds, under oak trees for summer shade, with hopefully a view of the southern sky for possible winter sun; and then I wanted to fully enclose them in so as to further protect them from winter north winds and also various animals (like our cattle and also, hopefully, harmful critters).

And so, here is the location I ended up choosing, shown after clearing some of the underbrush:

Bees 2012 Bee Hive Fenced Area Location

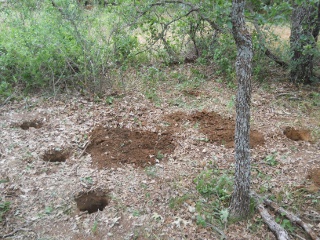
And here it is with the post holes for the fence dug:

Bees 2012 Fenced Area Post Holes

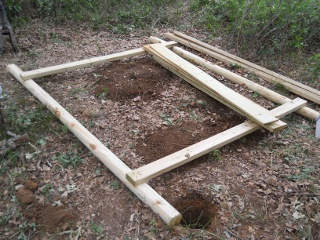
I decided to use treated wood around, including the fence slats (which I chose for maximum wind protection); and here is the beginning of assembling the first wall. After measuring for and attaching the cross-piece 2x4s, I squared the “box” from corner to corner before adding the third cross piece in the center:

Bees 2012 Building First Wall of Fenced Area

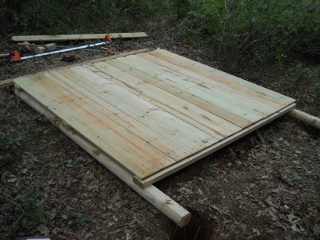
And here it is complete:

Bees 2012 First Wall of Fenced Area Complete

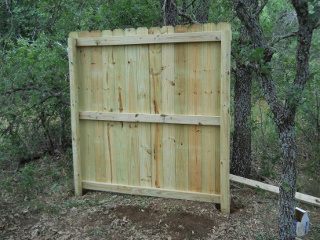
And standing:

Bees 2012 First Wall of Fenced Area Raised

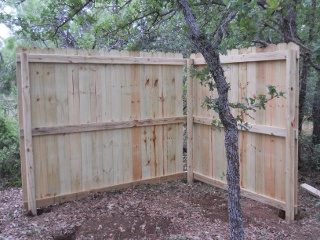
Here is the second wall:

Bees 2012 Second Wall of Fenced Area Raised

And the third wall:

Bees 2012 Third Wall of Fenced Area Raised

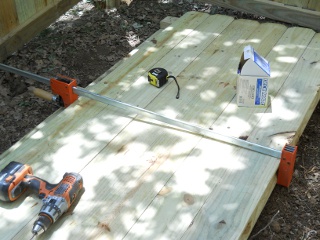
And the fourth, half wall. In order to line up the fence slats next to each other, it was necessary to use bar clamps to bend over one end after securing the other end; and here I’m using the clamp in the middle to bring the fence slats together before securing them to the cross piece. For the longer walls, I had to string several bar clamps together:

Bees 2012 Fourth Wall of Fenced Area with Clamp Over Fence Slats

And here is that fourth wall raised:

Bees 2012 Fourth Wall of Fenced Area Raised

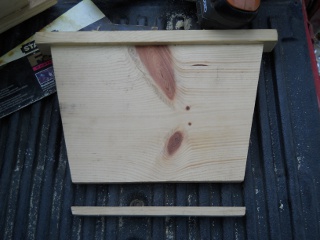
In the original design for the top bar bee hive, if I interpreted correctly the instructions for the false back, which is used to keep the bees in a smaller area in the hive, particularly during the winter so they can stay warm more easily, I cut the bottom of the false back up 1/2″ from the bottom of the hive. After thinking about it, that didn’t quite make sense to me if using the false back in back of the hive, because the bees could get under it and go to the empty part of the hive that had no exit. And so, to create a true false back, I tacked on that extra 1/2″ piece. After considering it more though, I suppose I could move the bees to the back (which seems to be where they naturally want to go), and use the false back as a false front by removing the 1/2″ extension, which would allow them access to the empty front area, and thus the hive entrance. But for now, I’m not sure which way it will go; but the extension is removable if need be:

Bees 2012 Top Bar Bee Hive False Back Extension

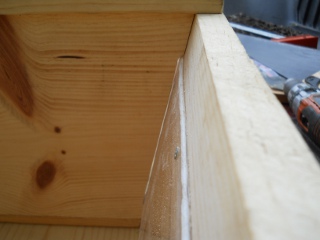
One thing I didn’t consider with the false back was it fitting in the middle of the hive, given that I did not embed into the wood the plexiglass window I installed. And for that, I had to notch out the side of the false back:

Bees 2012 Top Bar Bee Hive False Back Notched to Fit Over Plexiglass Window

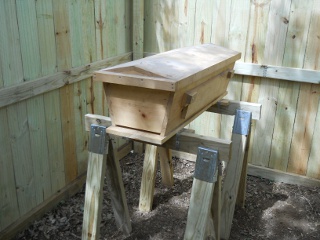
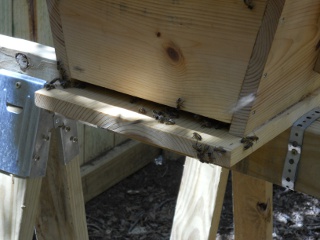
I decided to place the top bar bee hive on sawhorses, using them as a stand, to get them off the ground and keep the entrance “suspended” in mid air, thus hopefully making it harder for little critters to get to the entrance:

Bees 2012 Top Bar Bee Hive on Sawhorses

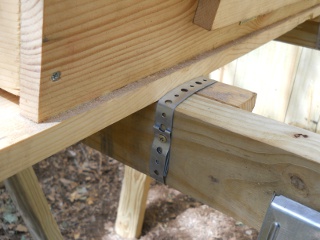
And I “tied” the bee hive legs to the sawhorses using plummer’s tape:

Bees 2012 Top Bar Bee Hive Plummer's Taped to Sawhorses

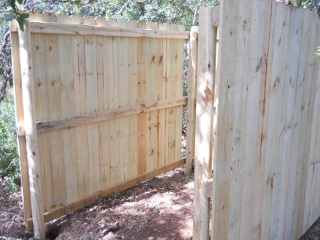
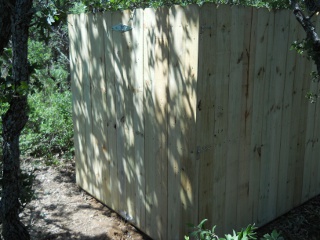
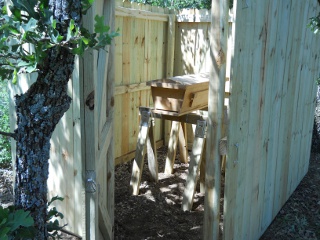
Here is the bee area fenced in with the door hung and closed:

Bees 2012 Fenced Area with Door Hung

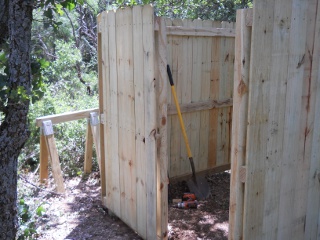
And then with the door open:

Bees 2012 Fenced Area with Door Open

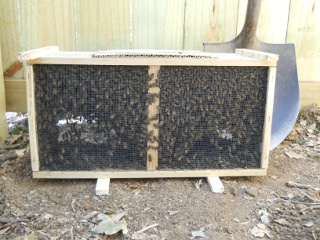
And here are the delivered bees!

Bees 2012 in Shipped Box

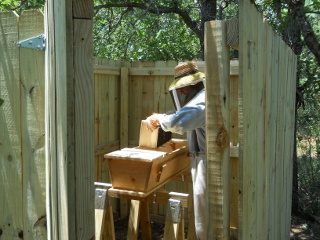
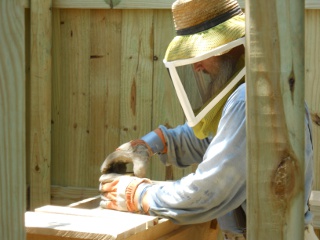
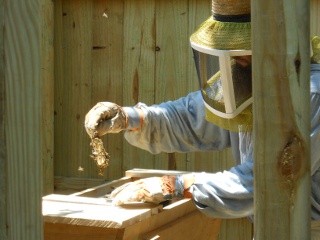
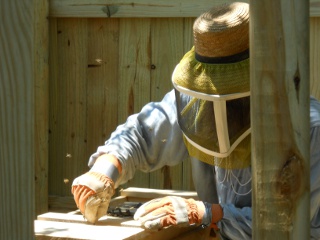
After donning the folding bee veil (something I read suggested a folding veil was easier to store away) I purchased from Weaver, which slides over a hat (I’m using a hard-hat helmet now, which works better and doesn’t deform my straw hat), putting on some gloves and taping the wrists closed, and spraying the bees in the package with sugar water (which I read distracts them and calms them very well), I took the bee package box, “clunked” it on the ground one time (I read doing it multiple times can disturb the bees more) to get them all to the bottom of the box, and went in and placed the bee package in the hive:

Bees 2012 Placing Box in Top Bar Bee Hive

After trying to figure out how it was all put together (I thought the top of the honey water can was just a lid), I removed the honey-water can using my knife to slide it up slightly but enough to grab it with my fingers:

Bees 2012 Removing Honey Water Can

And then removed the queen cage:

Bees 2012 Queen Cage

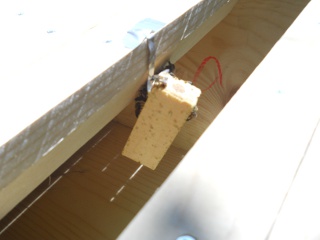
I had heard to hang the queen cage between two top bars, and so I taped the little cage “handle” to one of the top bars:

Bees 2012 Placing the Queen Cage
Bees 2012 Top Bar Bee Hive with Queen Cage Hung

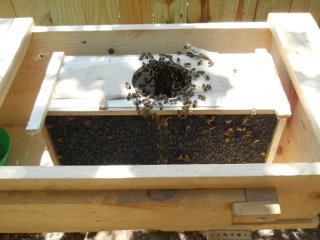
And here are the bees in their package box in the hive, moving in to their new digs:

Bees 2012 Box Placed in Top Bar Bee Hive

And then I replaced the missing bars and carefully closed the hive by trying to sweep the bees out of the way with my hand.

The next day, I went back and opened the hive to see how the queen was progressing in being released from the cage. There is apparently a candy plug that the bees eat away eventually to release the queen, but in my ignorance, figured it would only take a day, having since learned it can apparently take longer. At any rate, I had read that some people poke holes through the candy plug to help along the process, and had decided to do that if the queen was still in her cage, which she was. I brought an awl with me, began trying to push it through, and it popped the whole candy plug into the cage, and here came queenie waltzing out onto the top of the top bars. Uh oh…panic! She flew into the air, but then I found her again on top of the top bars, with other bees surrounding her; and I quickly took the small sweeping brush I had brought, and tried to sweep her and cluster of “attendants” into the bee hive through the space of one of the top bars I had removed. At the time, I thought I had swept them in; and so, I closed everything up and hoped and prayed that I had and for the best of the situation.

After doing a little more study, that bees could just abscond (leave) the hive for whatever reason, even after several days; and after watching a video on tips for installing new bees, I dropped in a few drops of food-grade lemongrass essential oils into the hive, as apparently bees perceive the smell of lemon as home. I also took the remaining honey water and put it in a little bowl on the ground with lots of twigs in it, especially ones leaning against the brim going into the water, so the bees would have something to stand on, as they can drown in open water.

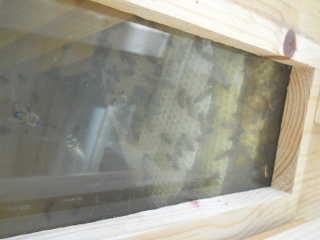
Well, over the next several days, it appeared I did get the queen in there, as there was a continuous large cluster of bees in the back of the hive; and, after about two weeks, here are the bees congregating in the front:

Bees 2012 Comb Being Built

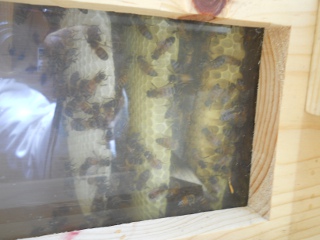
And after a about three weeks, here is the progress!

Bees 2012 Comb Being Built

We are grateful to the Lord for the example of these busy workers, and we pray we manage well these little well-ordered creatures, so we have more pollinators around, and for honey eventually for food preservation (and a little sweetener!), for His glory and the benefit of His Church.

— David

Meat Dryer

In continued efforts to separate from the world, unto God, one of the things that keeps us currently tied to it is how we process the meat after butchering the animal. At this time, we typically fire up the freezer, running off the generator, and then Sue pressure-cans it all. Processing the meat this way has two main problems: 1) running a generator and an electrical appliance, both which require ongoing maintenance and can break; and 2) using a canner, which also can require maintenance, and for us requires propane. Now, one can pressure-can using a wood burner; but it’s apparently not very easy to do correctly; and still, the canner can lose parts or require replacement ones.

And so, how was it all done before there were these things we use today? Or even, how is it done by people today who don’t have them either?

If you’ve studied this at all, you’ll know that salt is typically used for preserving meats; but what do you do with it after that, especially when dealing with larger quantities of meat? Again, with further study, even today, especially in countries where freezers, etc. aren’t available, the meat is hung in the wind to dry — the air helping pull out the moisture — the seed bed of bacteria — out of the meat. And this can be done any time during the year.

Excellent!

And so, I wanted us to start heading down this direction. With all of the insects we have during the warmer months, I really wanted our place of drying to be enclosed in some way; but in looking for ideas on the Internet, there really weren’t many I could see — it appears in the countries where they process meat like this, they just simply hang it up in the open air. Still not really wanting to do that, I started to try to put a design together myself. And so, the plan was to have something that had removable doors, was screened in, and allowed the hanging of lots of meat of all different lengths.

Using left over sections that were cut off from our house porch posts, I made a base frame using them and treated 2x4s. The overall plan was to use as little wood as possible, being able to fit the dryer’s frame under one piece of plywood as a roof, allowing for a little bit of roof overhang all around. I had originally thought about making a large dryer, but then figured I wouldn’t use that many more materials if I made multiple dryers instead as needed, and they would be somewhat portable:
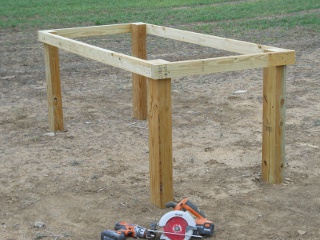
Meat Dryer Base

And then added the main frame and bottom frame joists:
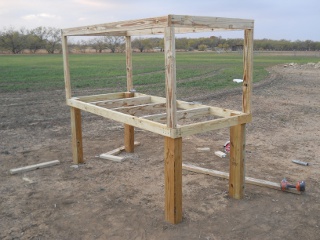
Meat Dryer Main Frame

And I planned for the removable doors to fit inside a frame, which is shown here:
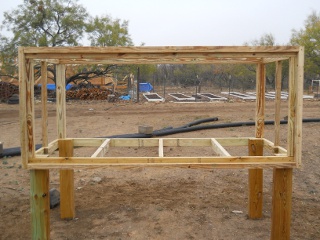
Meat Dryer with Screen Door Frame

Here is the bottom of the meat dryer with the screening in place:
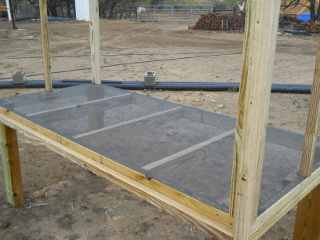
Meat Dryer Screened Bottom

And frame strips in place to hold on the screening. The strips are made by ripping the 2x4s into 4 strips each and then cutting to size. They are held by screws, as I wanted to be able to remove them to replace the screening if necessary. I also cut them to size to run counter to the bottom frame/joists connections (the strip would overlap where the joist butted up to the frame), to make it stronger; but next time, for expediency sake, I may place them in the same directions as the frame and joists:
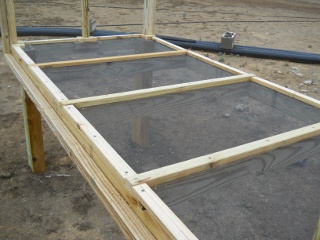
Meat Dryer Screened Bottom with Frame

I thought to use rebar on which to hang the meat hooks. I was going to hang rebar from wires that were hanging from the roof rafters; but one of the men here suggested I take a 2×4, drill holes along it, rip it in half, and us the half circles as the rebar holders. Great idea!
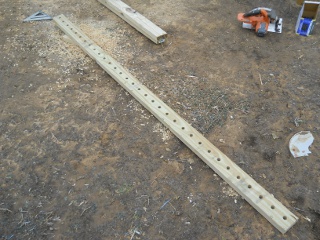
Meat Dryer Rebar Holder Before Being Ripped in Half
Meat Dryer Rebar Holder in Place

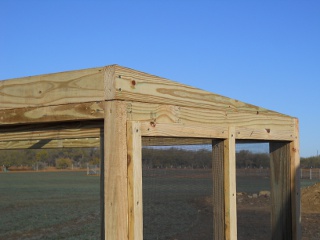
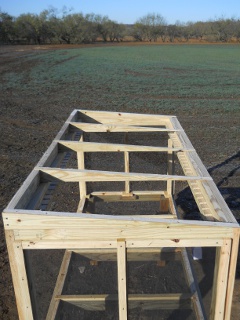
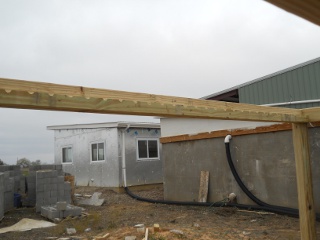
Here are the roof rafters and blocks in place:
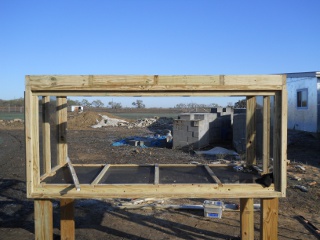
Meat Dryer Roof Rafters/Blocks, Front View
Meat Dryer Roof Rafter/Block, Side View
Meat Dryer Roof Rafters/Blocks, Top View

With the bottom screening in place, the one thing I told myself was, “Do not drop anything on it.” Well, that didn’t last too long:
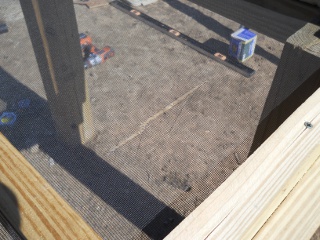
Meat Dryer Hole in Bottom Screening

Oops. It was the thin corner of the roof rafter that got away from me. And so, I caulked it:
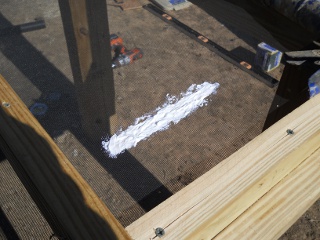
Meat Dryer Hole in Bottom Screening, Caulking Applied

And here it is pretty much dry. I purposely designed everything (with screws, etc.) so that I could fairly easily replace the screening if I ever need to:
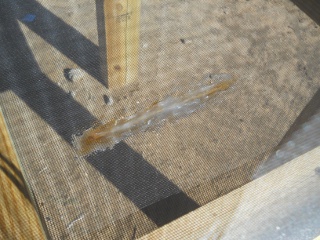
Meat Dryer Hole in Bottom Screening, Dry Caulking

With Gary, the goose we use to have, being gone and no longer able to supervise as foreman, our cat, William, has apparently taken over:
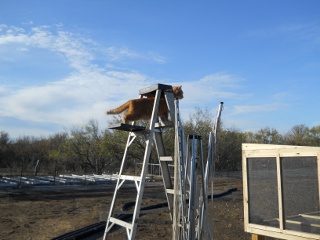
William the Cat Supervising Meat Dryer Construction

Here is the first frame of the removable screen door with the screening stapled in place:
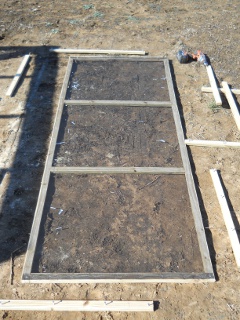
Meat Dryer Screen Door Screening in Place

And then the other frame pieces were placed on top a piece at a time, secured with wood screws, in pilot holes:
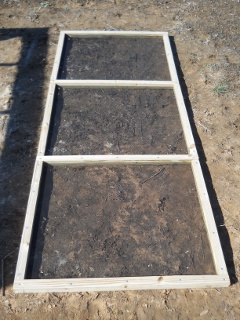
Meat Dryer Screen Door Full Frame in Place

Each frame piece was cut to overlap the pieces of the other frame (like the strips over the bottom frame joists):
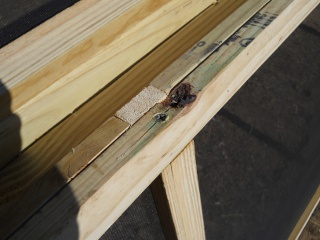
Meat Dryer Screen Door Full Frame in Place

I wanted to make sure the door was fairly square and a little stronger, and so I thought to add plywood corners. Here is a scrap piece of plywood, marked for cutting the corners:
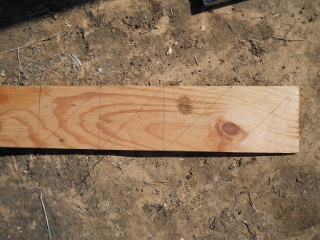
Meat Dryer Screen Door Plywood Corner Braces Marked Before Cuts

And then with the corners cut:

Meat Dryer Screen Door Plywood Corner After Cuts

And here is the removable screen door in place on the dryer, showing the corners attached, handles in place, and wood latches on top and below, holding it in place:
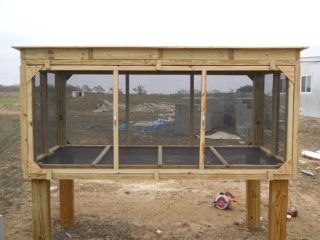
Meat Dryer with Screen Door and Screen Door Handles, Corners, and Latches in Place

Here’s a picture of the plywood roof in place:
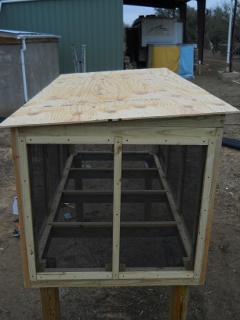
Meat Dryer Plywood Roof

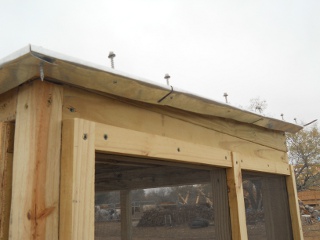
I decided to use flashing for the roof:
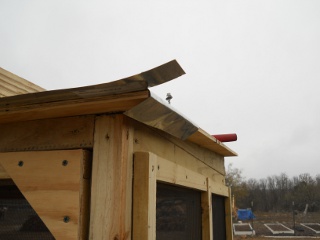
Meat Dryer Installing Roof Flashing
Meat Dryer Roof Flashing, Two Sides
Another Angle of Meat Dryer Roof Flashing, Two Sides

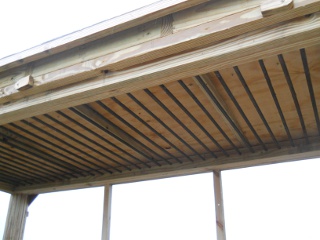
On the low side of the roof, I had to move the screen door latch to the side, because I had planned to attach strips of wood under the overhang that the grommeted screws would attach to (which would also help hide the screws so they wouldn’t become a skin or clothing hazard):
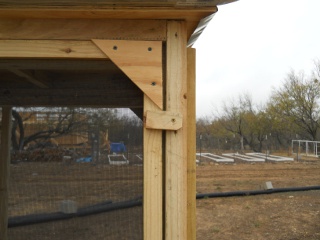
Meat Dryer Screen Door Latch Placement for Low Side of Roof

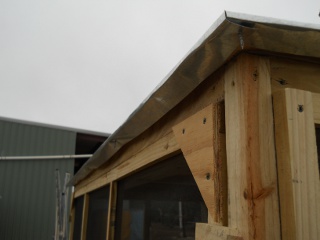
And here is the roof with the flashing installed:
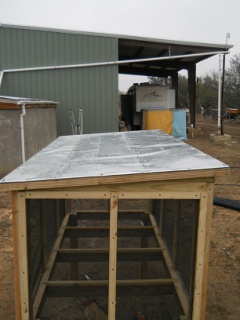
Meat Dryer Roof Flashing Installed, Top View

And here are the flashing overhang supports/screw covers:
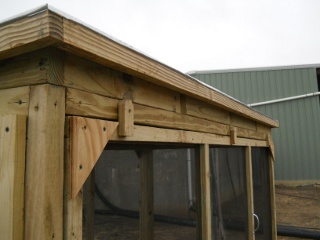
Meat Dryer Roof Flashing Supports

Here are the rebar hangers in place:

Meat Dryer Rebar Pieces in Place

And some meat hooks bent in shape. I used a coat hanger, cutting the ends to be pointed, and I sanded the paint off. I needed an extra one after the coat hanger was used, and so I thought to use a piece of galvanized electric wire, because it appeared the coat hanger hooks were rusting some. In the end, I might need to have stainless steel ones:
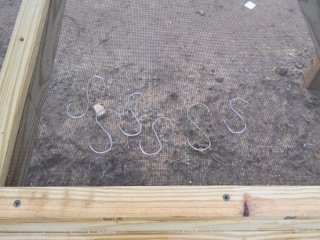
Meat Dryer Meat Hooks

Here they are hanging from the rebar:
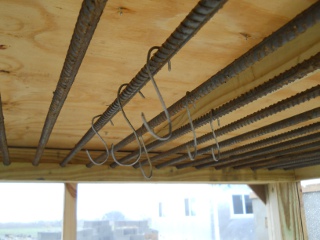
Meat Dryer with Meat Hooks Hanging

I initially had the meat dryer facing broadside to the north and learned the hard way that the dryer wasn’t very aerodynamic — a strong wind not only tipped it over, but flipped it upside down. Nice. So, I turned it to be long-ways north and south and staked the legs to the ground:
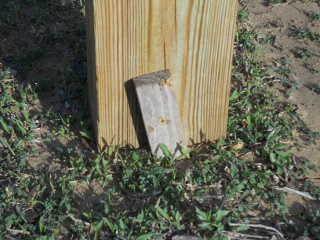
Meat Dryer Leg Staked to the Ground

And finally, voila! Brined/spiced meat hanging in the meat dryer!
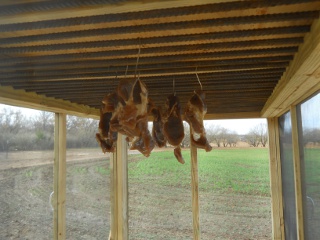
Meat Dryer with Brined/Spiced Meat Hanging

We’re still waiting for it to finish drying; and Lord willing, we’ll report on that process at a later time.

We are grateful to the Lord for His provisions, and showing us how to handle those He’s given us in a way that He has invented (with salt and air) instead of using man’s enslaving methods.

— David
Homemade Top Bar Bee Hive

In our desire to live separated from the world, we need methods of food preservation; and one of the methods is via sugar. One of most practical ways we could obtain sugar is from honey, which of course comes from bees. Well, in our hopes to be able to produce honey, for its preservation use and for its health benefits, we needed a bee hive. We had heard top-bar hives were better than regular stacked hives, in ease of use for us and the bees; and so rather than purchase one, I found a design on the Internet, and decided to try to build one. The following is the process based on the design provided by at Backyard Bee Hives.

Here are the sides and bottom. As per the instructions, the angles were 13 degrees:

Homemade Top Bar Bee Hive Side and Bottom Pieces

And here are the sides and bottom put together. I used 1 1/2″ wood screws and wood glue. Also, notice the window hole — I cut this out before joining everything together:

Homemade Top Bar Bee Hive Side and Bottom Together

For the window, I cut a piece of plexiglass to fit over the hole (I used similar plexiglas to what I used on our solar food dehydrator). In working with the plexiglas, I pre-drilled a small hole, and then bored it out just slightly using a larger drill bit, the same size as the head of the wood screw, to allow the declining angle of the head of the wood screw to fit almost exactly in, making the top of the head of the screw flush with the plexiglas:

Homemade Top Bar Bee Hive Top View with Plexiglas Window in Place

And here’s a close up:

Homemade Top Bar Bee Hive Close Up of Plexiglas Window

This is a view of the front side, where you can see the entrance area at the bottom:

Homemade Top Bar Bee Hive Front Side

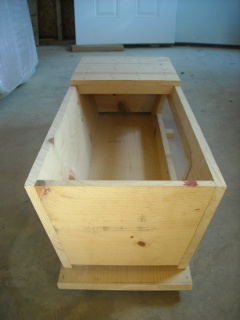
After getting the main box together, it was time to build the top bars. To make these, I ripped (using a table saw) 1x4s to the width of the top bars, and then cut those “strips” of 1×4 to the width of the hive box. These would be the top of the top bars. For the bottom of the top bars, I ripped 2x wood at probably somewhere around 26.5 degrees I believe for a 1 1/2″-wide top bar (you would need to figure the angle out based on the width of a top bar) down one direction and then down the opposite way, which basically created long strips of the pointed top bar bottoms (with the point running down the middle of the top bar); and then I chopped the end of those at 13 degrees (beveling each in opposite directions) to be able to fit inside the top of the hive box, accounting for the width of the sides of the hive:

Homemade Top Bar Bee Hive Top Bar Pieces

And here they are put together. I glued them and used wood screws:

Homemade Top Bar Bee Hive Top Bar Bottom View
Homemade Top Bar Bee Hive Top Bar Top View

Here is the false back that’s part of the design. Moving the false back up to the last bar with comb on it during the Winter creates a smaller space in the hive to help the bees stay warmer:

Homemade Top Bar Bee Hive False Back

And here is the false back and some of the top bars in place. I had to file down some of the bottom parts of the top bars to get them to fit into the sides of the hive box:

Homemade Top Bar Bee Hive with False Back and Some Top Bars in Place

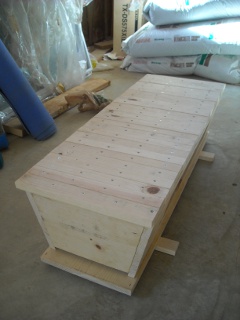
And then here is the hive with all of them in place, including the front and back handles that book-end the top bars. For those, I installed one handle first, placed all of the top bars in place not too tightly, and then installed the other handle up against the top bar next to it:

Homemade Top Bar Bee Hive with All Top Bars in Place

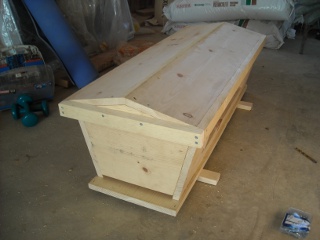
I changed the lid design a little, making it gabled instead of just flat. This was more complicated, but allows for the use of 1x wood for the top instead of plywood, and hopefully will allow the rain to run off easier:

Homemade Top Bar Bee Hive with Lid On

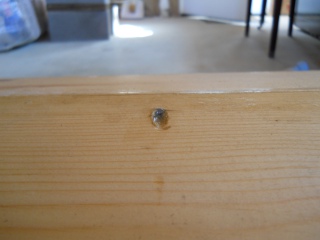
In joining the boards at the roof peak, I drilled pilot holes from one board to the other, and drilled out the hole a little more with a larger bit to allow the head of the screw to sink farther in; and for this part, I used 3/4″ wood screws:

Homemade Top Bar Bee Hive Lid Joined with Screw at the Peak

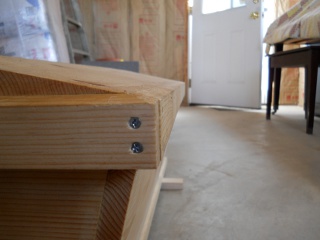
I also angled downward the tops of the edge pieces of the hive top to allow for better water run-off:

Homemade Top Bar Bee Hive Lid with Angled Edges

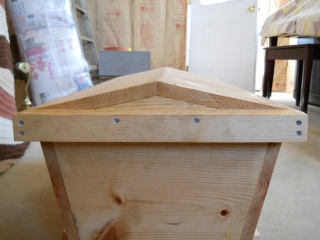
And here’s a picture of the end of the lid:

Homemade Top Bar Bee Hive Lid Side View

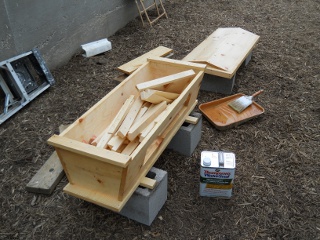
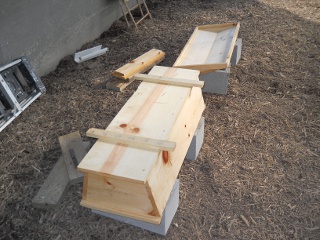
Once built, to weatherize it, I painted all of the external parts with water sealer. After that was dry, I caulked the lid on the outside and inside to help keep water from getting into the inside of the hive:

Homemade Top Bar Bee Hive Painting with Water Sealer
Homemade Top Bar Bee Hive Underside Painting with Water Sealer

Once painted, I attached the window cover with hinges:

Homemade Top Bar Bee Hive Side Window Hinges

Here it is open:

Homemade Top Bar Bee Hive Side Window Open

I also added wood latches I cut to keep the door closed. I originally tried aluminum butterfly latches, but those were pretty flimsy and bent easily:

Homemade Top Bar Bee Hive Side Window Latched Closed

We are grateful to the Lord for allowing the provision of this hive; and we pray we are able to husband bees well, to His glory, for preserving food, and having more bees to keep our gardens and trees pollinated.

— David
Goat Shed Redesign

In my initial design for our goat sheds, I wanted to be able to enclose the goats in the shed if necessary for protection, especially for when a doe might have new kids; but I wanted to be able to have the door completely out of the way during the hot months to allow as much breeze in while offering shade. And so, I made the front door completely removable. Well, that became somewhat difficult in having to pick up the door and maneuver it into place. Also, strong winds would blow the sheds over backwards, so we strapped them to a ground hook. Over time though, I thought of a different way to accomplish the same thing while keeping the current general design of the sheds but making it easier to manipulate the doors.

So the idea would be to have the entire door on a hinge while having another smaller door cut out of the big door, allowing the main door to be closed while a portion of it remained open to allow for the goats to move in and out. This would allow for the shed to be more enclosed when it is cold, or completely when necessary, and would also allow the entire door to be completely open during the hotter days, as before.

Here are the shed and door originally designed:

Original Goat Shed
Original Goat Shed Door

I cut off a part of the big door:

Goat Shed Redesign Cut Off Small Door

Added the missing piece of the frame onto the smaller door:

Goat Shed Redesign Small Door New Frame Piece

And attached the hinges, joining it back to the main door:

Goat Shed Redesign Small Door Reattached with Hinges

I attached 8″ hinges to the shed, using 1 5/8″ deck screws through #8 washers, the hinges, the siding, and into 2×4 blocks behind the siding. I then did similarly to the door, making sure it was raised up 1/4″ so the door frame doesn’t sit completely on the shed frame, making it difficult to close:

Got Shed Redesign Main Door Hinges

Here are the 2×4 blocks:

Goat Shed Redesign Back Blocks to Hold Hinge Screws

I then installed a 2×4 the width of the shed just above the door frame on top, to keep the top of the door from pushing in:

Goat Shed Redesign Large Door Frame

And then I installed two bolt latches, top and bottom, to the door frame. The bottom one uses the latch receptacle provided with the hardware; the top latch latches straight into the 2×4 above it:

Goat Shed Redesign Main Door Top Bolt Latch
Goat Shed Redesign Main Door Bottom Bolt Latch

Finally, I added a small hook and eye latch to the little door to be able to keep it held open; and installed a larger one to the side of the shed to keep the larger door latched. I drilled appropriately sized pilot holes for each before attaching the latches; and also, for the main door, I had to put a 2×4 block behind the hook latch that was attached to the siding:

Goat Shed Redesign Small Door Hook and Eye Latch
Goat Shed Redesign Main Door Hook and Eye Latch

Here the shed is completely closed:

Goat Shed Redesign Both Doors Closed

Here it is with the small door open only:

Goat Shed Redesign Main Door Closed, Small Door Open

And here it is completely open:

Goat Shed Redesign, Main Door Open

This redesign has made things much easier to handle when dealing with the sheds in various types of weather. We’re thankful to the Lord for granting us the land, goats, sheds, and ideas to be able to husband animals, we pray, for His glory.

— David
« Older posts Newer posts »