In our desire to live separated from the world, we need methods of food preservation; and one of the methods is via sugar. One of most practical ways we could obtain sugar is from honey, which of course comes from bees. Well, in our hopes to be able to produce honey, for its preservation use and for its health benefits, we needed a bee hive. We had heard top-bar hives were better than regular stacked hives, in ease of use for us and the bees; and so rather than purchase one, I found a design on the Internet, and decided to try to build one. The following is the process based on the design provided by at Backyard Bee Hives.
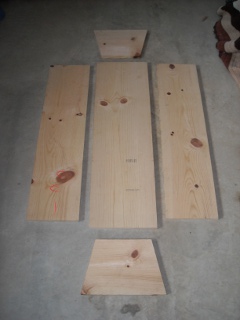
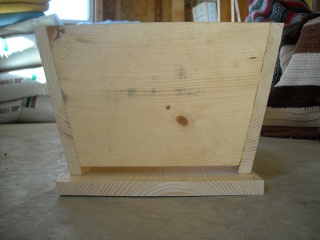
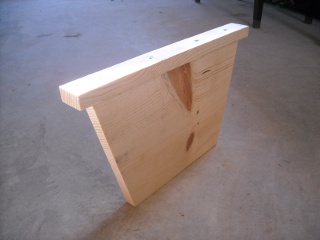
Here are the sides and bottom. As per the instructions, the angles were 13 degrees:
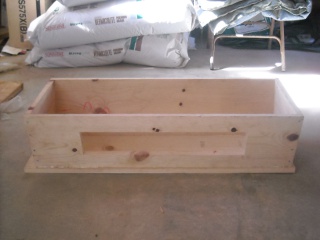
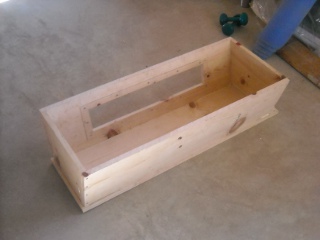
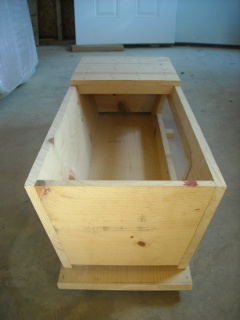
And here are the sides and bottom put together. I used 1 1/2″ wood screws and wood glue. Also, notice the window hole — I cut this out before joining everything together:
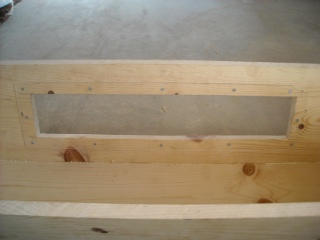
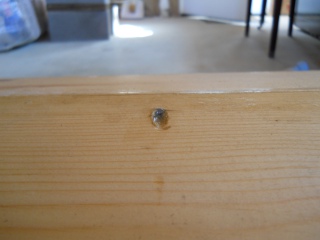
For the window, I cut a piece of plexiglass to fit over the hole (I used similar plexiglas to what I used on our solar food dehydrator). In working with the plexiglas, I pre-drilled a small hole, and then bored it out just slightly using a larger drill bit, the same size as the head of the wood screw, to allow the declining angle of the head of the wood screw to fit almost exactly in, making the top of the head of the screw flush with the plexiglas:
And here’s a close up:
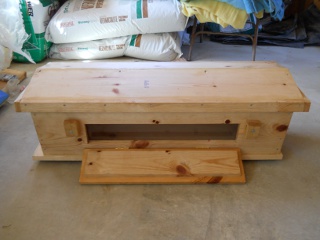
This is a view of the front side, where you can see the entrance area at the bottom:
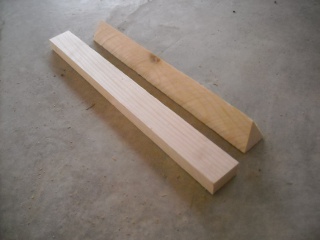
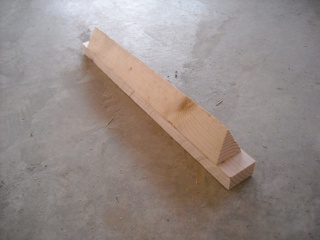
After getting the main box together, it was time to build the top bars. To make these, I ripped (using a table saw) 1x4s to the width of the top bars, and then cut those “strips” of 1×4 to the width of the hive box. These would be the top of the top bars. For the bottom of the top bars, I ripped 2x wood at probably somewhere around 26.5 degrees I believe for a 1 1/2″-wide top bar (you would need to figure the angle out based on the width of a top bar) down one direction and then down the opposite way, which basically created long strips of the pointed top bar bottoms (with the point running down the middle of the top bar); and then I chopped the end of those at 13 degrees (beveling each in opposite directions) to be able to fit inside the top of the hive box, accounting for the width of the sides of the hive:
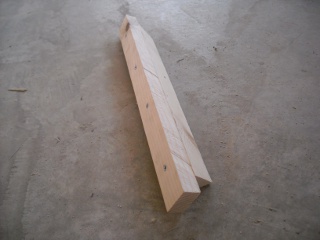
And here they are put together. I glued them and used wood screws:
Here is the false back that’s part of the design. Moving the false back up to the last bar with comb on it during the Winter creates a smaller space in the hive to help the bees stay warmer:
And here is the false back and some of the top bars in place. I had to file down some of the bottom parts of the top bars to get them to fit into the sides of the hive box:
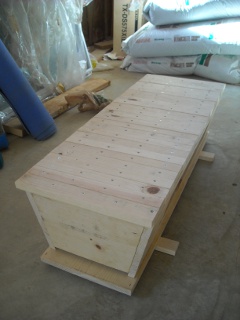
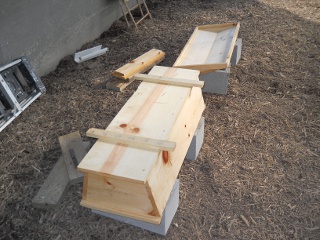
And then here is the hive with all of them in place, including the front and back handles that book-end the top bars. For those, I installed one handle first, placed all of the top bars in place not too tightly, and then installed the other handle up against the top bar next to it:
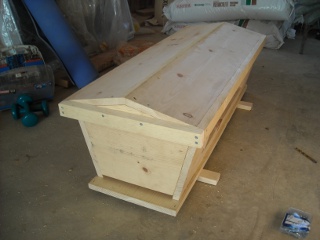
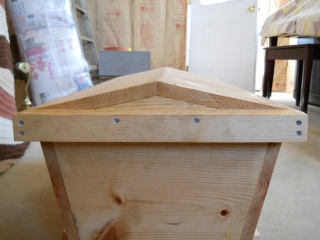
I changed the lid design a little, making it gabled instead of just flat. This was more complicated, but allows for the use of 1x wood for the top instead of plywood, and hopefully will allow the rain to run off easier:
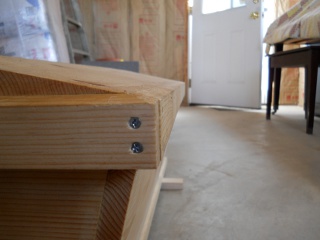
In joining the boards at the roof peak, I drilled pilot holes from one board to the other, and drilled out the hole a little more with a larger bit to allow the head of the screw to sink farther in; and for this part, I used 3/4″ wood screws:
I also angled downward the tops of the edge pieces of the hive top to allow for better water run-off:
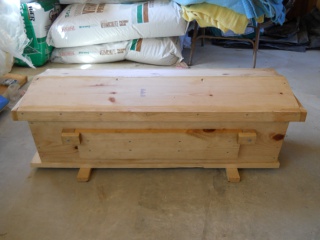
And here’s a picture of the end of the lid:
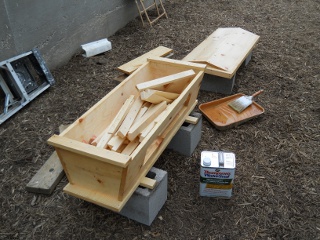
Once built, to weatherize it, I painted all of the external parts with water sealer. After that was dry, I caulked the lid on the outside and inside to help keep water from getting into the inside of the hive:
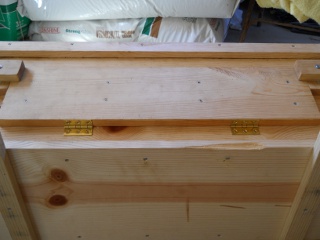
Once painted, I attached the window cover with hinges:
Here it is open:
I also added wood latches I cut to keep the door closed. I originally tried aluminum butterfly latches, but those were pretty flimsy and bent easily:
We are grateful to the Lord for allowing the provision of this hive; and we pray we are able to husband bees well, to His glory, for preserving food, and having more bees to keep our gardens and trees pollinated.
— David
Excellent job. I have had the plans for a top bar hive for a while and I am happy that you were able to build such a nice one.
Great job, David… and thank you for the excellent write up… Now, where or how are you going to get bees?
Thanks debbieo and ChrisW.
ChrisW, I haven't figured that part out yet. 🙂 Hopefully soon, DV.
— David
Bless you brother, I have been thinking about doing this for a while. I guess there is no excuse now for me not getting this done.
– Todd
Hi Todd,
May God guide you. Thanks for saying hi.
— David
That is one benevolent top bar bee hive! Good work!
Mark
Hi Mark,
Thanks, and thanks for saying hi.
— David
just wanted to say that the hive is a real beauty! Praise the Lord for your ability to build it. I hope it is a real blessing to your farm homestead.
Thank you, ann from KY; and thanks to the Lord.
— David
How did the hives work out? With the drought I was thinking about building some and stocking one and see if the wild bees would find the other two as attracting them was easy with water last year.
Hi Rob,
We haven't proceeded with the "bee" part of the bee hive yet, mostly because of the drought. Interesting idea about attracting wild ones with water, although I wonder if it wouldn't attract undesirable insects as well.
Anyway, Lord willing, once we get bees in place, we plan to do blog post about that.
— David
Quite a bee adventure, congratulations. So, how successful were the bees to make honey with your 20+ bar?
I like your blog, well writen, concise, to the point with excellent photos to demonstrate.
P.S. please note that beehive_012-10311.jpg is not available when clickin on it. Thanks
Hi Daniel,
Well, I went in there several months ago, and there was at least some honey in there. There was comb built out on every bar too. I didn't want to touch the honey so they would have it for the winter. I plan to hopefully go in again during the spring to see how things are, and maybe take some honey. I don't really have the proper body wear to go in, and have found that out the hard way the last couple of times. 🙂
Thanks for the info about the missing pic, thanks for saying hi, and we do hope the blog benefits someone.
— David
I was wanting to do this as well and as I look at the beautiful design I wonder if there is wood attached to all the top bars or just the ones you use for the ends for saving heat? God bless you for sharing.
Penny from Maine
Hi Penny,
If I understand your question, only one of the bars has the false back (there are two end "bars" which are attached to the top of the front and back walls of the hive which are used as handles, and the rest, beside the one false back bar, are the regular top bars), which I ended up moving to the front, figuring their activity seems to work from the back, and that if they were kept in the back of the hive, it would be farther from the entrance where the cold comes in. Also, during the colder months I put up a block of wood at the entrance that covers about 2/3 to 3/4 of it, to try to help against the cold.
I haven't felt the need to use the false back because all of the bars have full comb hanging from them, and I figure those act as insulation barriers, although that assumption could be wrong. But they seem to be hanging in there.
If you make one of these, I hope it goes well for you. One thing I would do a little differently is I would not pack the bars in so tightly — while they were removable when nothing was on them, they're a little difficult to remove now, so I plan to shave off some of the handle widths to hopefully allow a little spacing availability between the bars. I might make the bars themselves a smidge wider too — I think making sure they're a full 1 1/2 inches wide, if I remember correctly.
Thanks for saying hi!
— David